By Mike Kuchar
Introduction
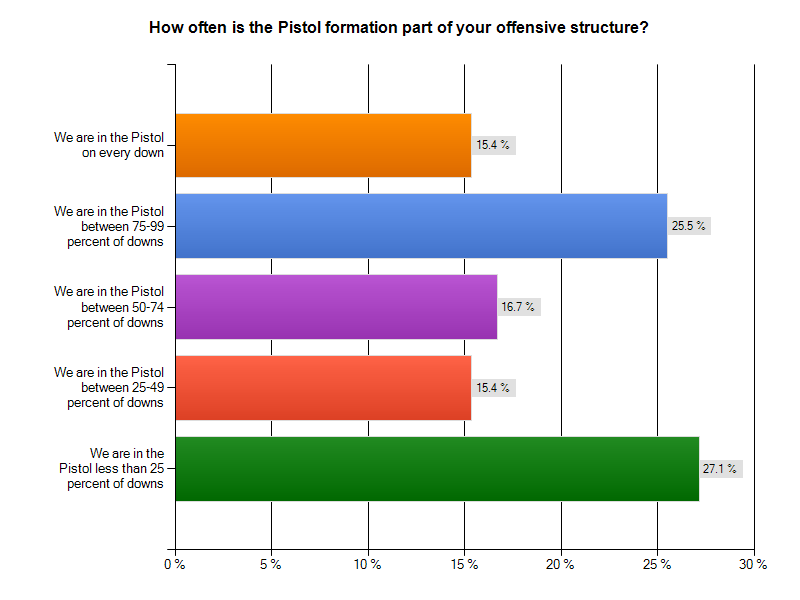
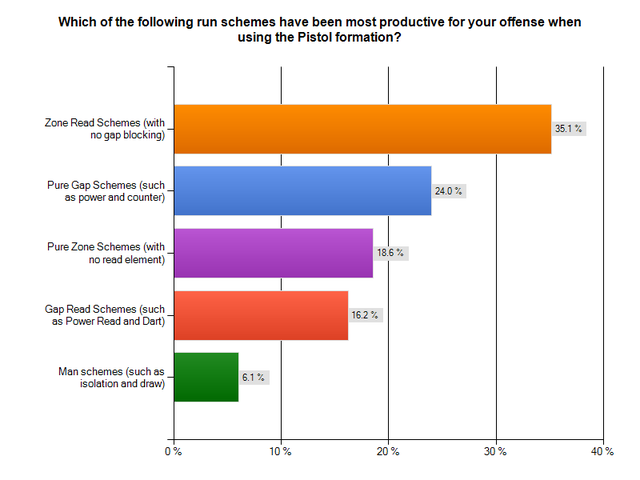
So, perhaps below is the information many of our coaches were looking for. Thanks to QB’s like Colin Kaepernick and Robert Griffin Jr., the zone read game out of the Pistol has reached the forefront of schemes most utilized in this formation and our survey only validated that fact. Of all the coaches that were surveyed, 35.1 percent said the zone read scheme was the number one most efficient run concept out of the Pistol formation in their program this past season.
There are many reasons for this, all of which we will explain later in the report. Before we start to pontificate on all of the various principles and concepts out of the pistol zone read game, we thought it was important to address the various types of options most commonly used in the Pistol formation.
Genres of Option Concepts:
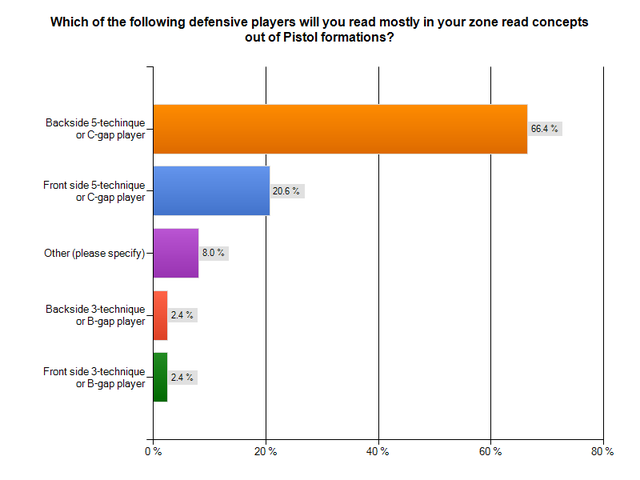
Before we address these various types of option concepts, it’s important to note that based on our research, 66.4 percent of coaches prefer to read the backside 5-technique or C gap player in their read option game. This is more than any other read.
Double option concepts– Quite simply, a double option concept is one that involves a potential ball carrier and the QB. This is most synonymous in the form of a QB pull or give read on zone options. These option concepts could be classified as the following:
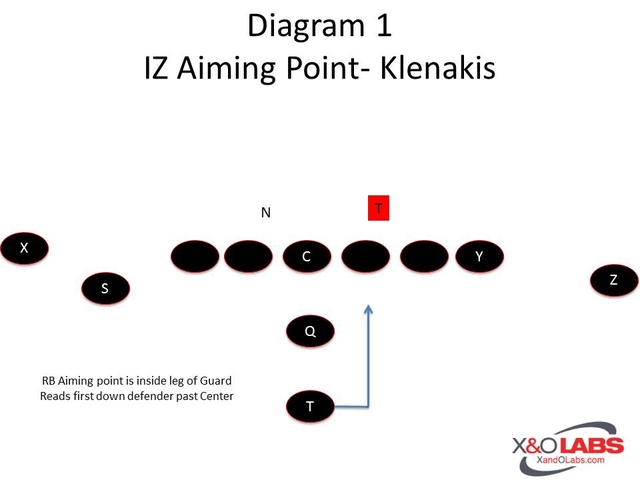
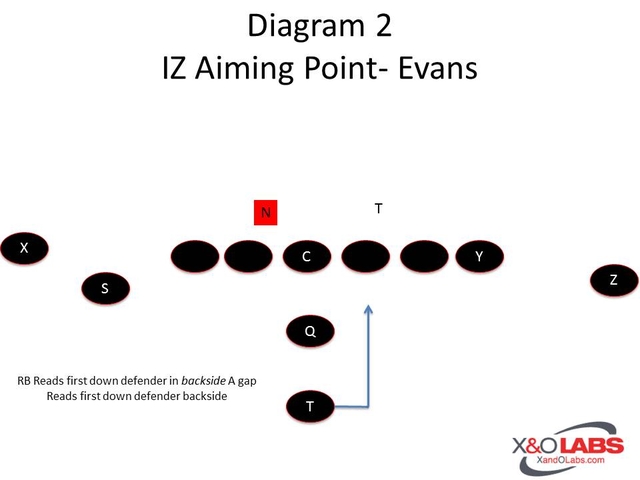
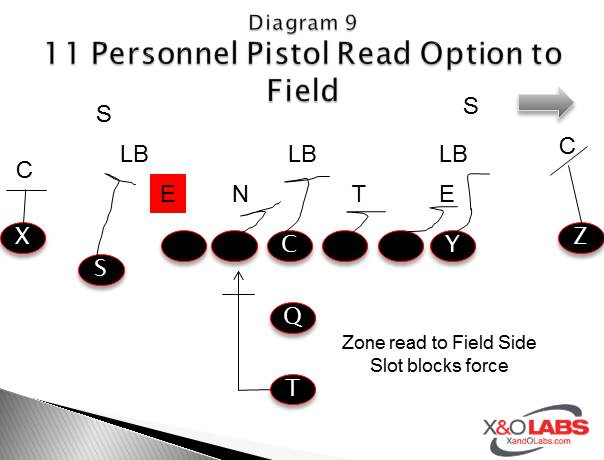
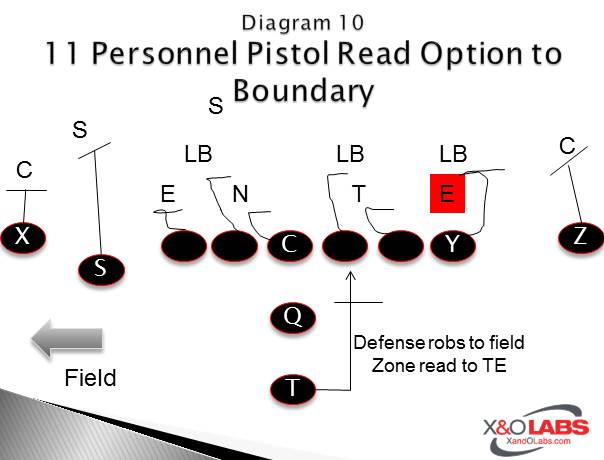
- Zone reads- This type of scheme involves a ball carrier, usually the tailback, and the QB. It is usually a backside read scheme. This was referred to as “bluff” in Nevada’s play concepts.
- Gap reads- This read concept is modeled after gap schemes like the Power O, Counter or Dart Schemes in which offenses will gap block at the point of attack and entail a backside puller(s). The QB will either give the ball to an up back on a fast flow path, or keep the ball on the Power. It is a front side read scheme.
- Midline reads- The midline read scheme usually involves optioning an interior first level defender. While this scheme has become more relative to triple option teams, we’ve found that many spread offensive coaches are starting to integrate some of the midline option from a Pistol formation. It is a front side option read.
- Load Options-This is perhaps the most common concept that entails a offensive player blocking the pitch player (or force player) allowing a QB to keep the ball.
Triple Option Concepts- Triple option schemes involve a third player as a potential pitch player for the third phase of an option. This player can come in the form of a pure pitch with motion, pure pitch without motion or even a bubble screen variable. These option concepts could be classified as the following:
- Front side Veer Option- We’ve found that the veer option scheme out the Pistol is continually generating interest for option coaches. It is a front side read play, which can implement man or gap blocking schemes.
- Back side Veer Option- The backside veer option scheme is very similar to the zone read with one major discrepancy- the availability of a third option. Although we didn’t originally differentiate these two schemes when we started our research, by talking to Pistol formation coaches we’ve found that there are several drastic differences between those two concepts.
QB Footwork and Mesh Game
We all know the schemes look pretty, but when it comes down to option football, there is nothing more important than the mesh game. Don’t just take our word for it; listen to some of the more high-profile coaches we talked to for this report. Whoever we talked to, there was one common thread among teaching the mesh- teach one thing, be consistent and don’t over coach it! That sentiment was echoed throughout our reporting on the mesh game from the Pistol. Consider Portland State’s offensive coordinator Bruce Barnum’s quip about how he learned to teach the mesh in his option game.
When Barnum and his assistant Dave Brown first installed the Pistol in 2010 at Portland State, there was much ado about the QB/RB mesh in the option game. Brown, who was a Graduate Assistant coach working with the running backs under Chris Ault at Nevada, had accessed hours of game film at Nevada and presented it to Barnum. “I took all of Nevada’s video on Kaepernick,” said Barnum. They used to talk about jab stepping, stepping to six o’clock, clearing the back, etc. I turn on the film of Kaepernick and he catches the snap and hops in the air, stops and run the read zone. I remember thinking this is crazy. “
Of course, Barnum was providing a little tongue and cheek humor, or perhaps just validating the super athlete that Kaepernick is. But, he was illustrating a fair point: be consistent. “As long as the ball is getting deep and the read is long- that’ important,” according to Barnum. “The last thing you want is that QB sticking that ball straight out because there is no read for that DE and there is no smoke to the mirrors. It’s got to be consistent. I don’t care if you jab step and clear. I don’t care if you open to six o’clock and he screams by you. We had a freshman last year who would ride the back all the way to the Center. It doesn’t matter as long as it’s consistent. “
So, as a research company, we did our own validation on this topic and we went right to the source- Washington State running backs coach Jim Mastro- who was the running backs coach under Ault while at Nevada and quite frankly who Cameron Norcross calls the “best Pistol running back coach in the country. “ Since moving on from Nevada, Mastro has helped install the Pistol at UCLA under Coach Neuheisel and now is tinkering with it at WSU under Mike Leach. Mastro spoke about making sure things are uniformed in the mesh game, particularly in the zone read. “It’s not like the traditional run game which may be different because different QB’s have different arm lengths,” said Mastro. “In the read zone game, the running back and QB must be attached at the hip all you will have balls on the ground all day long.”


306")


 By Joseph Opalenick
 Editor’s Note: Coach Valeria is entering his third year as cornerbacks coach at Eastern Washington University. In all, he has 9 years of college coaching experience with seven of those years coming at the Division I – FCS level and two at DII level. During that time, he has mentored six All-Conference Cornerbacks and two All-Americans. He has also served as Assistant Recruiting Coordinator and as Director of Football Operations during his career. Both starting corners won All Big Sky Conference honors both years he has been at EWU.
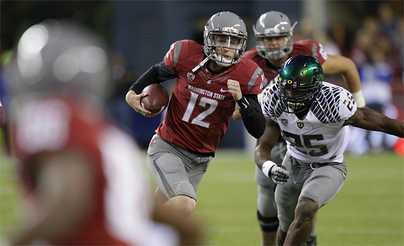

 Editor’s Note: Jeremy Darveau just finished his sixth season on the SMSU coaching staff as the team’s offensive line coach and his first as the offensive coordinator. The Mustang offense has never been more potent than it was in 2013. SMSU broke numerous school and conference records including total offensive yards, rushing yards and total points scored. The SMSU offense also produced a school first Harlon Hill Trophy finalist in Running back Tyler Tonderum. Darveau also oversaw an offensive line that produced three All-NSIC linemen as well as 2 All-Region offensive linemen and one All-American.
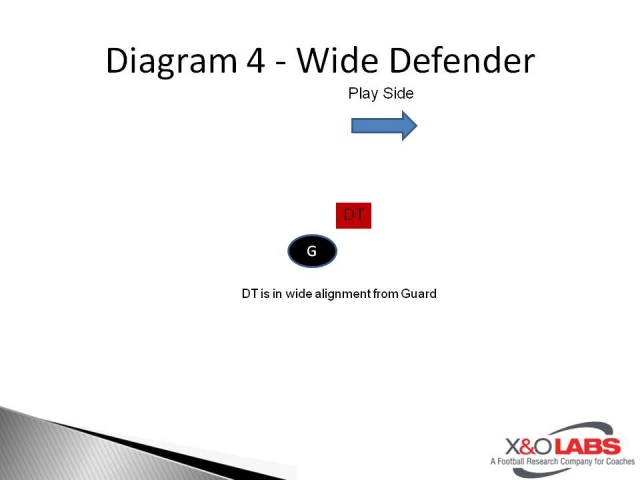
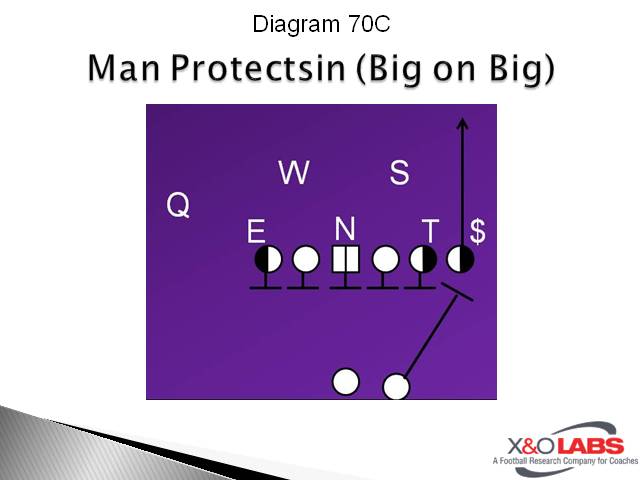
 It seems everyone runs some version of the “Power” play. Some may describe it as a counter play but since we do not have any counter action in the backfield we have just called it our power play. My concept of a power play is when the front side of the line blocks down, somebody kicks out the front side “C” gap player and somebody will lead through from the back side to a front side linebacker. So whatever you want to call this play it is a downhill aggressive play that when we run it well we are tough to beat. When we struggled to gain yards on this play then we struggled as an offense to move the football.