Using a Dual Player Pre-Snap Check System

By Cameron Andersen
Head Coach/Offensive Coordinator
Gooding High School (ID)
Twitter: @SenatorCoach

Introduction:

First of all, just like all successful coaches, this stuff comes from the concepts of great football minds and we adjust them to fit our scheme, philosophy, and athletes. That being said, our “win” concept, was one of the more effective tools we had to combat a variety of situations. It helped us against adjustments to our top wide receivers, a loaded box, a blitz happy team, and most importantly, matchups where we felt we had better athletes.

In the end, we found this concept more than acquitted itself on the field. This season we had enjoyed a 2nd place state finish. In the playoffs we averaged just over 40 points per game, and in the game where we used this concept the most, we scored 87 points. The “win” concept never resulted in negative yards, and scored a touchdown in all but 2 of our 11 games.

The win concept is based on getting the ball to your guys as quickly as possible in a check situation. It is never an original call, it is an audible to defensive adjustments on the fly. First, I must say that this works better with tempo, especially fast tempo, because you can catch defenses in a predictable repeat look. To master the concept, you must rep it every day in practice; the quarterback and his receiving options have to be on the same page with what they see in front of them.

When to Use “WIN”:

This being a concept that is used as an audible and not an organized play, the only people on the field aware of it happening is the QB and whatever receiver he or I have signaled. In time, the running back and receivers in the area will hear the call and even adjust or check to blocking the MDM, but we tell them to stick to the play called unless they see the ball in flight to the “win.” We can use either a verbal call, literally yelling out “Y win” or give a hand signal that we have predetermined for each game.

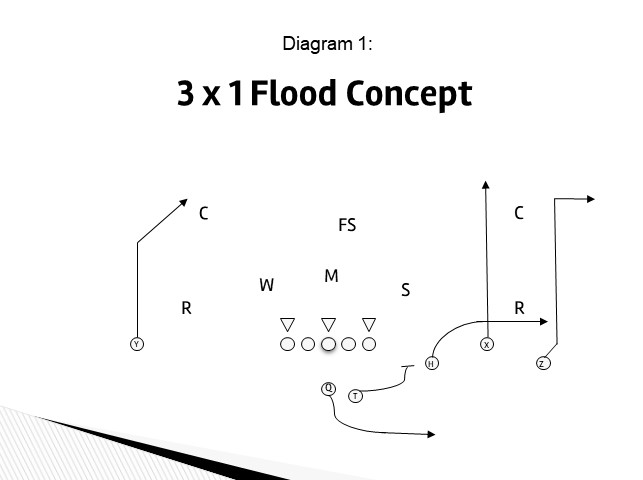
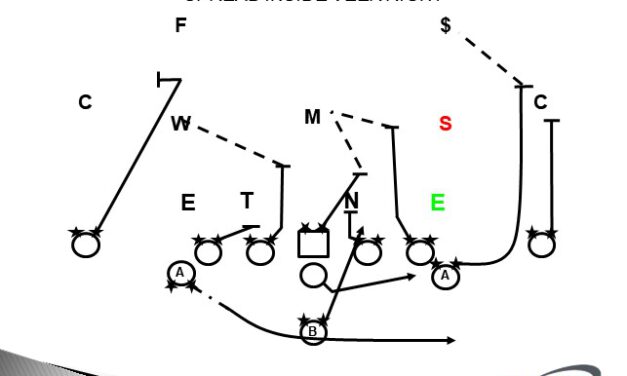
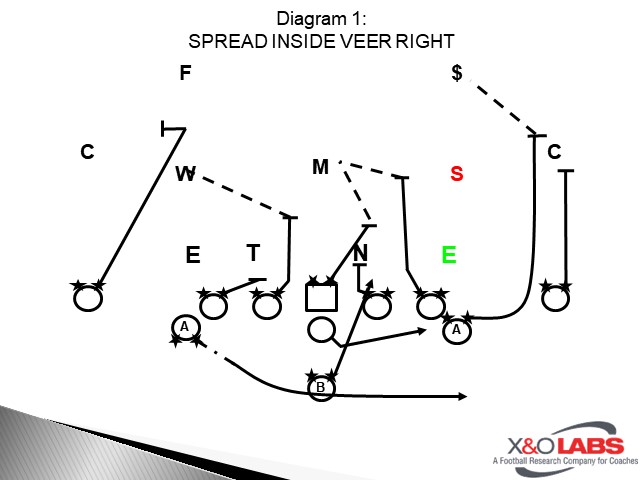
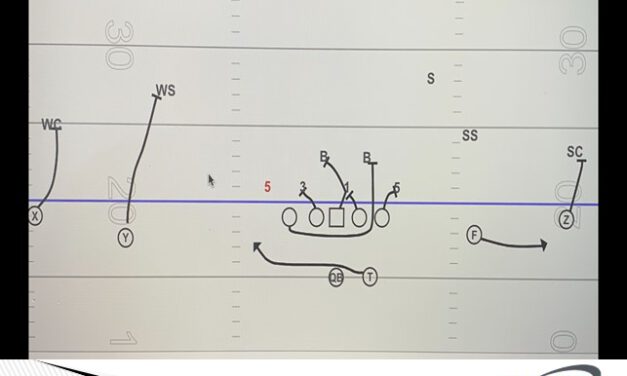
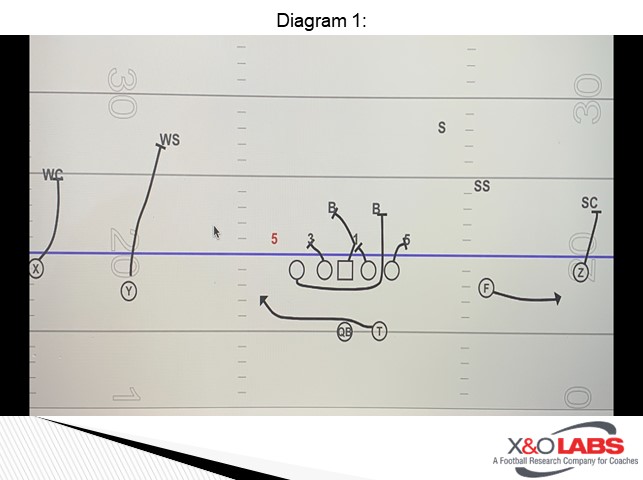
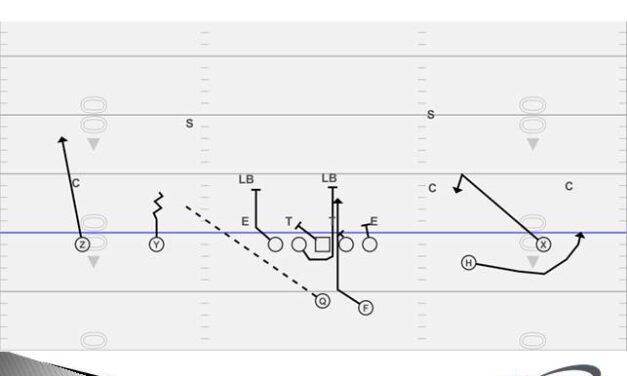
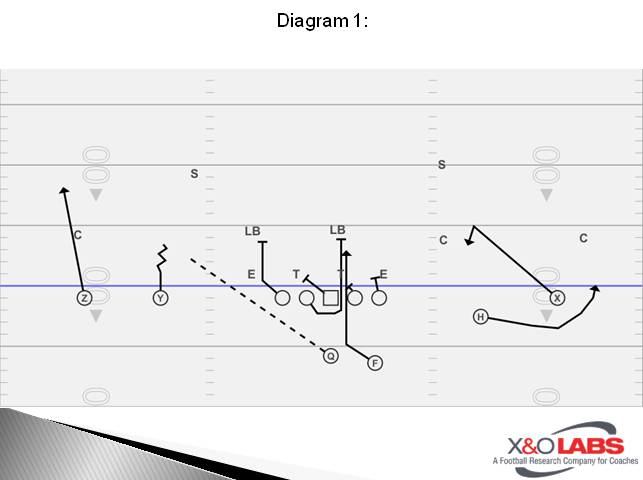
We call it a “win” because we want to rapidly defeat all space and man-to-man situations where we feel we have a superior athlete. We first look for uncovered defenders, we then look toward the slot defender’s alignment (usually the SS or OLB) and last we check the alignment of the FS. These factors help us determine when to use this audible, and are outlined below. As seen in Diagram 1, the Y is in a position where he is uncovered, being walled by the linebacker and checked deep by the safety. We tell him in that situation to treat it like a “hot” off a blitz look. Show hands immediately and move toward space.

Slide1

Read More

12 Pre-Season OL Vs. DL Compete Drills

By Justin Iske
Offensive Line Coach / Co-Offensive Coordinator
Southwest Oklahoma State University
Twitter: @justiniske

Introduction

Being efficient with practice time is one of the most important aspects of being successful on game day. Individual time is critical in terms of installing plays and working technique, but it is a struggle to get good looks most of the time. Full 11-on-11 live (or thud) work is very productive, but it increases the risk of injury. We have found that working o-line versus d-line as much as possible helps make both sides better and is more efficient than trying to get back-up offensive linemen or scout team defensive linemen to give us a good look during individual.

In terms of practice time, any practice where we have at least half pads, we will dedicate the last 10-15 minutes of individual to working run pods vs. the defensive line. Depending on the time of year and what our needs are, this could be done in one of four ways (one-on-one, two-on-one, half-line or full line). We will also spend 15-20 minutes, depending on how long we are running pass skeleton/seven-on-seven, with some combination of three pass protection drills against the defensive line (one-on-one pass rush, full line, or blitz pick-up). We work one-on-one pass rush no matter the dress for practice and will work full line and/or blitz pickup when we have half pads or full gear.

One-On-One Run Pod

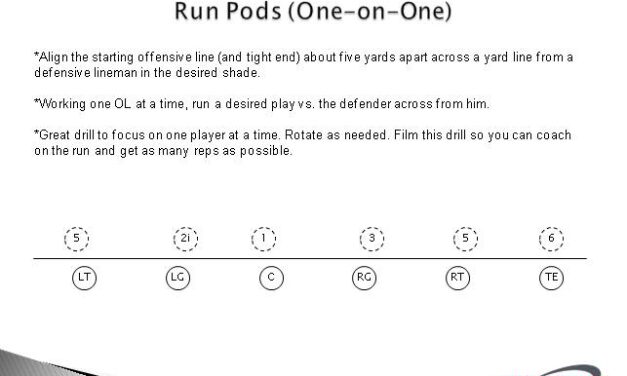
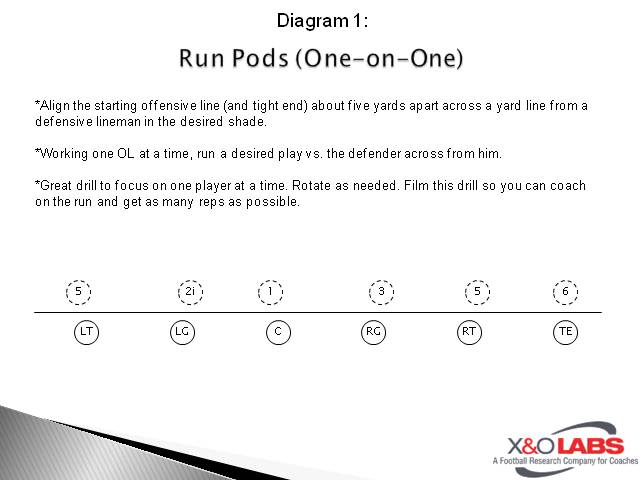
The first type of run pod we do is one-on-one. We will line up the first string offensive line with about five foot splits on a yard line and align a defensive lineman across from each one. Starting with one of the tackles (or a tight end), we will execute a base block, reach block, down block or cutoff against the defender while he works his technique to recognize and defeat the block. We will then work down the line to the next player in rapid succession to get as many reps as possible. While we will get some coaching done “on the run,” filming this session is critical so that we can get a maximum number of reps and still be able to go back later and review each rep.

Slide1

To study film of this drill, click on the video below:

Read More

8 Rationales to Defend Jet Motion

By Jason Brown
Defensive Coordinator
Dutchtown High School (LA)

Introduction:

Jet motion is becoming more and more prevalent within offensive schemes today. This concept presents a multitude of problems that are not solved by the typical motion adjustments most defenses employ in their basic defensive schemes. We feel that it is important to have multiple ways to defend an offensive attack. Our rationale is simple: if an offense can determine how you adjust, they can force that adjustment and exploit its inherent weaknesses. We believe that it is important to move the stress points around in your defense so the offense cannot determine where to attack.

At Dutchtown High, we know we don’t have all the answers but we do have answers in which we really believe. Furthermore, we are always looking for more and more answers to try and improve our defense. That said, It is my intention, to show you the ways that we have defended the Jet concept and hopefully stimulate thought for you to develop even more and better ways to defend this concept.

Jet Motion Problems

The Jet Motion Concept has been around for a long time within the Spread offense. Offenses are starting to build more and more plays into the concept to make it even more effective. It has a lot of similarities to Flexbone motion, and Wing T motion (End-Over formations with two backs in the backfield is a totally different animal for us that we treat differently). The problems we see with defending Jet motion are as follows:

  1. The Speed Sweep gets on the perimeter very quickly.
  2. The Trio passing game is created from the 2×2 set.
  3. Doubles passing game is created from the 3×1 set.
  4. Front side and Backside internal run plays come off the Jet action
  5. Play action exists on the Front side and Backside of the Jet motion.
  6. Vertical shots are prevalent within the Jet concept.
  7. There are a lot of similarities with the Wildcat offense if run with a good running QB.

Defending the Jet Motion

We believe the ways you pick to defend Jet Motion must have the previous points in mind. It is also important to note that you will have a tradeoff in every way that you choose to defend Jet motion. Therefore, make your choices of defensive concepts understanding each one has a weakness.

The multiple ways that we defend Jet motion are listed as follows:

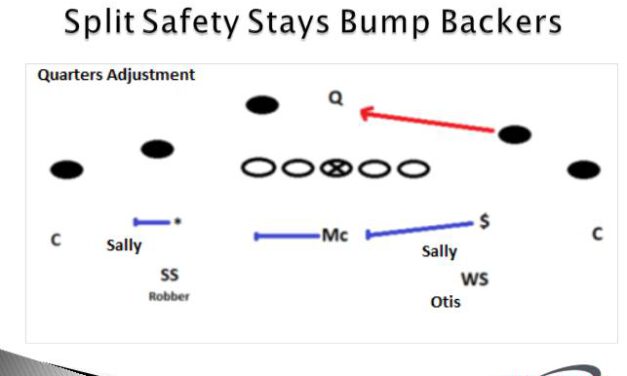
  1. Bump the backers and stick with your Split Safety or MOF coverage.
  • Rationale: Simple answer if you can hold up versus speed and the trio passing game.
  1. Rotation of the Secondary from a Split Safety look to a MOF look with the Safety or the Corner being Primary Force.
  • Rationale: Good answer to speed portion of the series and the trio passing game. Safety rotation allows you to respond to multiple motions and yo-yo motions. Corner rotation gives great leverage versus the speed play.
  1. Rotation of the MOF concept to a Trap side with Man on the Backside of the coverage.
  • Rationale:  If MOF coverage is called in the huddle and we can’t handle the Jet motion plays by just bumping the backers.
  1. “Ghost rule” the backside of Jet motion to keep the Split Safety zone structure to the direction of the Jet.
  • Rationale: Benefits of Trap coverage with the ability to disguise coverage on the slot receiver versus the RPO game.
  1. Pressure the strong side or field side of the set exclusively.
  • Rationale: Setting pressure exactly where you want it.
  1. “Indy” concept a MOF or Split Safety call to the Jet direction.
  • Rationale: Gives pressure in the face of the Jet motion.
  1. “Slingshot” the pressure if the Jet is going away from the pressure.
  • Rationale:  Helps guard against the dilemma of getting pressure away from the Jet motion.
  1. “Wildcat” or “Run over” man coverage to keep leverage on the run/pass threats
  • Rationale: Allows us to play man coverage and still be sound versus the perimeter plays and switch routes that happen inside in the passing

Read More

Drilling Mid-Point Technique For 3-Deep and 2-Deep Zone Defenders

By Mark Theophel
Defensive Coordinator
Hartwick College (NY)


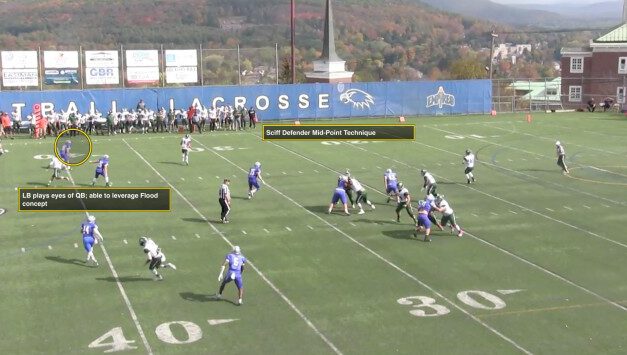
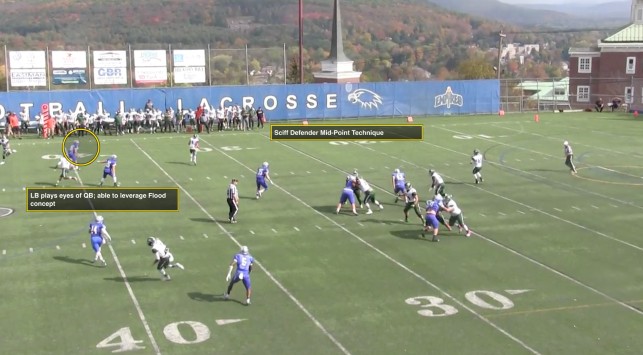
Zone concepts like cover 2 and cover 3 allow DBs the freedom to read the QB and make lots of plays on the football, although they also present the challenge of having to defend multiple receiving threats in an area of the field. This happens most often for us when a defender in an underneath zone is “high-lowed” or when a defender in a deep zone is stretched vertically by multiple receivers. To better position our DBs to defend these concepts, we teach “midpoint” principles in zone coverage, which allow defenders to play in-between multiple receiving threats in their zone and react to the throw.

theophel 063020


Zone Coverage vs. Man Coverage:

It’s important that we first educate our players on the distinction between zone coverage and man coverage. This may seem obvious, but it will help our players to better understand their teaching and why we are doing what we are doing. Man coverage for us is not necessarily going to be just straight man-to-man. Some coverages like quarters will still fall into the “man” category for us because of the key reads for the DB’s. Simply put, if a DB has a “man key” at the snap, then it is a man concept coverage. By contrast, when we play zone coverage, DBs will key the backfield action/QB rather than focusing on a specific WR at the snap.


Features of Man Concept Coverage:

DBs have a “Man Key.”

Eyes are on a WR at the snap.

Man Key will define both our run and pass responsibility.

DBs cover a specific WR on the play.


Features of Zone Concept Coverage:

DBs key the QB/ball.

the initial read will indicate either outside run or pass.

Any ball off the line (of scrimmage) action such as an inside run or drop-back = PASS to deep zone defenders.

DBs cover an area of the field and do not lock on to one WR.

Again, these distinctions may seem somewhat obvious, but it helps our DBs to differentiate between man and zone concepts, especially with their key reads. While man coverage is usually considered much more physically difficult than zone, it is also much simpler in concept. Zone coverage requires DBs to make reads on the QB, recognize different route concepts, and anticipate throws. One of the challenges to playing zone is defenders being stressed by multiple threats to their zone in some route concepts. How we handle this depends on the coverage but the unilateral principle we will use is to “midpoint” the zone.


Midpoint Technique in Cover 2:


Corner Midpoint Technique:

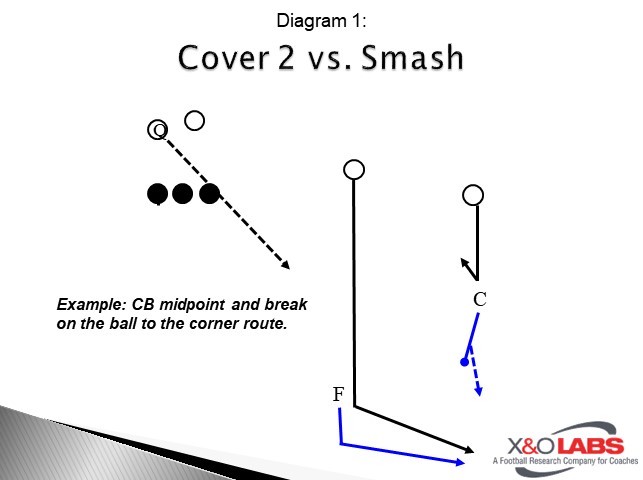
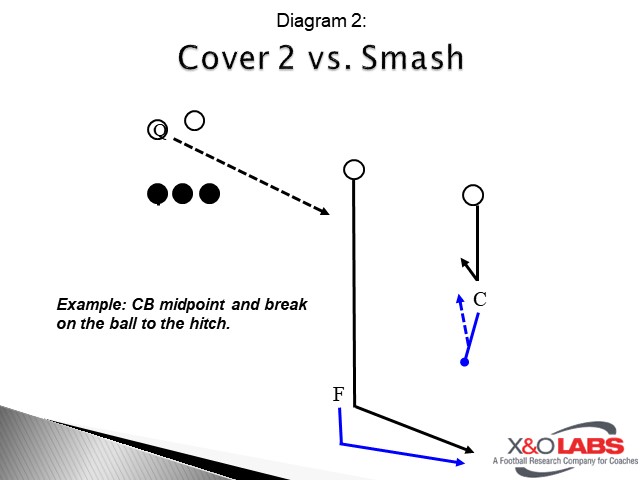
In Cover 2, the midpoint technique comes into play for the corner most often vs. the “smash” concept, with the corner being “high-lowed” by an outside vertical and a short route/hitch to their side. The corner is technically an underneath defender in cover 2, responsible for the flat, and the smash route poses a challenge for him. If he is too aggressive on the hitch, he leaves us vulnerable to the ball being completed behind him in the cover 2 “hole”, before the safety can get there. If he gets too deep to prevent that throw, the hitch will be completed with ease. Teaching him to midpoint these routes can help position him well to defend both throws, while also creating indecision on the part of the QB.

Diagram 1

Diagram 2


It is important to note that while we do often use landmarks in zone coverage, and those landmarks will come into play later when discussing midpoint technique for deep zone defenders, we do not use landmarks for the cover 2 corner vs. smash. The main reason for this is because the ideal positioning for this route depends on several factors that can vary from opponent to opponent. Instead, we focus on specific coaching points to put the corner in the best position.


Midpoint Technique Coaching Points For Cover 2 Corner vs. Smash:

Bait and Drive.

Bait the corner route with body positioning then drive the hitch.

Read the front shoulder of the QB for the throw.

Depth and Width vary based on several factors.

  1. Spacing of the routes.
  2. QB’s abilities/arm strength.
  3.  abilities (know yourself).


Read More

3 Concepts to Manipulate Apex Defenders in Odd Robber Defense

By Adam Schiermyer
Offensive Coordinator/Wide Receivers
Eastmark High School (AZ)
Twitter: @aschiermyer


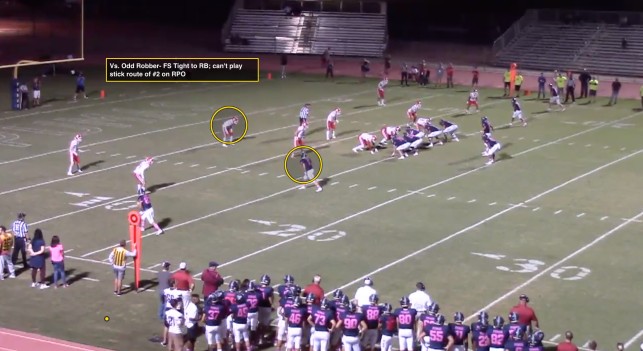
This was the first time as an offensive staff we saw a defensive with a “3-high” robber look, and what made it even more exotic was how far the rovers were playing inside the outside receivers.  Once we dug into the film breakdown of the opponent we were facing, we thought that there was potential with a few concepts.  Deep outs to our outside receivers, vertical routes out of empty, and RPO’s out of 2×2. 


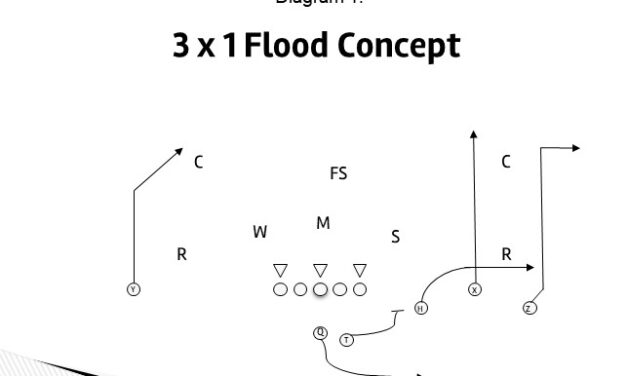
Flood Concept:

Diagram 1


In our flood concept, we will always have a receiver occupying the flat, a deep out, and a vertical.  We can tag whom we want to run what route based on what we see on film.  Here we have our H running a 3-5-yard speed out, knowing that the rover will sink and trap as he is reading 2 to 3.  The X receiver is running a vertical route to hold the free safety as he is reading 3 to 2 and has to carry 2, vertical.  Our Z receiver is running a deep out and breaking it off at 15 yards, the corner has 1 vertical.  Our tailback will set the edge to the side that we are sprinting to.  We tell the Quarterback to “take a peek” at the vertical route, then read the flat defender.  If the flat defender sinks under the deep out, throw the speed out.  If the flat defender traps the speed out throw the deep out.


To study game film of this concept, click on the video below:

Read More

Split Mid-Zone with Formation and Motion Variations

By Adam Hovorka
Managing Editor
X&O Labs

with Jason Eck
Offensive Coordinator/Offensive Line Coach
South Dakota State University
Twitter: @Coach_Eck


To compete in the Missouri Valley Conference in the late fall you must be able to run the ball and run it with physicality.  South Dakota State University believes in this philosophy wholeheartedly and they major in both inside and mid-zone concepts. Offensive coordinator/offensive line coach Jason Eck has been utilizing the concept of split-zone runs in the SDSU run game.  Coach Eck is using the split concept (he calls this Swipe) with his Mid-Zone and not just with the Inside Zone action that many teams are running throughout the country at every level.  Mid Zone is similar to the outside zone scheme, but with tighter aiming points. Coach Eck explains the term Mid-Zone as an alternative to Outside Zone as a way to remind the back that he is not just trying to get to the sideline but is trying to give the illusion of a wide play and then cut it back to the inside.  The “split” part of the concept comes from when a player will line up to the call but come across the formation and block the C gap defender, who is usually being unblocked or read in zone runs. 

Mid-Zone is a staple run play for many teams across the country and at various levels of football.  The play starts with offensive linemen working in combination trying to take over down lineman by reaching them or stretching them horizontally to the sideline.  The ball carrier will read these blocks and either run it to the sideline or see the defensive lineman being washed down the line and cut it up the field getting vertically right now.  Part of why the mid-zone is so popular is how many different formations and personnel grouping the play can be successfully run from.   Offenses can read the backside end and have all the secondary manipulations that go along with reading the run game. Offenses can also go heavy personnel and overwhelm defenses at the point of attack with the mid-zone.  

Coach Eck and the staff at South Dakota State found that meshing its mid-zone concept with the swipe principle provided solutions to the following four problems:

  1. Back-gapping by second level defenders off divide action
  2. “Spill” defensive ends coming underneath swipe blocks
  3. “Lag” technique defensive lineman who played underneath reach blocks
  4. “Rock Back” 2i technique defenders that were used to eliminate cutbacks


Answer to “Back Gapping” LB’s:

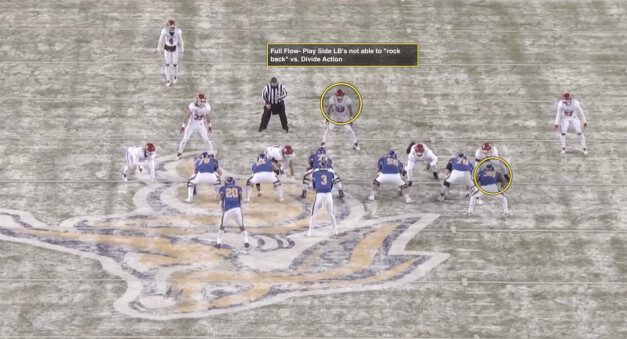
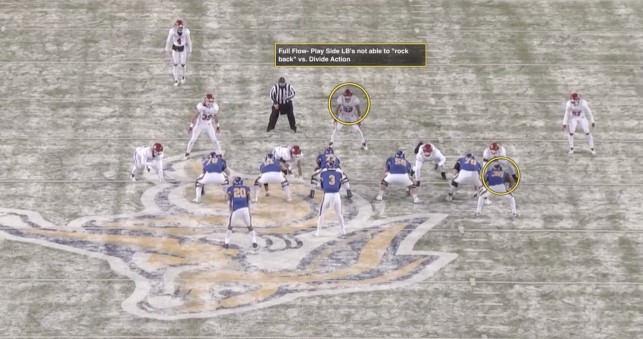
Defenses are taught to “back gap” spilt zone schemes. This means that second level defenders play behind blocks to account for the extra gap created by the H or fullback coming across the formation. While this may work against the tight zone aiming point of the inside zone (inside leg of the play side Guard) that most programs run swipe action with, the mid-zone hits wider. This can promote the potential of the ball staying front side. Coach Eck likes this split action on the Mid-Zone because of the misdirection it provides while running a play that attacks wider than Inside Zone.  Coach Eck also says the moment of hesitation it creates in 2nd and 3rd-level players can be very advantageous to the running back in the Mid-Zone allowing for potential big plays.  Second level linebackers who habitually are taught to “rock back” vs. divide zone action, cannot for fear of the ball hitting front side.

Remember that Coach Eck is calling this Split-Action, Swipe.  The Swipe Action is great against man to man defenses because that play side Backer has his eyes on the H-Back who is going across the formation away from the play. That action causes the Backer to hesitate for a split second.   Man teams are accounting for that Swipe player going to the flat and must insert a defender that way.    This simple swipe action often leads to mis-fitting by the defense.  Coach Eck feels its easier for one of the defenders to be wrong than all the guys on offense to execute correctly every play.


The clip below best illustrates this coaching point:

Read More

The Outside Linebacker Training Manual in the 3-4

By David Pitman
Defensive Coordinator
Sachem North High School (NY)
Twitter: @coachdip


I recently wrote a sort of manifesto, putting the defensive system that I have adapted and evolved over the course of my almost 20-year coaching career into words.  I want to share part of the introduction:

“I have read many articles promoting the value of playing multiple fronts and although I understand this value, I believe that it also promotes the ‘Jack of all trades, master of none’ mentality. In our system, we talk about playing a singular front with multiple coverage checks and adjustments. Our players are given visual keys and taught that action leads to reaction. If they can master this action and reaction, I believe that we can compete. In high school, we have to coach the players that show up and at times those players will not be the most talented players on the field, but by concentrating on a singular front we create mastery, it is this mastery that defines ‘What We Do.’”

In my original article, I spoke, in a general way, about a 3-4 defense built around a “box” that rarely changes. We play a 0 and two 4is with two ILBs aligned at 5 yards over the guards almost 100% of the time. By consistently, “Closing the Box” we can through automatic coverage checks be prepared to play against a multitude of different offenses. We believe that this consistency allows us to be a sound high school defense year in and year out.

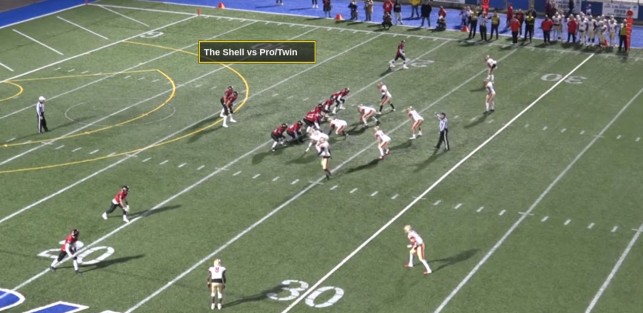
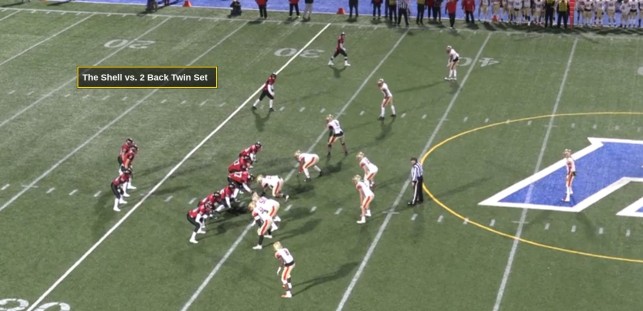
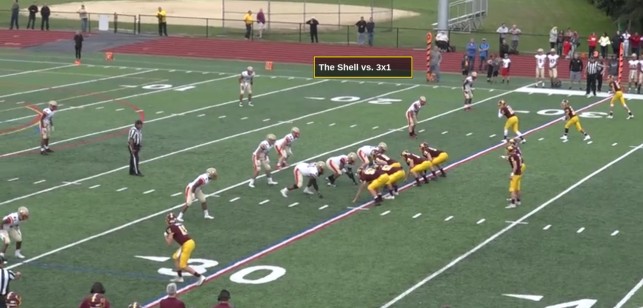
If we can trust that the box will be closed, we can now focus on the “shell”. The shell consists of two OLBs, two corners, and two safeties. We will align them pre-snap in a two-high look and move according to the coverage check made by the players on the field. The beauty of the 3-4 is we can manipulate who the force player is by changing the coverage call, while not changing the alignments or assignments for the box players. The difference between our philosophy and others is we believe that maintaining the stability of the box is essential to being consistently successful. The flexibility of the shell allows us to do this. It is because of this that we put a focus on training our OLBs and Safeties. They are the key to this scheme and where you will put your best players. They are true “Hybrids.” Cody Alexander states in his book Hybrids: The Making of a Modern Defense, “The beauty within football is the constant cat and mouse game between offense and defense. As the modern game moves forward defenses are constantly being challenged to adjust to the way the modern offensive game is played.” It is the OLBs and Safeties in this system that allows for those adjustments. They also allow you to be competitive with lesser ability players at the other positions who have, again, mastered their limited and repetitive alignments and assignments. This is why as the defensive coordinator I coach the safeties and often drill the OLBs and safeties together. They must be an extension of the coach on the field.


Notice in the above diagrams the box remains intact vs a number of different offensive formations.


In the above diagrams, we will adjust the shell to align to different formations and play different coverages.

The purpose of this article is to detail how we teach the OLB.


The Shell: OLBs

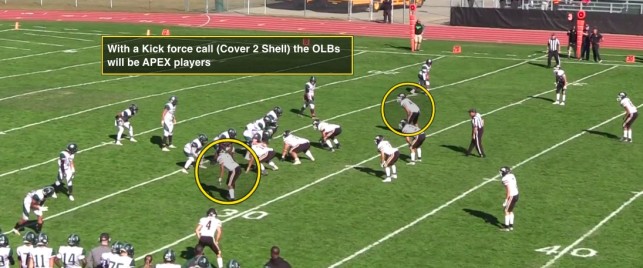
We play with two stand up OLBs. Their alignment is determined by the coverage check made by the safety. For example, if the safety checks the coverage to cover 2 scheme then he will align in the apex between the #2 receiver and the EMLOS. If the safety calls for a cover 3 scheme he will either become an on the ball defensive end (if the safety has taken force) or a 4×4 off the EMLOS in a traditional 4-4 OLB position prepared to be the force player to his side. The OLB must be able to play on the line of scrimmage, in the apex, and over a #2 receiver. This is challenging and we have traditionally flipped these players strong and weak to highlight the things each player does well. These players need to be able to edge rush the quarterback and drop into a number of coverage schemes. This diversity requires a great commitment from the player and the coaching staff. The OLBs are given the EMLOS as their visual key. Their reactions to the actions of this player will in a sense, set the edge. Depending on the coverage and force call the OLB will be responsible to either force the run back inside or spill the ball carrier to a defensive back who has been established as the force player. Because the OLBs reactions are connected to the actions of the EMLOS we can introduce it in the spring and summer. As was stated earlier, the EMLOS can only do a few things. The EMLOS can reach, scoop, pull to/away, block down, or pass set. Each of these actions has a complementary reaction. I feel the urge to apologize for being repetitive, but that is the underlying theme of our defense. It is this repetitive nature that gives us the confidence, that gives us an edge as we face multiple offenses throughout the season.

Read More

Adjusting the Slot Fade Concept to Fit Receiver Skill Set

By Luke Dawson
Offensive Coordinator/Wide Receivers
Shiloh Christian School (AR)
Twitter: @coachldawson


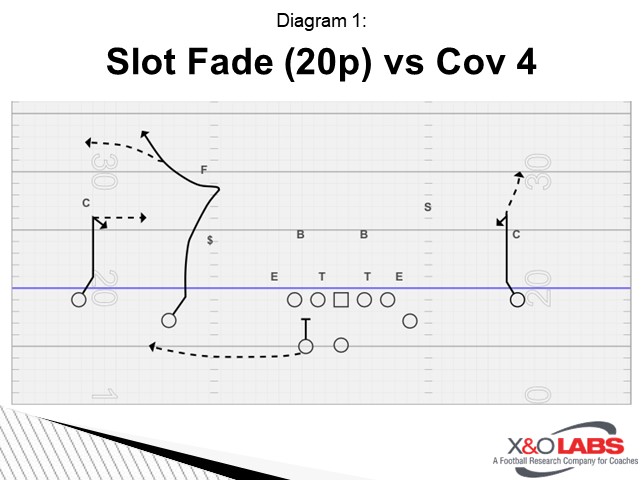
If you happened to watch any college football this year, specifically certain spread teams such as LSU, Oklahoma, or Clemson, you most certainly saw one of football’s newest favorite passing concepts – the slot fade. The country’s top college coaches like the concept for the same reasons you should:  taking a vertical shot play to one of your best athletes in a lot of grass. The play is also very versatile and can be run against a variety of coverages.

When I arrived at Baptist Prep in 2018, the Eagles were riding a 27-game losing streak and running the double-slot triple option. It became clear early on that, although we were going to be in the gun, we were not going to be an air raid team by any means. We built an offensive identity on our downhill gap scheme run game. This past offseason we decided to make our vertical passing game a focus point to complement our 20/21 personnel run game, and the slot fade became an essential part of this vertical passing game.


Molding the Slot Fade to Your Personnel & Opponent

Some of you reading this will understand when I say this, but at Baptist Prep, we were not going to outrun any DB we would face from the WR position. This is what scared me the most as a play-caller about the slot fade concept. When you watch Oklahoma or LSU run the concept on TV, the dudes they are doing it with a look a little different than ours. We had WRs with good hands and could run decent routes, but we needed to find a way to stretch teams vertically with players that were not built to do so. We also knew that we were going to see almost exclusively 2-high (quarters or man) coverage shells the entire season. 

Thus, the idea of an adjustable slot fade was formed. But before we get into the top-end adjustable portion of the route, we need to know the important coaching points about the first half of the route.


The First Half of the Route

We had to make it clear to our receivers early on that they must be able to avoid contact. Since we were not exactly the fastest group, any contact on a slot from an OSLB would slow down our route (even more than it already was). Thus, we needed to avoid any contact before we got to the safety we were trying to attack. They also could not get shoved too far inside or out. Thus, they must practice and prepare to avoid contact by the OSLB to get to the third level. There are many good resources to find WR releases, and we made many of these available for our guys to use at their discretion.

Once we avoid the OSLB by whatever release we choose, we must press the safety’s inside shoulder to either retain his inside leverage or, more desirably, flip his hips toward the inside. This is the key to the first half of the route. We must make that DB believe that we are trying to beat him to the inside. If that can be done, we have already won the route.

Diagram 1


The Second Half of the Route

The second half of the route is where the adjustability of the route comes into play. Let us assume at this point that we have controlled the safety’s leverage by the first half of the route, and he is protecting the inside (as is typical in most 2-high structures). The next step in adjusting the route is to know where the corner will be:  is he jumping the short route underneath, or retaining his depth to shelter under the slot fade? 

Read More

Rip/Liz Match Principles vs. to Defend Specific Formations

By Owen Jordan
Defensive Backs & Special Teams Coordinator
Lincoln University (MO)
Twitter: @LUCoachJordan


Whether you plan on using Cover 3 as one of multiple coverages that your defense runs or as a staple of your defense. It is important to be able to match formations, as well as put your players in the best position to be successful. I will break down the ways we use Cover 3 to match up versus multiple formations. The versatility that we get from playing multiple variations of our Cover 3 helps us to change the run fits and disguise the box count.

We can present a different post-snap picture while maintaining consistent coverage principles. Throughout the report, you will read how we can change the look of the flat defender. This may seem like an elementary variation, but the benefit of changing the flat defender is the ability to change leverage as well to change the picture that the quarterback is seeing from snap to snap. It will make the quarterback find the flat defender instead of automatically being able to find the outside linebacker or safety knowing who will play the flats. The rhythm and timing of each player are different which will change the look for the quarterback, he will not be able to develop as much rhythm and manipulate the flat defender based on previous snaps.

Terminology

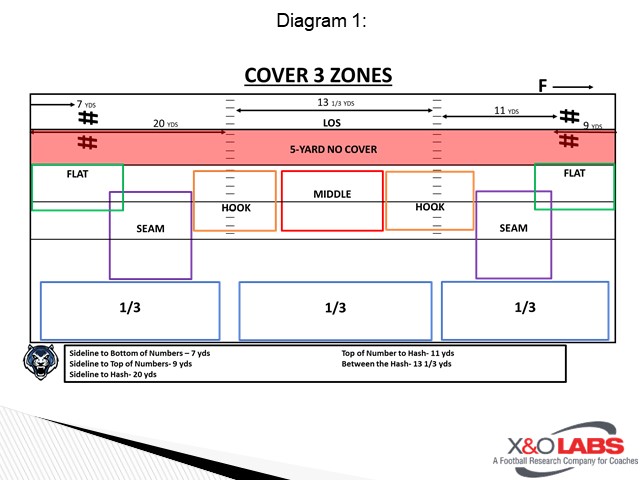
Before we get into the breakdown of how we utilize our Cover 3, it is important to understand how we label the zones and positions for each player to give you an understanding while reading the terminology used in the article. In our Cover 3, we are a spot drop defense that will carry and pass routes through our zone. Each zone from sideline to sideline is roughly 8 yards of horizontal cover with the overlap of the zones.

Diagram 1

Zones

Seam/Flat: Often referred to as the Curl/Flat. We use the term “Seam” to emphasize a re-route of the #2 receiver. We define the “Seam” as roughly 2 yards outside the hash to 2 Yards inside of the numbers. The “Flat” is 2 yards inside the numbers to the sideline.

Strong Hook: Fieldside hash plus 4 yards on either side.

Middle: The middle of the field 3 yards inside the hash marks.

Weak Hook: Boundary side hash plus 4 yards on either side.

Positions

Sam: Field linebacker with Seam/Flat and Strong Hook responsibilities.

Mike: Middle linebacker with Strong and Weak Hook responsibilities.

Will: Boundary linebacker with Seam/Flat and Weak Hook responsibilities.

Rover: Boundary Safety with Seam/Flat, Weak Hook, and Deep Middle responsibilities.

Free Safety: Field Safety with Seam/Flat, Strong Hook and Deep Middle responsibilities.

Base Cover 3

Our base Cover 3 principles are strong and weak rotations. For teaching purposes, we will describe the zones of a Cover 3 strong rotation with the Free Safety outside the Sam in a 3×1 attached formation with the back set to the single wide receiver. In all our zone coverages we will have a 5-yard “No-Cover Zone”. We don’t want the underneath defender to drive underneath routes until the throw. We will maintain our leverage on routes while keeping our depth. Everyone on our defense must understand their landmark as well as the first threat to their zone. If we get a condensed formation, we will adjust our landmarks according to the #2 receiver. We will hold a two-high shell in our pre-snap alignment. The alignment of the safeties will be 10-12 yards deep. The boundary safety will align 1 yard inside the hash. The field safety will align 1-2 yards inside the receiver he will be rolling down to. The base alignment for the corners will be 7×2, 7 yards off and 2 yards inside the widest receiver.  To a single receiver side, we want to press bail based on the alignment of the running back. If the running back is aligned to the single receiver side, we will bail with our back to the sideline so we can get our eyes to the running back out of the backfield. If the running back is away, we can man turn and play the single receiver. Our linebackers will adjust their alignment based on front and coverage responsibility. Our base alignment to 3×1, the Will is going to be in a “30” aligned in the B-gap, the Mike will be aligned in a “20” over the guard, the Sam will align 2 yards inside the #3 receiver.

Free Safety (Seam/Flat): In a 3×1 detached formation the safeties will start showing a two-high shell with a depth of 10-12 yards. The free safety will align 2 yards inside the #2 receiver. We align based on the split of the wide receiver so that we can adjust to the formation and route alignment of the receivers. The free safety will start his rotation on the snap rolling from an inside position to the outside shoulder of the #2 receiver. We want to attack the outside shoulder for two reasons. We want to force the inside release and shorten the divide for the rover rotating to the middle third, we also don’t want to get pinned by the #2 receiver who is trying to occupy the flat defender. The free safety must be patient in his rotation while reading the release of the #2 receiver. We want the free safety to hold the seam as long as he can while working to the flat. Once the free safety gets his hands on the #2 receiver, we want his eyes to go to the #1 receiver. The free safety needs to take his eyes to the #1 receiver to determine where he is going to go after rerouting the #2 receiver.  

Sam (Strong Hook): The Sam will align on the inside shoulder of the #3 receiver. The Sam will be responsible for the strong hook. The Sam will push to the hash on his spot drop looking to collision the #3 receiver. If the #3 receiver takes an immediate inside shallow release the Sam will give an “Under-Under” call to alert the Mike of something coming low into his zone. Once the Sam makes the “Under-Under” call he will take his eyes to the #2 receiver looking for the next threat to his zone. Once the Sam levels off he needs to be aware of an “Under-Under” call from the Mike to indicate a route working shallow across the field or an “In-In” call from the free safety or corner to indicate a route working inside with depth. After the initial spot drop, the Sam needs to be able to work horizontally in his zone. The Sam needs to be able to push out with horizontal stretch from the

Read More

Adding Pistol and RPOs to Traditional Triple Option

By Danny DuPaix
Offensive Coordinator/QBs
Southern Virginia University
Twitter: @coachdandupaix


When I came to Southern Virginia, a small, liberal arts college competing in NCAA Division 3, they had just finished their 2nd season out of NAIA with a combined 1-19 record. The initial roster of 27 including just 2 seniors. We knew we had work to do! Our offensive staff has had great success running the triple option throughout our careers including multiple FBS and FCS post-season appearances, four High School State Championships, and over a dozen region and conference championships. We are schooled by the traditional rushing powers of Navy, Army, Georgia Tech, and Air Force. However, we enjoy seeing the new wrinkles these past couple seasons that New Mexico, Jacksonville, Davidson, and others run with great success. The triple option is not fading, and different variations can be seen throughout all levels of football today.

What I will convey in this report is how to marry the two to help your staff and players make the change in presentation without changing many rules. This will allow for teams to add RPOs while keepi­­­­­ng the core foundation of the triple option.


Triple Option Foundations

The traditional under the center triple option is not a week-in and week-out offense. It requires the defense to be fundamentally sound and play assignment football where one small mistake can lead to huge chunk plays and demoralize a sound game plan. Many teams will invest part of their spring practice AND their fall camp to install their “Option Package” for the one game they face a triple option team. Even then, it is hard to simulate a full speed option attack that will be seen on game day.

Our base play is the Triple Option under center.  

Diagram 1


I will not be getting into the nuts and bolts of this scheme.  However, the foundational keys to our offense are:

  1. PST does not touch the first read man (dive key). He needs to take the easiest release to his assignment (LB in this case)
  2. QB footwork is to align his toes parallel with the track of the fullback. His eyes are on the first read man. 
  3. Mesh is critical, but don’t over complicate it. The QB, staying in an athletic position, reaches the ball as far back as reasonably possible and rides the mesh of the fullback from QB’s back hip to front hip while making his decision.  Once the ball reaches the QB’s front hip, he needs to pull or release the football.  When he pulls the ball, he needs to have a “violent disconnect” which alerts the FB to the not clamp down.
  4. PS slotback takes care of the primary run support on the perimeter while the BS slotback works into a 5×1 yard pitch relationship with the QB. He doesn’t leave that path unless he gets the ball.


Pistol Zone Triple Option

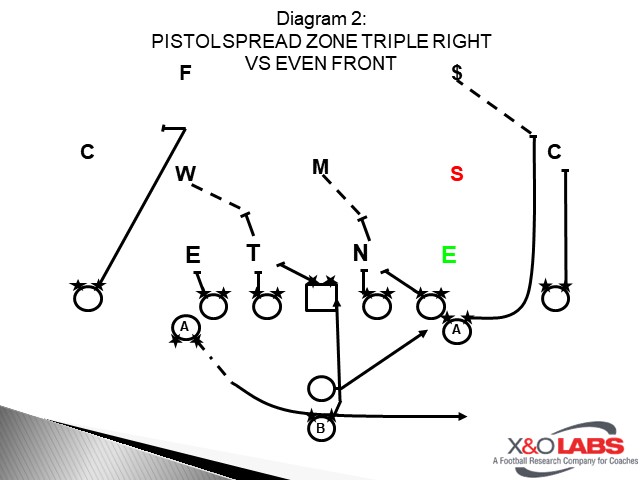
When teams load the box or we want to throw a curve ball, we go to our Pistol Zone Triple Option.  Shown here against an even front.

Diagram 2


With our use of a dual-threat QB, putting him in the Pistol is a no-brainer. Because we begin by teaching the traditional triple option under center, the QB is already proficient in reading defenders and making quick decisions for the dive, keep or pitch. By putting him in the pistol, we increase the time and space he has to decide while opening the door for RPOs. 

One hurdle that comes with putting the QB in the pistol is how to simplify the mental load. We have done this by making a majority of his reads, techniques, and footwork similar if not the same as the majority of the under center run game. The same goes for our OL and skill positions.

Read More

“Falcon” and “Heavy” Adjustments to Defend Big Personnel from 4-2-5 Spacing

By George Karafantis
Defensive Assistant
St. Anthony’s High School (NY)
Twitter: @greek42e


One of the perceived weaknesses of playing a 4-2-5 defense is the extra safety type body that it requires, as opposed to a bigger more physical linebacker that a traditional 4-3 or 4-4 utilize. This additional safety type can make defending a big power-run based offense, challenging. Most run heavy offensive coordinators will salivate when they see 5 defensive backs on the field. We as a defense want to have simple alignment rules and reads in order to allow us to play fast and efficient. We also want to matchup with all offensive personnel without major changes to our defensive personnel. We have three adjustments that are simple adjustments used mostly against 21, 22 & 32 personnel. Two of those are formation based adjustments that are worked throughout the summer and preseason and one is a personnel driven adjustment.


1. Base

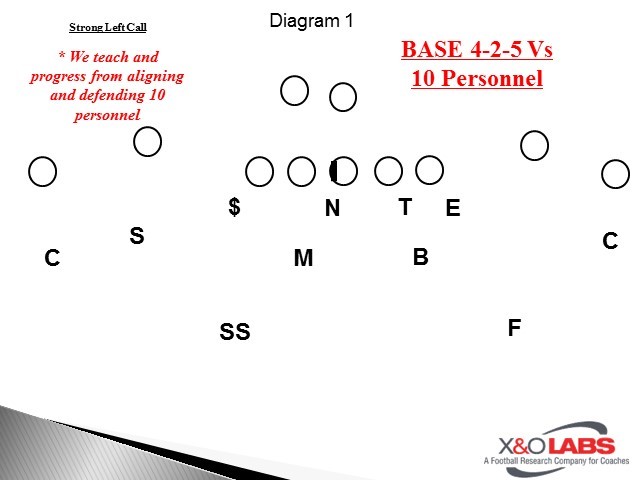
We are a Base 4-2-5 defense that plays predominantly an under front with the strength of the secondary going to the field, or passing strength. Our Sam (Overhang), SS, and Mike all travel together, and our FS and Bandit (weak side Middle LB) travel together.

Diagram 1


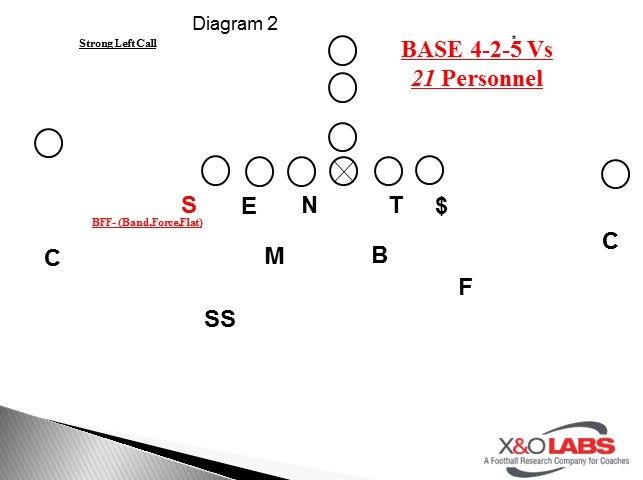
Verse traditional 21 personnel we like to keep our under front and walk up the Sam to what we call a BFF (Bang, Force, Flat) technique. He is in a two point stance -outside eye alignment off the TE, with outside foot back and hands in the holsters. This technique is part of the Sam’s everyday drill work. He must be able to collision (bang) the TE and force the ball while redirecting to the flat if pass shows. The FS, who is our down safety to the boundary, also works BFF since he will be in that technique vs Double Tight, at times.

Diagram 2


Our philosophy to stop power heavy run teams is to get them into 3rd and Long situations. We accomplish this by:

  • Aligning Properly
  • Spilling and Overlapping all gap schemes.
  • Attacking the play before it develops. We get the secondary involved in the run game.
  • Stressing the importance of getting 3 and outs early in the game.


The most basic alignment vs team that uses at least one tight end and 2 or 3 backs is to be aligned in a 6-2 defense that was prevalent at the HS level until offenses became more multiple, diverse and pass capable. While we do occasionally align in this it is not the ideal alignment for us in our 4-2-5.

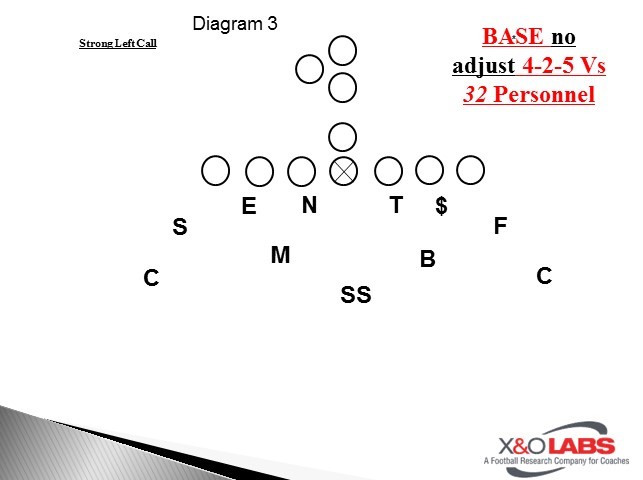
Diagram 3


Clip #1 shows our Base call alignment vs 32 personnel. We only call this if we lock in a base call to our defense in certain situations.

Read More

Press Technique Toolbox to Defend Multiple Routes

By Brock McCullough
Defensive Coordinator
Shenandoah University (VA)
Twitter: @BrockMcCullough


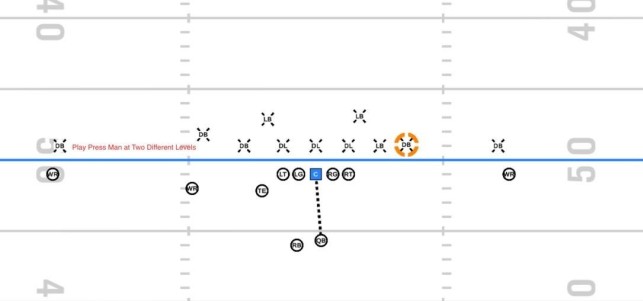
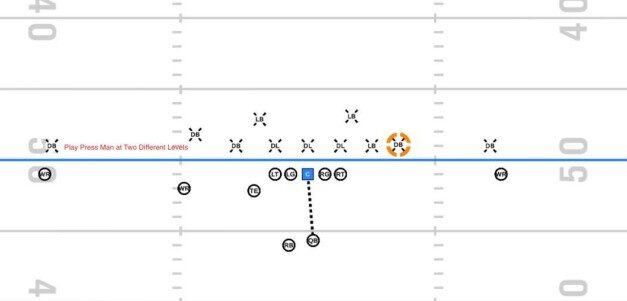
Situational press man coverage has merit at most levels of football. Typically, our press man coverage is paired with bringing more defenders than the offense can block (Cover Zero). A quarterback allows defenses to outnumber the offense’s protection. Press man eliminates the modern quick game, easy access, high percentage throws which offenses love to take. We teach a heavy inside press alignment to help discourage easy, in-breaking routes by the offense. This approach and alignment allow us to force out-breaking throws which are completed at a lower percentage. Our teaching progression starts thereby eliminating those types of throws simply by our alignment. A key point to this article is disruption. Press man is disruptive. Any wide receiver loves a free release. If he runs a 4.6 forty and is allowed a free release, he still runs his 4.6 forty. However, receivers at every level hate being disrupted. By disruption, they likely now will run a 5.0 forty because we are in the way as defenders. Also, you will often hear radio broadcasters and television commentary on how the receiver “dropped an easy touchdown pass.” What they hardly ever consider is that receivers hate to be touched. They often complain to the official when they are touched. The reason they likely dropped that “easy” touchdown pass is often because they were disrupted off of the line of scrimmage therefore, they dropped the pass three steps later. Or they have been disrupted with thoughts that a 230-pound linebacker was within a foot of their pattern.  Disruption is especially important for defenses. This article will talk about one form of defensive disruption: press-man coverage.

Man coverage from a press position all starts with great alignment. We always start any coverage with alignment as the first thing on our checklist. We want our corners, nickel, and press safeties to take a hard-inside ability alignment. First, we want to educate you on the difference between a “man turn” and a “zone turn.” We drill these types of turns daily. A zone turn by a defender means that we see the quarterback and the ball throughout the entirety of the play. We feel this visual key increases our chances for turnovers and provides more eyes on the football for tackling. A man turn involves turning our back to the quarterback and the football while focusing our vision on our man. We feel this has merit at times throughout a football game as well. Man turn technique is what we will be focusing on in this article. Man coverage means we are canceling out one offensive player with one defensive player. We want to melt to this man and eliminate him. Our teaching progression for all coverages/concepts is A.S.K.I.R. I will take you through our press man Alignment, Stance, Keys, Initial reaction, and Responsibility.

Inside press man generally invites lower percentage throws to the perimeter of the field.

Read More

The QB Dart Concept

By Kyle Wagner
Offensive Coordinator & QB Coach
Lutheran North High School (MO)
Twitter: @THECoachKdub


The QB dart play is an excellent addition to any spread offensive attack. The dart play in its essence is a “tackle iso” play. It stresses defenses preparing to handle inside zone read because the defensive end being read is now away from the back. The play is also versatile in the way that your back and quarterback can switch roles from year to year depending on whom you want to be the primary ball-carrier when the play is called. QB dart can be effectively tagged with key game RPOs to be even more deadly and save the offense valuable yards in case of a missed block or assignment. This play was a key part of our 14-0 season and provided us with an answer in critical moments throughout the playoffs.

Why Run QB Dart?

The QB dart is a rather inexpensive play to install. The blocking assignments are rather simple especially if you already incorporate any iso into your offense. It is a great way to allow your dual-threat Quarterback to make easy decisions and get him out in space with a lead blocker. The misdirection of the play makes it tough for the defender to remain consistent in their eye discipline. Also, being able to tag RPOs onto the play makes it even more of a headache for the defense both in preparation and on the field. The QB dart play is also a way to break inside zone read tendencies, which is what originally intrigued me. It’s an Inside Zone tendency breaker because usually we are reading the Defensive End on the same side as the back and now we are reading the end away from the back.  The games defenses play to stop the Zone play with exchanging gaps are now less effective. In a day and age where explosive plays are king, QB dart is just that. Every run is a big play possibility unless the defense concedes numbers on the perimeter. Finally, the play is versatile, and it can be very simple or you can use motions, etc. to make it more complex.

Coaching Points:

The major coaching point at getting good at running this play is the same as most, reps! As the quarterback’s coach, we try to get at least 10-15 minutes a day of working our mesh at an extremely fast pace. We will rep all our run read plays at least four or five times each way during this period. During the period we have our offensive line hose rolled out and have a defender playing as the read defender. The job of the defender is to try to confuse the quarterback into making a mistake. The QB meshes with the back keeping his eyes on the defender. I tell him to “feel” the flow of the defender and trust his instincts. It is important that if you have a QB who can run that you tell him to keep it unless the defensive end can get to him as opposed to keep it if the defensive end takes the back. The fact that we only must spend a few reps on the play is why I consider it an inexpensive, explosive play!
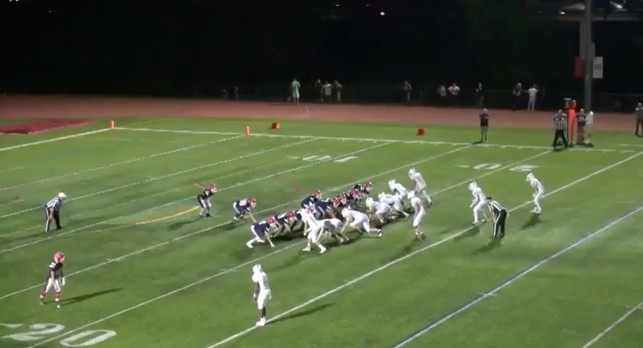
Game Planning the Dart Scheme:

You want to run to the side of the 1-technique vs a split look (5-3-1-5 defensive front). If you are a heavy spread team you will see this look quite a bit. If you face a 30-front that slants, you just have to find out what formation dictates the way that they slant and run the QB dart towards the way they are slanting as it will become their “1-5 bubble”. PST will block the play-side defensive end. PSG will work a double-team with the center on the 1-technique. The center will block on a double-team and work back to backside backer. BSG takes the 3-technique to turn him out and BST pulls for play side backer. QB reads the backside end for a keep or give read. If the defensive end attacks the back, the QB keeps the ball and follows the tackle on the Dart play.  (It is also effective to have the PST pass set to induce a pass rush by the PSE.)

Diagram 1

Diagram 2

Variations:

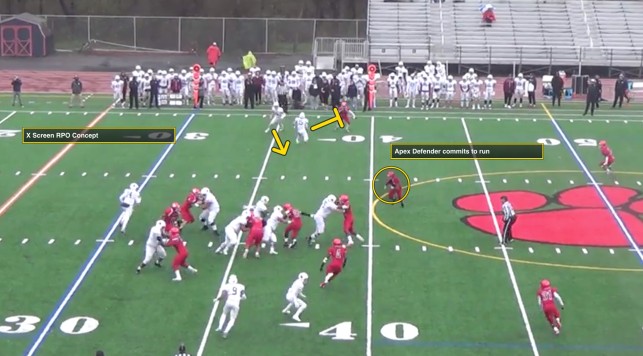
To add in a built-in safety net into the play, add key screen RPOs that will be thrown off the overhang defender. Here is an example of how the key screen saved us 13 yards in our semifinal game.

Some of the key variations to spice up the play a bit and make it look like a different play are using jet motions to provide misdirection and utilizing an H-back for additional blocking. You will see both in the play below. We end up getting called for holding on the edge then come back and score the next play on QB Dart from a different look adjusting to a different front. Versatility.

Using different formations to manipulate the defensive front into the look you want is pivotal and using an H-back is a sure-fire way to get the 1 tech where you need him.

The final adjustment that we utilized this season was to leave the BST on the backside end and pull the H back for play side backer. This was an adjustment to stop defensive ends from trying to shoot the gap vacated by the pulling tackle. Making this adjustment allowed us to run QB dart from empty and opened key screens as well.

To study game film of this concept, click on the video below:

Read More

Using The Lag Technique to Slow Down Wide Zone Runs

By Joseph M. Purvis
Defensive Coordinator/Linebackers Coach
Franklin Parish High School (LA)
Twitter: @FPCoach_Purvis


I first came across the lag technique several years ago as I was doing research on defensive line drills. I was watching Rex Ryan talk about defensive line techniques while he was at the University of Cincinnati. He utilized the lag technique with his “two” gaping nose guard. At the time we were a true Jimmy Johnson 4-3 defense playing mostly over and under fronts, but I believed that utilizing the lag technique would help our defense due to the type of defensive line we had on the team most years, and with the heavy shades we played.

The reason we felt that the lag technique would be a great fit for us here at Franklin Parish High School was that we typically have an undersized defensive line compared to the offensive line we see each and every week. Due to the large size difference, we incorporate as many outside shades as we can because a 185-230lb average defensive line would not withstand the constant down blocking an inside shade would get and hold up verse 265-315lb offensive line. We play a very tight outside shade and utilize the two gap-one gap concept (Bully). Together the two gap-one gap (Bully) technique vs downs and on blocks pair very well with the lag technique on reach/zone schemes.


When to Lag?

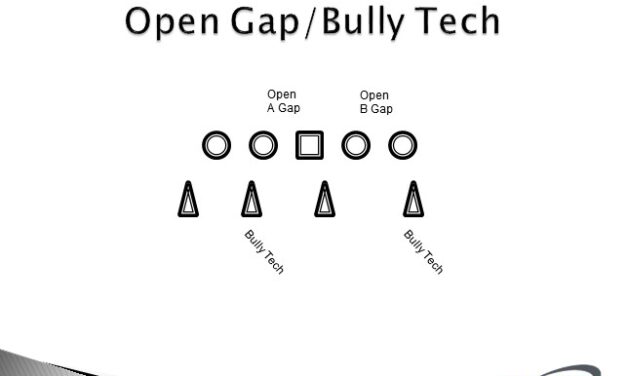
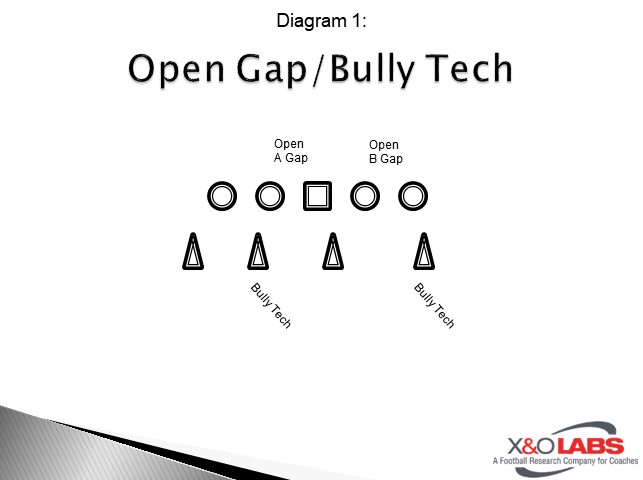
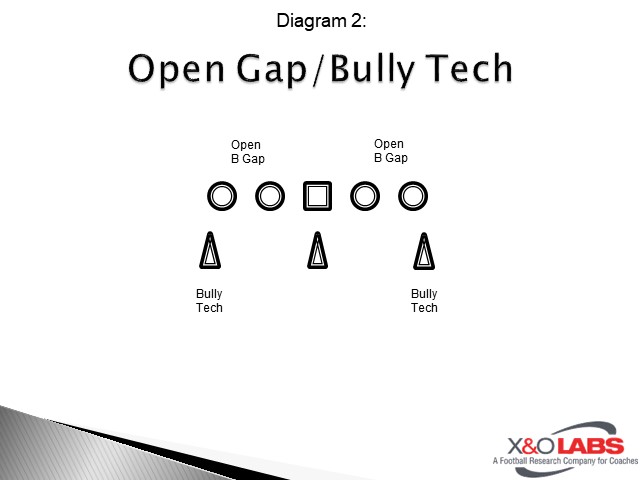
The defensive line must understand that there are open gaps and closed gaps.

Diagram 1

Diagram 2


If the defensive lineman has an open gap inside of him, he will play a bully technique (very tight and aggressive outside shade).

When the defensive line plays a bully technique, we are telling him we expect the offensive lineman he is aligned on will likely down block and we are overplaying the down block to keep our linebackers clean and free to fast flow. This also allows our defensive lineman to take the inside gap as if they were playing an inside shade if the offensive line on blocks or to lag if they run a reach scheme.

In our opinion, we do not believe that a defensive lineman can effectively play the aggressive style versus the down block attacking the offensive line and be able to play the reach block effectively. The way we can sell the idea to our defensive line is that we do not care about the reach/zone block. The typical defensive lineman in most high schools will struggle at mastering the disruption of multiple blocks, so we really focus on the down block as the most important block we must disrupt. By disrupting the down, we feel we will put ourselves in a great position to be successful versus several offensive schemes (Power/Counter, Veer, Wing T) we see each year. 

The first thing we must have as a defensive line is violent hips and hands! Our goal is to attack the offensive line and attack the inside armpit of the offensive line, by using this aiming point we can put our defensive line in great position verse the down block. The downside of the bully technique, before we started using the lag technique, is that when you faced a reach/zone team they could get to our outside shoulder very easy and it would be difficult for our defensive line to fight back across successfully.


How to Lag

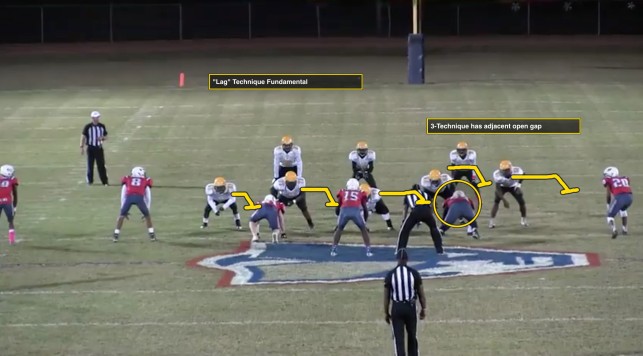
Once the OL has taken the reach step and the DL has taken his first step and realized that he is being reached, he must shoot his hands and press the inside shoulder of the offensive line up and out. Doing this will prevent the OL you are aligned on from getting to the next level and will also not allow the next inside offensive lineman to reach you. We tell our guys that if you are bullying then you can get reached by the man you are aligned on but must never allow the next guy to reach you. We run this technique because it will place the body of the defensive line in the cut back lanes and allows the linebackers to be aggressive fast flow players to anything outside.

Looking at Diagram 3 you can see how this will allow a single defensive lineman to eat two blocks. Lagging behind the reach and not allowing the next offensive lineman to reach you will allow the linebacker to run free. This will also play well with teams that utilize a quarter’s coverage system allowing for the back-side safety to be responsible for the backside B gap from depth allowing him to be slow to run fits and helping with any type of RPO or Read scheme backside.

Read More

Vertical Pass Concepts Off Jet Motion

By Dan Hughes
Head Coach/OC
Sioux Valley High School (SD)
Twitter: @CossackFootball @SVGuybrarian


Jet motion forces the defense to react pre-snap, stress horizontally, and most importantly, force the DB’s to fit the run. In doing so it grabs the defensive backs’ attention as they play an integral role in defending the perimeter. In the following clips take special note to how the DB’s must honor the jet and flow to the ball.

It’s interesting to note the different fronts and looks the defense will utilize to defend the perimeter. In nearly every instance a defensive back must interpret run, defeat a block, and pursue the ball carrier. Stress is placed on DB’s because of the amount of open field, lack of numbers, and the speed of the play.  These factors make defensive backs vulnerable to the play-action pass, especially off jet motion.

The vertical passing game compliments the Jet sweep by putting defensive backs in conflict. You will see it only takes a peek or slight hesitation from a corner or safety to create a big-play opportunity. Whether your team’s identity is under center, shotgun, the zone or power running game, the Air Raid, or wing-t, a single vertical scheme combined with Jet motion can give your offense some much-needed explosiveness.

This strategy can be incorporated into any offense regardless of formation or personnel group. Simple verbiage or a hand signal is more than adequate to add this extra layer of deception to your offense. In our system we use the buzz words “Trump” and “Hillary” to communicate jet motion to the right/left respectively. Hand signals are great as well, but our DC is a very political guy and I feel like he appreciates it.

On each of the clips in this report, you will notice a defensive back looking at the backfield. The location of their eyes keeps them from adequately covering the WR. It communicated to the QB which DB we want to attack.  These clips show the QB completing vertical passes to each third of the field.


Jet Player & Quarterback Technique: Under Center

In our system, the motion is initiated by the cadence and the jet player is responsible for sending himself in motion; the target for the jet motion is a spot 20” behind the QB. This spacing gives the QB room to do a 180-degree pivot and execute a proximity fake to the jet motion player. The QB keeps the ball secured with two-hands in his belly while the jet player, using high-cradle position with his hands/arms, creates the fake.

  1. Pre-Snap Motion initiated by QB cadence.
  2. QB does a 180-degree pivot and executes proximity fake
  3. “Giant Step” straight back with plant foot
  4. On rhythm deliver the ball to the window above the #1 WR


Clip note: Notice how the DB is in press coverage, but our WR’s role stays consistent, “get behind the defense.” In this clip, you can clearly see the CB only peeks for a split second. This is all our receiver needed to get behind him.  This clip also shows how the receiver stayed on top of his landmark, which in this case is the numbers.  This game the QB an area to throw and prevented the free safety from being a factor in the play.

Read More