The Mid Zone Mindset for the Play Side Tackle

By Mike Kuchar with Greg Whalen
Offensive Line Coach
Marian University (IN)
Twitter: @CoachWhalen59


The Mid zone concept- the offspring of the inside zone and outside zone family may be the most ideal boundary run scheme to two-man surfaces. It’s the preferred run of choice against any front- 4-3, 4-2-5, 3-man fronts- and against any coverage look. It can also be run from under center, shotgun, offset or pistol alignments. It can also be tagged with RPO’s, PAP’s or bootlegs to make the play much harder to defend.

But if you’re running mid zone in your system, you already know that. And if you’re not running mid-zone, you probably need to. Yet it’s important to note that the mid zone may not always be an effective play. The sources we talked to continually referenced the necessity of the back to understand the timing of the play. There’s more fitness to it than inside zone, and you don’t have the “circle the defense” mindset as you would in wide zone schemes. The back must blend the perfect mix of vision and speed in order to get the play right.


RB Aiming Point:

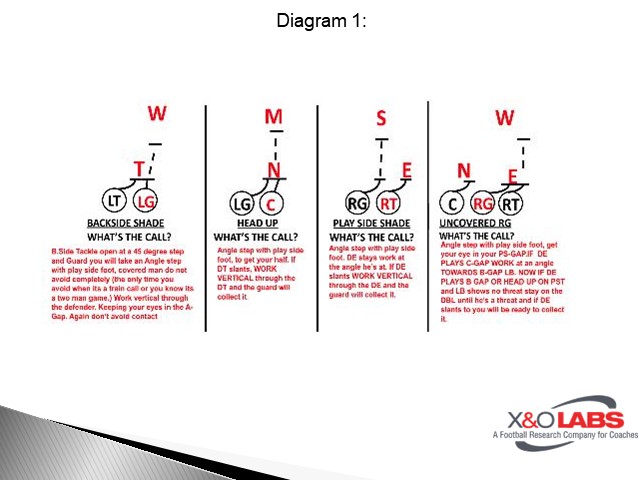
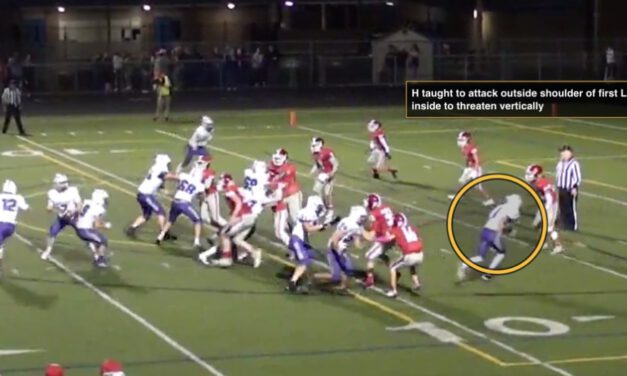
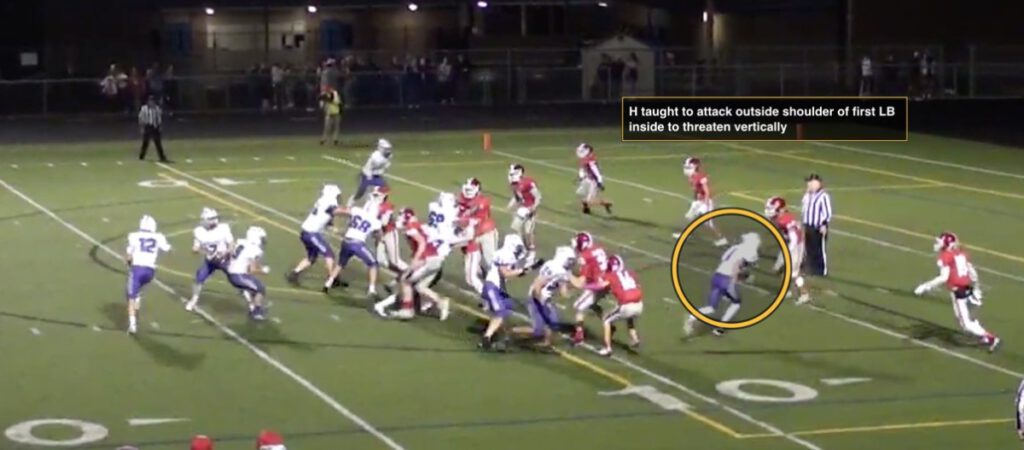
The ball carrier aiming point is the inside heel of the play side Tackle, which is a universal aiming point to two-man surfaces. Most prefer the same aiming point in pin and pull schemes as well. The back is taught the bang, bend, bounce methodology.  He will press and read shoulder tilt of play side Tackle. If his shoulders are parallel, he continues on his path and reads the next down defender. If any doubt in his mind, he sticks his foot to go north.

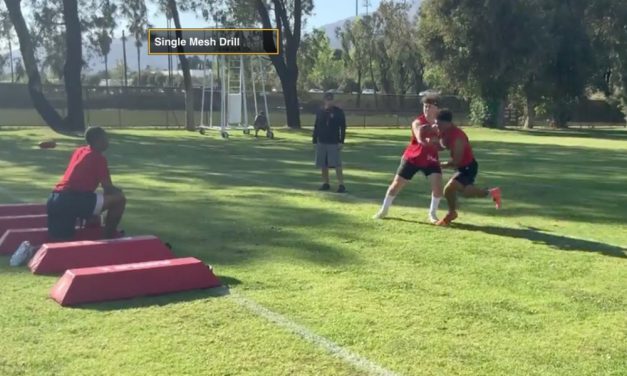
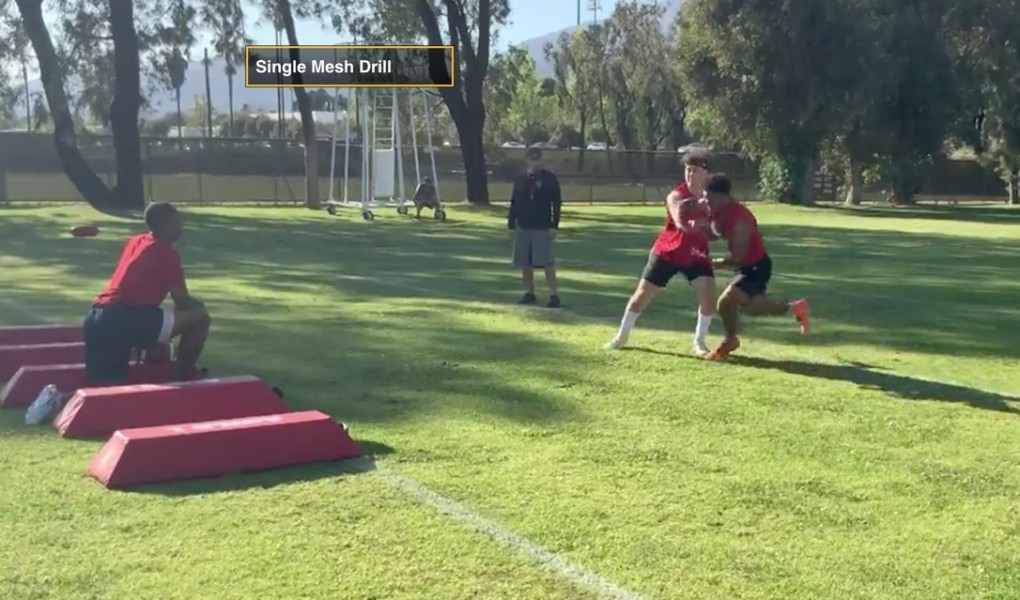
Marian offensive line coach Greg Whalen calls it the “flashlight” in the butt of the play side Tackle. “We tell him to run to that light,” he said. “We take the edge if it’s there, otherwise we need to read it back.” He’s gone to using more of a Pistol mesh because the drop step puts the ball carrier directly on the right path. In Pistol, the aiming point is pushed wider to the butt of the tight end or ghost tight end to two man surface. Now, the quarterback sprints to the mesh like he would on outside zone. “We want QB to get there easily so blocks can develop,” said Coach Whalen. “It helps because you can get behind a penetrating B gap defender in Pistol. You have more space that way. It puts him in right track and slows him down to let blocks develop.”

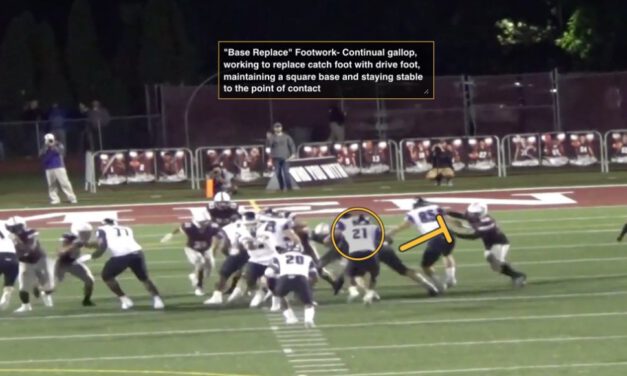
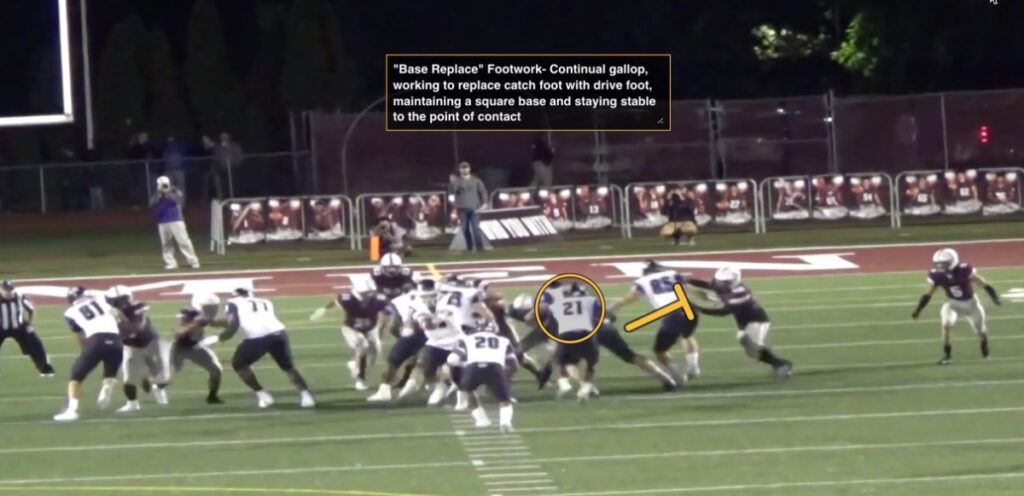
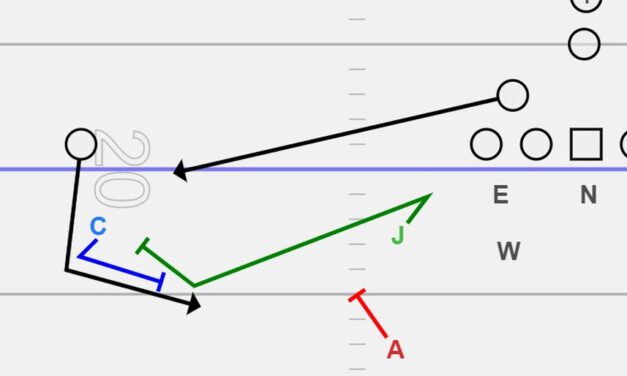
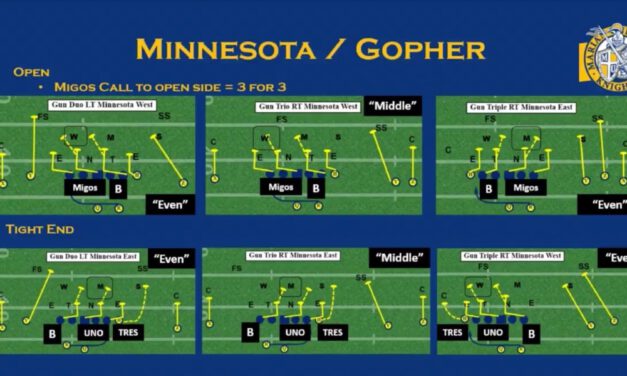
Quite frankly, a lot of responsibility is placed on the play side Tackle, which is why some mid-zone majors, like the outfit at Trinity College (CT), prefers to use a boundary and field tackle putting their better mid zone technician to the play side.   At the University of Marian (IN), the concept is called Minnesota/Gopher for a reason. Modeled after the success that the University of Minnesota has had utilizing the scheme, the Mid-Zone run play is a staple in Marian’s system- helping produce over 190 yards per game on the ground this season.
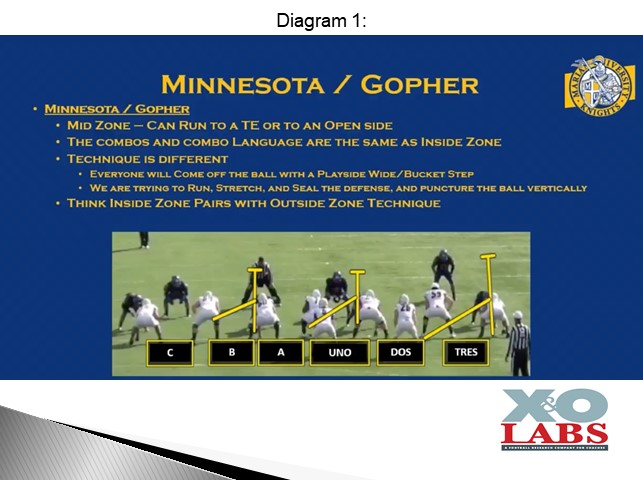
 

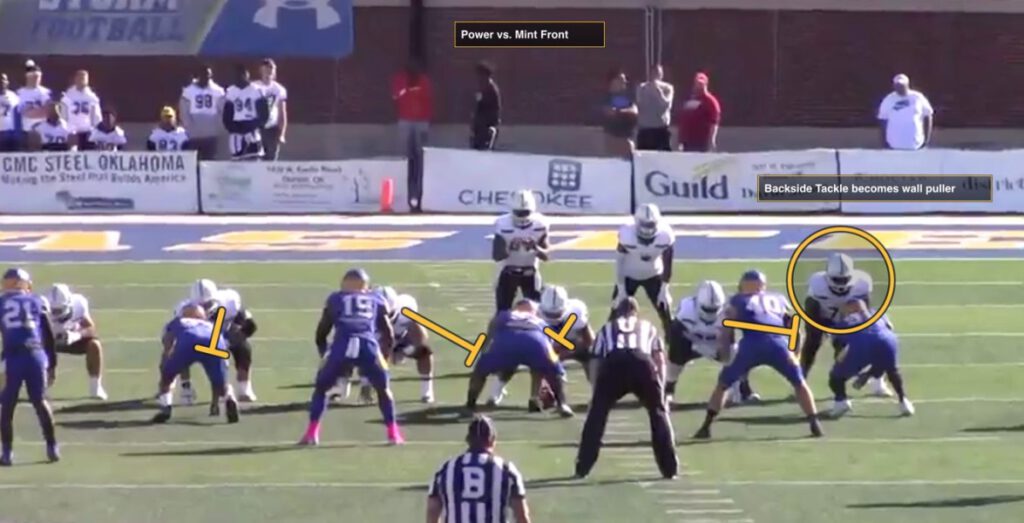
In its base form, the Mid Zone concept is best utilized to a two man surface, putting the play side Tackle on an island to handle the C gap defender down defender. The play side Guard and Center work in combination to block the second down defender and play side linebacker, or one past the point.
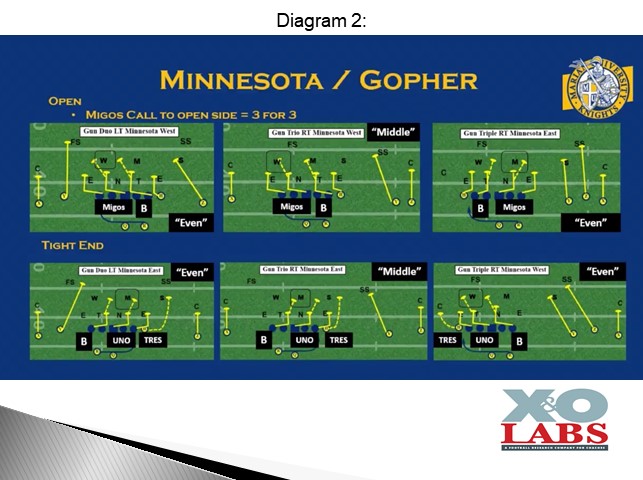
 

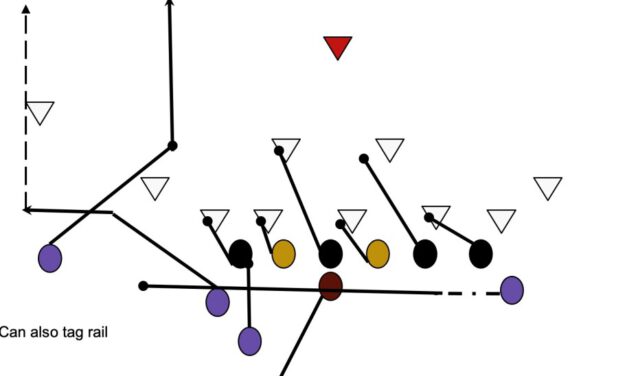
Two-Back Mid-Zone

While it’s often used as an open side concept, the staff at Marian has more success running it to an artificial three-man surface from a Y off formation or with a grounded tight end. With the Y-off formation, the tight end is responsible for “plus two” past the point. In this concept, the Y needs to clear the running lane and define the entry point for the running back. Coach Whalen calls the tight end the fixer. “You have a pre-snap assignment,” he said. “But if anyone crosses your face before your assignment, you take him.”
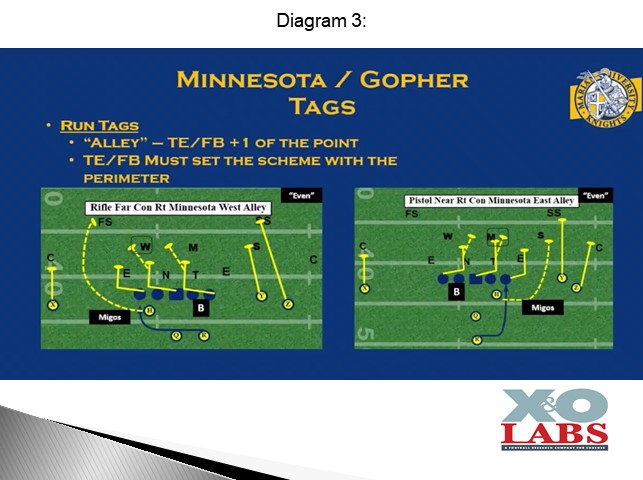
 

Against four-down structures, the benefit of having the lead back gets him in a position to block a high safety or overhang defender if the boundary corner is locked in man coverage.
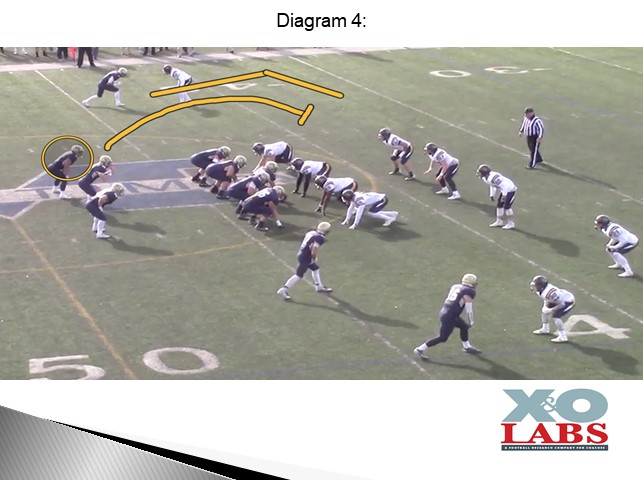

 

Read More

Base Reduction Principles to Defend Run Game

By Steve Erxleben with Spencer Leno
Co-Defensive Coordinator
Massillon High School (OH)


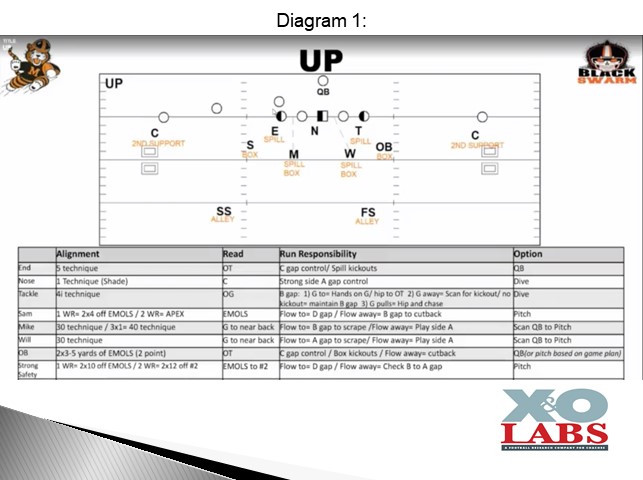
The benefits of the reduction front lie in the ability to play both even and odd looks on the snap of the ball. Its simple spacing keeps box and spill defenders consistent without an immense amount of checks. At Massillon High School (OH) co-defensive coordinator Spencer Leno uses two base reduction principles (Up and Eagle) to help solidify run fits by playing single gap control (and no two-gap) defense.


Base Front Structure:

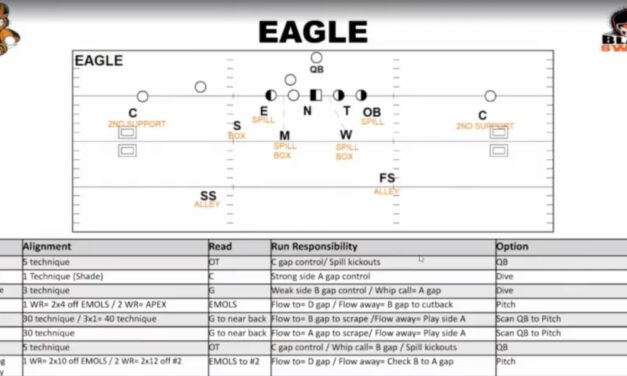
At its core, Massillon is an “Up” Front defense. 3-4 spacing, with two interior linebackers, a hybrid strong safety or outside linebacker and a hybrid defensive end/outside linebacker. With the strength set to passing strength, the outside linebacker is the most critical component of the defense. He and the Sam linebacker are apex defenders against a removed number two and key the EMLOS for both run and pass reads. They are box defenders against the run game and will attack the line of scrimmage. The 5-technique and shade are to the “Sam” linebacker and the 4i and OB are set away. The 4i is aligned over the offensive tackle but will key the V of the neck of the offensive guard, essentially playing a 3 technique from 4i positioning.


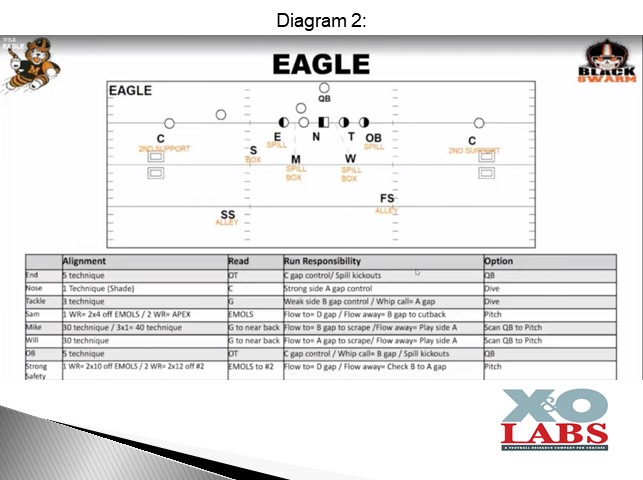
The changeup front Massillon uses are what they call “Eagle,” where the OB walks up on the tip of the offensive tackle, reducing the Tackle to a 3-technique. Everything else stays the same.


Front Techniques:

Where Massillon differs is the way in which they play the Odd front. They are not a two-gap outfit and will work to attack the “V” of the neck of the down lineman for two essential reads: if the offensive lineman comes at them, they play vertical. If the offensive lineman works downhill, they squeeze and spill chasing pullers. The difference lies in that 4i technique. If he’s playing a true 4i, Coach Leno works to have him work down the line of scrimmage and chase pullers. If he’s playing a 3-technique, he’ll work to squeeze down blocks to play the jump cut lane on cutback. In both circumstances, they are Guard read defenders.

Since there is no two-gap technique across the board, the Nose is a shade with a single purpose of getting his hands on the Center. If the Nose feels pressure from the offensive Guard, he “hips” the Guard but doesn’t fully turn, keeping both linemen on two different levels preventing them from getting hip-to-hip on the double team or working to the Mike.


Base Coverage System:

Both safeties key number two pre-snap and are in a palms coverage scenario. They have a man-play-man rule, which Coach Leno describes that their initial read is #2, then they become a surface to alley defender. If there is no number two, the safety is reading the end man on the line of scrimmage, making the outside linebackers correct. This helps with the consistency of OLBs as box players and safeties as alley players keeps the run fits fast.

Read More

Variations of Trap in the Power Spread

By Matt Kimmes (with Kyle Borland)
Offensive Coordinator/Quarterbacks Coach
DeForest High School (WI)
Twitter: @norskicoachk (@kblu54)


We utilize the Trap concept in our offense because of its quick-hitting nature and its flexibility regarding personnel. We are primarily a gap scheme/skip-pull team, so Trap gives the illusion of that while being a “rule-breaker” for us in terms of how we block it. There are also many ways to “dress it up” with motions, RPOs, triple-option looks, and by using the QB as the primary ball carrier. Double-wing, Wing T, and similar-based teams have been using Trap effectively for years, but we’ve adapted the same concept to our shotgun-based approach. First, let’s start with the basics of our shotgun Trap:


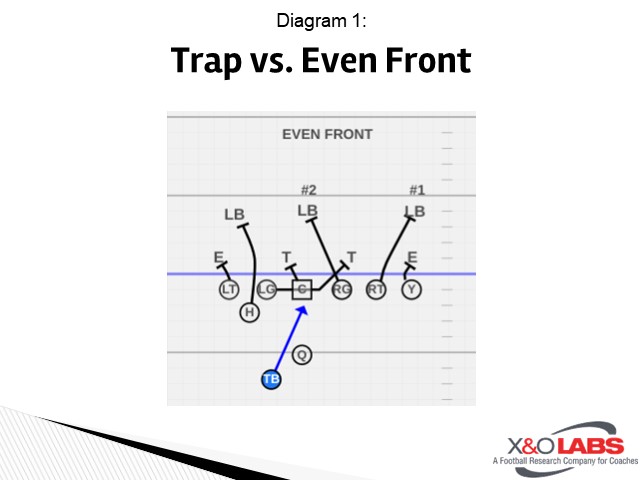
The main crux of the blocking scheme comes from the middle 3 linemen: both guards and the center. Essentially, they block each other’s first threat to give the appearance of a gap scheme but also leaving no reaction time for the defense. This first diagram is drawn up against an Even/4-down front with a 1-tech to the side of the TB and a 3-tech aligned away. This is the traditional “favorite” defense for Trap because it allows enough spacing for the blockers to hit their marks as well as keeping the TB on a normal track.

Starting with the center, he should down block to the backside DL which in this case would be the 1-tech. The play side guard should release up to the #2 linebacker, which is usually the Mike LB. These two blocks should create a crease in the play side A-gap and influence the unblocked 3-tech. The backside guard then takes a direct angle to perform the Trap block onto the play side DL and opens the A-gap for the TB. The TB should secure the handoff and aim directly upfield; it will look messy for a split second before a significant opening. Ideally, the TB should not take any lateral movement.

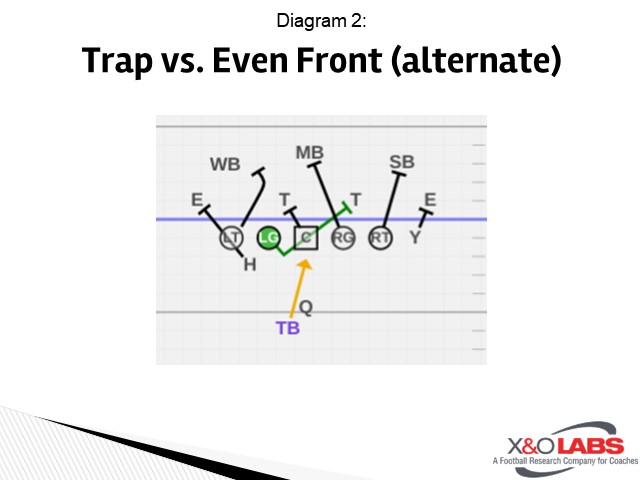
Since the crux of the blocking scheme is in the middle, that allows a lot of variation for the rest of the scheme as well as flexibility for personnel and tags. In the first diagram above, the play side tackle releases up to the #1 linebacker and the tight end (Y) base blocks on the edge defender. On the backside, our fullback (H) will release up to the #3 linebacker and the backside tackle will base block the edge defender. It can simply be explained as a “first threat” scheme for the periphery blockers. In some offenses, Trap requires both tackles to immediately release to their nearest linebacker, as the next diagram shows:


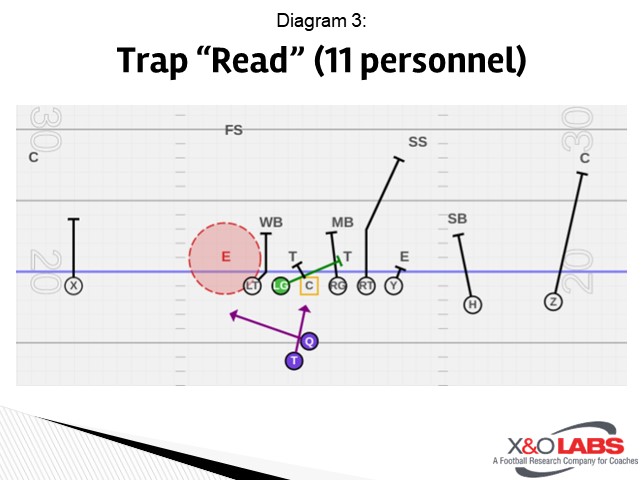
Here, the backside tackle releases up to the #3 linebacker, mirroring his tackle counterpart. This then allows the H to perform a more natural block on the backside edge. This might be an easier variation to teach as both tackles are now doing the same thing, as well as opening Read variations in different personnel sets. For example, you can put a “Read” tag on the play, out of 11 personnel and leave the backside edge to determine to give/keep for the QB:


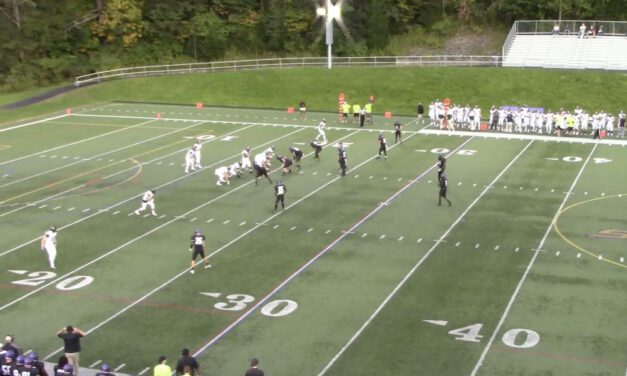
If the middle 3 linemen perform their blocks and the ball carrier remains on a tight inside track, you can break off a big play before the defense can properly react or run fit.

Read More

Teaching Eye Discipline to Buzz Safety in One-High Structures

By Brian Stoldt
Former Defensive Backs Coach
Alfred University (NY)
Twitter: @Brian_Stoldt13


Playing defensive back is one of the most physically difficult positions in football considering that defensive backs need to defend the best athletes on the field. One of the best ways to gain an advantage on the opposing offense is through our pre-snap eye discipline. Many physical traits are essential for a successful defensive back such as good feet, being balanced, but mentally, defensive backs can create a major advantage with their eye discipline. Specifically, this report will focus on the eye discipline of a strong safety in our Cover 3 Buzz.

First, the players need to understand the basic concepts of each coverage they are running. Man, Zone, or Zone blitz? No matter the coverage, eye discipline is incredibly important. Based on each coverage we run, each formation we face, and certain tendencies that we find, our safeties will have different responsibilities in each given situation. The process all starts with their eyes.

In Zone coverage, we want to have awareness of the offensive formation, but defensive backs want to read the drop and shoulders of the QB. This is especially true for an insert safety in our Cover 3 Buzz.


Buzz vs Run

The first key for our Strong Safety when he is inserting is to get a run/pass read in the backfield. If he sees the ball handed off, his responsibility is to take an inside path to the ball carrier by tracking his inside hip to the ball. Essentially, he is a spill player because he has a force/flat player outside of him. That player’s responsibility is to force the ball back inside. In the first clip, our strong safety, #5 reads that there is a low ball, and he inserts inside the RT to make the tackle.

Read More

QB Decision Protocols in 12 Personnel Split Zone RPOs

By Artie Allen
Former Offensive Coordinator/Quarterbacks Coach
Chaffey College (CA)
Twitter: @coachallen5


At Chaffey College, we do our best to be in offensive sets that complement the skill sets of our players. We try to take advantage of the strain that 11, 12, and 21 personnel looks, put on a defense. We are huge believers in running Tight Zone as a base run play. The flexibility to align and move Tight End’s to various positions allow for variability within the concept while keeping the offensive line’s responsibility simple.


One of our favorite variations of the zone is Split Zone with a TE/Wing player. How we run Split Zone with RPO attachments allow us to do the following:

  • Block or more in the run box to give the quarterback protection
  • Pre-snap read conflict defenders to each side
  • Post-snap read a sole conflict defender to a specified side


The focus of the report is the Quarterback’s decision making. I however want to briefly explain some details of each position.

Offensive Line: The primary goal of the offensive line is to vertically push the defensive line and get bodies on the 2nd level players to give the running back vertical seams to run through. The offensive line’s first step and working to get vertical with double teams are two of the most important techniques. Each offensive lineman will generally take the same step, but the steps may adjust slightly based on the different alignments each player may see.


Running Backs: The running back is critical to the play as he is responsible for working with the double teams and not against them. The running back has 1st-level keys and 2nd level keys. On the 1st level, we are identifying pre-snap what front we see. We expect vertical or lateral movement based on the alignment of each defensive tackle. On the 2nd level, we are looking for fast-flow or slow-flow based on alignment. The running back’s eyes will start on the 1st defensive lineman playside of the Center. He will “Bang” it front side, “Bend” it backside, or “Bounce” it outside.  One of the biggest coaching points is that the running back is patient and makes his move into the line of scrimmage. This helps the angles for the offensive line’s blocks.

Read More

Pairing the Jet Package with Sugar Huddle Tempo

By Seth Storer
Offensive Coordinator
Oberlin High School (LA)
Twitter: @SethStorer1


Our philosophy is to use our team speed coupled with the sugar huddle to try and outflank the defense and hit them before they are ready. We like to be able to attack both vertically and horizontally. We try to have a concept to attack all gaps and areas of the field to and away from jet motion or the featured play of our series. In doing this we have “if-then” built into our 3-prong attack. “If-then” is our answer to how the defense plays us. A 3-prong attack is being able to hit the defense with an inside run, outside threat, and deep threat vertically down the field. Essentially making defense cover the entire field. The Sugar Huddle or quick huddle is breaking the huddle and sprinting to the LOS. There are a few different ways you can do this.

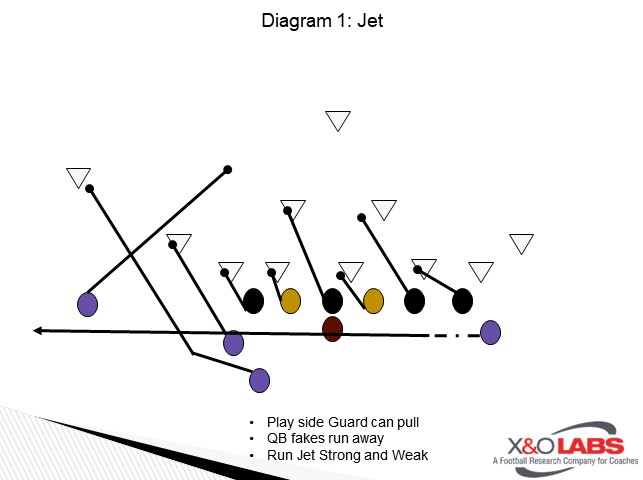
We will start with the jet that we like to run out of multiple formations with a few misdirections off the jet. One of the reasons we went to the jet is the same reason we went to the Wing-T 7 years ago our;  undersized line. The Jet requires minimal blocking at the point of attack and our best players are usually making the key blocks.  Like any series-based offense, the counters and PAP are only as good as the featured play, so we spend a great deal of time on the little things that make the Jet work for us.


Sugar Huddle:

The sugar huddle has been a key part of our offensive identity and success over the past 3 seasons. We have used it in a few different ways. We started out by just simply using a tag when we wanted to break the huddle at a super-fast pace and almost exclusively used it for sweep plays. We then used it for entire series or drives and eventually implemented it almost full-time. Auburn University has used it in a variety of ways leaking out the C and a few WR’s and then having the rest of the offense break to the LOS and run the play. We simply leak WR’s and then break to LOS. The main idea behind the sugar is to catch the defense misaligned. Often when we snap the ball the defensive line is still not set and allows our OL to get a great push off the LOS. One of the biggest obstacles for Wing-T teams using sugar huddle is deciding if you do or do not flip your OL.  There are trade-offs for both, and we have done both over the years. Not switching allows you to break faster. Our goal is to run the play from break to snap within 4 seconds. We have a few tempos that we use within our system also. These include quick, turbo, and milk. When we call milk, we stay in the huddle until the 10-second mark then breaks as fast as possible for LOS. This allows for our players to catch their breath and run time off the clock. Using different cadences when in sugar also help to keep the defense off-balance. We use a first sound cadence often and then switch it up while using sugar huddle. We feel like the combination of the two often causes the defense to jump offside.


Read More

Incorporating 4 Footwork Releases to Attack Press Coverage

By Luc Polglaze
Wide Receivers and Tight Ends Coach
Kenyon College (OH)
Twitter: @LucPolglaze


When facing coverages, receivers should be armed with a variety of tools and releases to help them attack the leverage of the cornerback. I want them to have the confidence to get off the line against press coverage and into their route as quickly and efficiently as possible.

Football is a physical sport, and nothing sums that up better than press coverage. It is a one-on-one coverage that challenges receivers to overcome a defensive back lined up directly across from them. As a result, the receiver’s mindset needs to be aggressive and physical. This is a great opportunity for them to make a play and get open.

At the same time, though, receivers shouldn’t overthink the release. It should be automatic and repeatedly drilled. I will rep releases on an almost daily basis – I want to make sure that this is something that feels natural to the players. Also, I make sure that the releases I coach are boiled down to the essentials. I effectively coach four releases against press coverage – each with its own benefits and risks.

When we talk about a release against press coverage, it comes down to two things: hands and footwork. Both of them operate independently, and both can be the cause of a great release, or lead to a poor release.

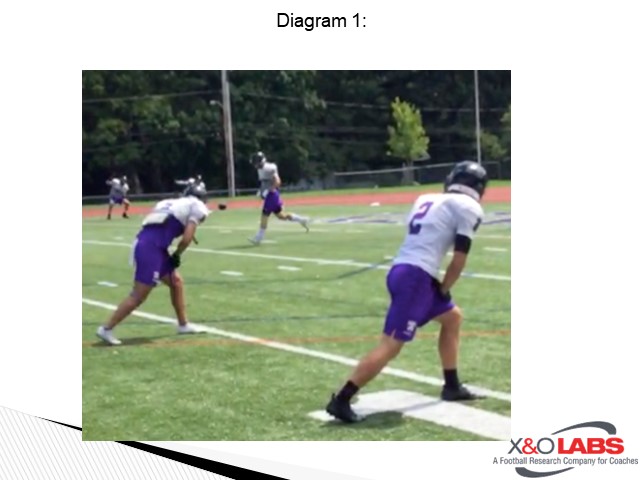
Hands: When a receiver is in their stance normally, I allow receivers to have some flexibility with their hands. They should do whatever feels the most comfortable for them, but that will still allow them to accelerate off the line of scrimmage quickly and smoothly. Most receivers will either rest their hands on their front knee or leave them dangling.


However, against press coverage, I want the receivers to have their hands up in almost a boxer’s stance. This makes sure that the defender does not have easy access to their main target area – the breastplate/shoulders of the receiver. The receiver is effectively making that window smaller for a defensive back to reach and allows him to have his hands already in a position to react, as we see here from this receiver. Having the hands at chest height means the receiver doesn’t have to waste precious time bringing them up from a lower angle.


When a DB shoots his hands, there are two main target areas for the receiver: the wrist, and the elbow. When targeting the wrist, the receiver should flatten their hand and chop the defender’s wrist with the side of the palm. When targeting the elbow, the receiver should cup their hand and swipe up at the defender’s elbow.

Read More

Fullback Kickout Technique: The Gallop

By Danny Schaechter
Offensive Coordinator/Quarterback’s Coach
Gonzaga College High School (DC)
Twitter: @CoachDShack


I love fullbacks. They’re the offensive line’s bash brother. They can add so much to an offense yet get little notoriety for their contributions, and they get the ball even less. What fullbacks get the least of is technique. This was one of my frustrations that came to a boil after our 2018 WCAC Championship. We were moving our sophomore fullback to defense. His replacement was a third-string linebacker who was smaller than our departing fullback, but he was one of the hardest workers on the team. We had to find a way to give this undersized, converted linebacker a chance to block defensive football players who were going to be much bigger and more athletic.

Like many other coaches, when it came to fullback, we had coaching points: contact near foot, near shoulder, and explode low to high. We’d been giving those fundamental points to our fullbacks for years, and it had been fairly successful, but there were still issues with fullbacks on our kick-out blocks lunging and whiffing, being driven back into the play, and/or playing too high. This is because coaching points are not the same as technique. After asking a lot of college coaches, including Power 5 coaches who were known for physical fullback play, this was the common answer: we just find someone who can do it. Many high school coaches don’t have that option. Through the search for an actual technique to a kick-out block, our staff had an idea that stole from the biggest fullbacks on the team, the offensive line. For us, this was the birth of the fullback gallop technique for kick-out blocks.


The Gallop

Once again, this technique is borrowed from the offensive line’s gallop technique used by the drive man on double teams.

Read More

The Complete Split Field Coverage Catalog

By Joey Ginn
Head Coach
Bethel High School (OK)
Twitter: @CoachGinn


Remember back in the old days when we had to guess which formation the offense was going to be in and hope we called the right coverage to defend them?  Why not teach a few coverage concepts and in your scouting report meeting tell your kids which coverage you want to play to specific formations? In 2016 we began utilizing split-field coverages in my previous stop at Choctaw, and one thing that traveled with me to Bethel was Split-Field Coverages.  I was blessed to have the same Free Safety 3 years in a row which certainly helped the process.  Last week in our exit interview he told me the one difficult thing was the one week this year the coaches called coverages from the sideline…  We believe split field coverages give our kids a toolbox to utilize the coverage based on the split of #2 Receiver on the Read Side and number of backs and number of receivers on the Away Side.  This approach helps our guys get us in the best coverage.  We believe the Split Field Coverages we use allow us to build coverages off each other to ease the install/teaching process. We also believe this helps us get as many hats in the run box as possible vs. certain formations.


Communication is Key:

The first thing we teach our Safeties before we start any formation calls/alignments is that there must be our communicators.  We do not want our Corners to have to worry about the formation, only the coverage they are playing, so they are our first communication via a hand signal to the corners.  The next call our safety must make is a communication call to the OLB, so he knows his coverage responsibility.  The simplest teaching point we use during this install process in his communication with the OLB is by asking him, where would we need that OLB to help us in Coverage?  This to me is the easiest way for these guys to understand where that OLB needs to be in coverage.
 

Read Side Definitions:


Pro 1 TE and 1 Split


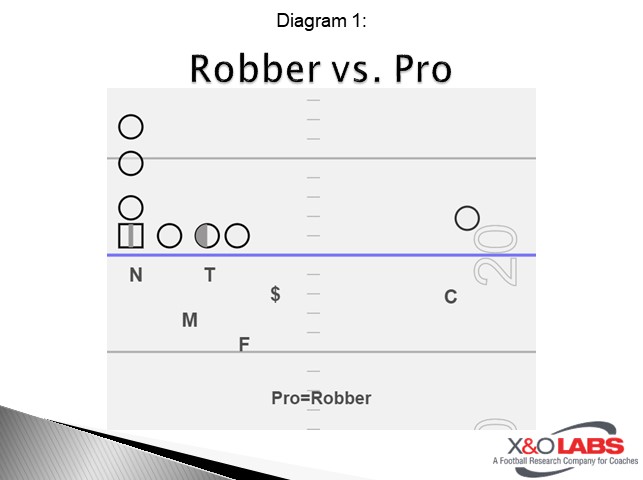
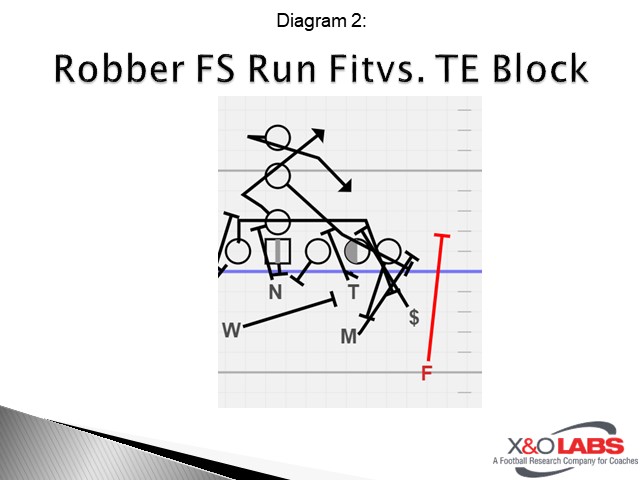
Vs. Pro set our 1st Coverage and quite honestly only coverage is a Robber Coverage.  FS will communicate “Robber” to the Corner, which tells the Corner he has all of #1.  There isn’t much teaching that will take place with the Corner, we work man drills with our Corners every Tuesday and Wednesday while the rest of the D is in Inside Period.  The Free Safety will then tell the $ “Wheel Alert” telling him he is the Flat player on a pass and must take the Wheel of #2.  The Safety is reading the TE once the ball is snapped.  We teach a bounce technique to the Safety in Robber; we play at 6-8 yards off in Robber and want to be 1 yard outside the TE.  The Safety’s rules on Robber are simple, if the TE is blocking you are in the run fit (Diagram 2), we are going to spill the ball to you, vs. The option you are the itch player.
 

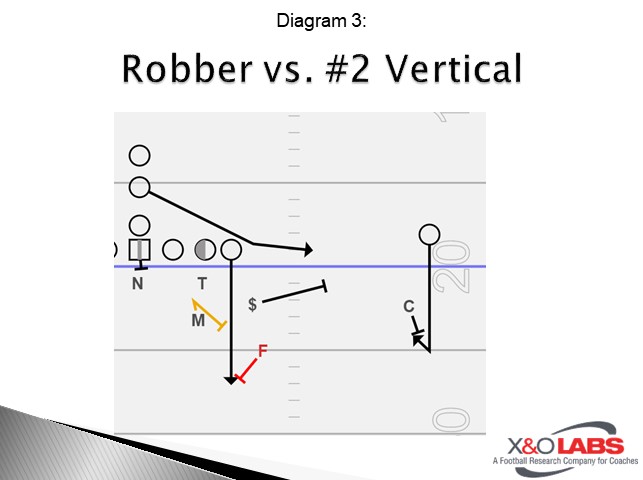
If the TE is Vertical, you have all of him m/m (Diagram 3).


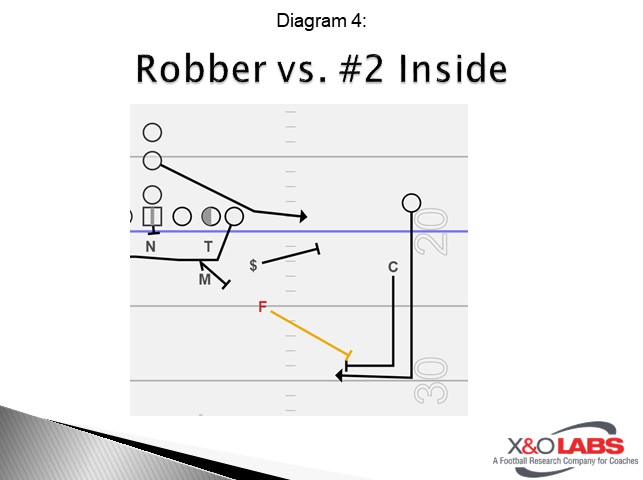
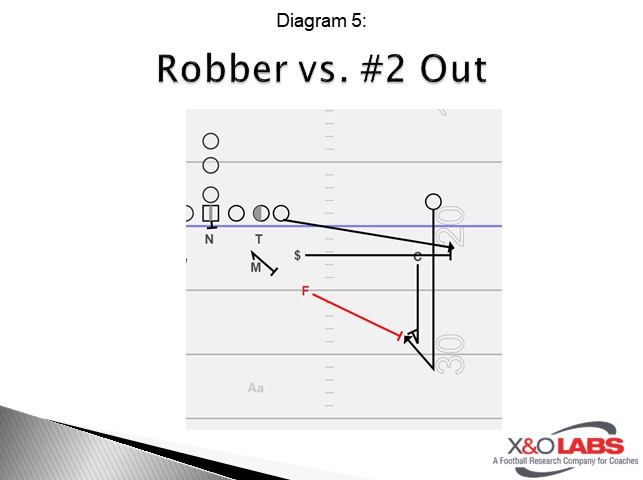
If the TE is Inside you rob the Curl of #1 (Diagram 4), if the TE is out the OLB will take him so again, you rob the Curl of #1 (Diagram 5).


I think it’s important to know our definition of vertical is a route past the backers.  We play our backers at 5 yards; we tell the defensive backs if the route goes past the LBs it’s vertical in all our coverages.

Read More

“Burst Corner” Route Technique in Gap PAP’s

By Kenny Koberstein
Head Football Coach
South Eugene High School (OR)
Twitter: @CoachKoby


As a player and young coach, I “grew up” around Wing-T programs. I have always admired how that offense has built-in answers for pretty much anything a defense can do it. When I set out to build my own offense, this type of flexibility was important to me. While we don’t run the Wing-T here at South Eugene we do base within its principles, especially with our play-action game.
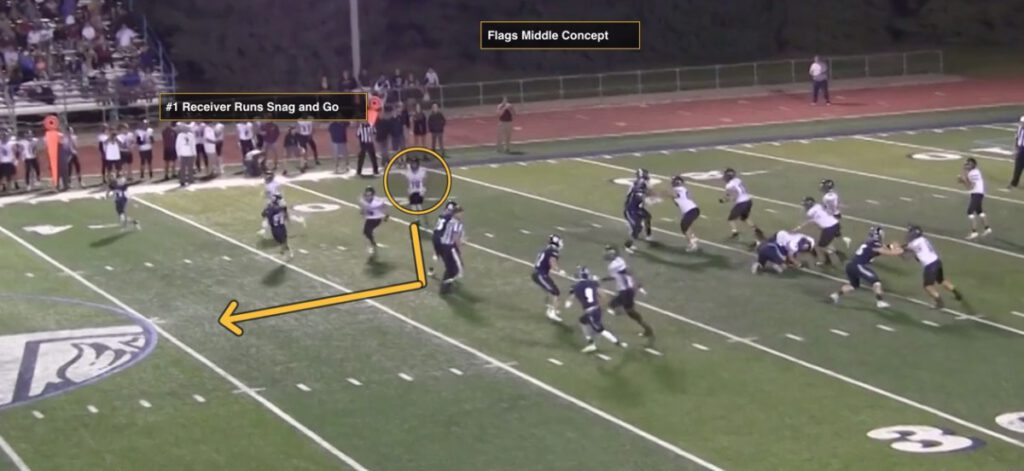
In this article, my goal is to show how we teach and install our play-action game to protect our base runs: power and counter. These shot plays have been our most productive passing concepts in the last four seasons.

The number one foundational run in our offense is the power play, predominantly from 20 personnel. This is the very first play we install on the first day of camp. Each week when we game plan our offense we are looking at how we are going to run power against the front we’re seeing that week. We hang our hat on this play week in and week out.


POWER PASS

Because Power is so important to our offense, the first play-action concept I’m going to discuss is our power pass. Again, our rationale is to make this look as much like power as we can. We do not pull a guard on the play-action.  We want to use eye-candy in the backfield to suck up LB’s while still allowing us to stay in our base 6-man pass protection.


Install:

For both power pass and counter pass, we install them the same day as power and counter. Our day 1 install is power and power pass. Day 2 is a counter and counter pass. We do this to emphasize to our players that these concepts are linked, and we want them to work in concert within our offense.

We always start the install process in the classroom. The play is diagrammed for the players and we show them video clips of the play from previous seasons.  From there we move to the field. The offensive line works this play against even and odd fronts as a part of their group period while the backs work the concept in our routes on air drill. Finally, we bring this all together in the team period. That evening coach will create a playlist of the install clips from practice that day and share it with notes for their position group. This process is repeated the next day with the next installment.

Read More

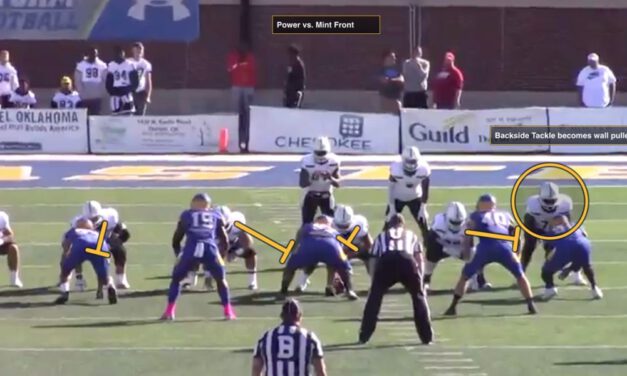
Box Run Fits in the Mint Front

By Max Fransen
Defensive Coordinator and Inside Linebackers Coach
Herscher High School (IL)
Twitter: @TheFran54


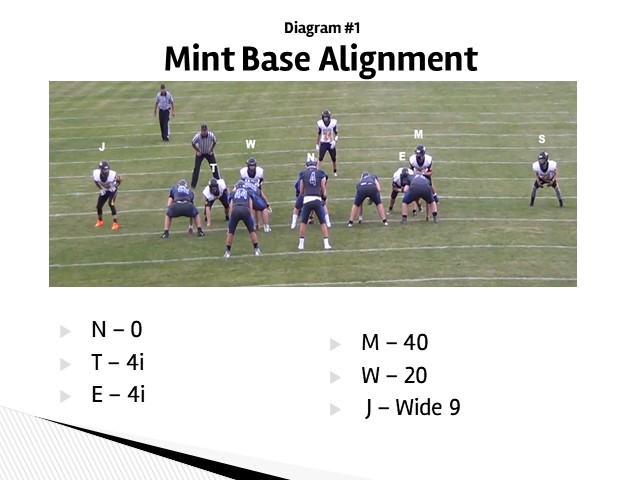
Last year, like many high schools and colleges across the country, our program implemented the mint front into our defense as a result of the growing popularity of the spread offense.  As a first-year defensive coordinator, I was transitioning our team from a 4-man front to a 3-man front.  I like the Mint front because it only requires 3 defensive linemen.  As I coach at a small 3A school in rural Illinois, numbers, and size can be limited from year to year.  Other benefits of the mint front include the closed B-gaps, as well as the easy linebacker keys.


Nose Technique:

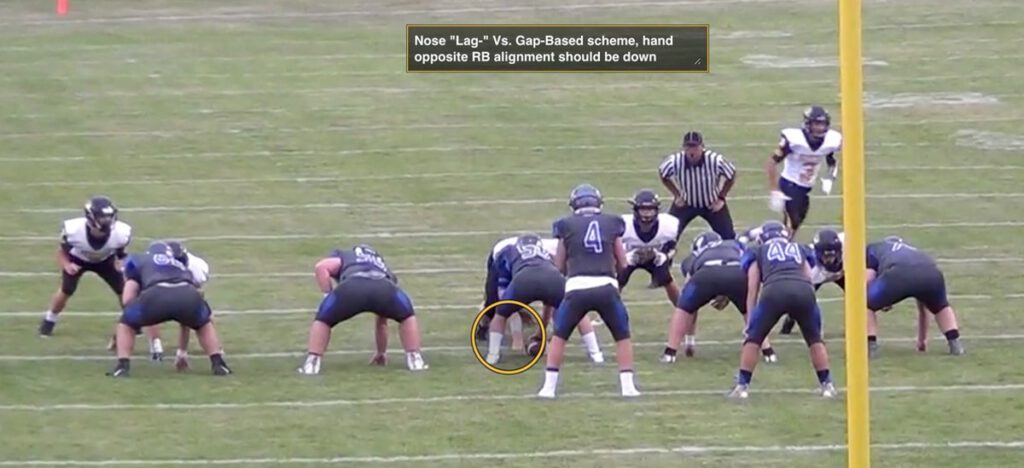
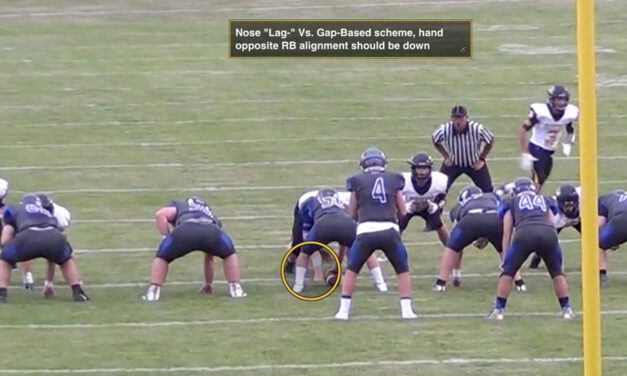
Starting in the center of our defense, the nose tackle lines up in a 0 (head up the center) and plays the “lag” technique.  Too often, interior defensive linemen can get washed down the line trying to cross face a lineman while attempting to maintain a gap.  The lag technique takes advantage of the center by allowing the nose to control the A-gap away from where the center steps.


If we are playing a gap-based scheme, the nose’s hand on the side of the running back should be down.  This allows the nose to get hands-on the center and prevent him from blocking back on one of the 4i’s.  However, if we are playing a zone-based scheme, the nose’s hand opposite the running back should be down.  This allows the nose to get hands-on the center and prevent him from having a free release to the linebackers.  As the nose explodes out of his stance, he will naturally fit into the A-gap away from where the center steps.   While doing so, the nose should lock out and force the center’s body in the opposite A-gap, thus 2-gapping the A-gaps.

Read More

5 Gap Run Build-Ins to Manipulate Free Hitters

By Ryan Lusby
Offensive Coordinator
University of Arkansas at Monticello
Twitter: @CoachLusby


The Power football play is one that has been a huge part of the game for a long time. Power has been and continues to be run no matter the style of offense you play, from spread teams to teams that play mostly out of heavy sets. In my first season on staff here at the University of Arkansas at Monticello, we added over 90 yards rushing per game to what they averaged the year before. A large part of that was our emphasis on gap scheme runs, and specifically two back power. Now I’m not saying Power, or even gap scheme plays, is the only play you should run, but I think that our emphasis on gap scheme runs played a large part in our kids having a better understanding of how running game works. This year we were over 70 percent efficient on two back power. We chart efficient plays in a very in-depth way. We consider the play efficient if on 1st and 10 if we gain 4 or more yards, on 2nd down if we gain half or more of what we have left to gain, or on 3rd or 4th down gaining all of the line to gain. In this article, we will dive into 2 back power from different sets and the RPOs that go with it schematically.


We run power most of the time out of 11 personnel out of formations with the tight end in the “sniffer” or fullback position. We align the tight end in a position where he splits the inside leg of the offensive tackle. This is advantageous to the power play in the way that allows for the tight end to be in a position inside of the defensive end he is to kick out. That tight end is to take a step with his inside foot first vertical and insert as tight as he can to the down blocking tackle. We like the play out of the sniffer position more than out of inline tight end formations because the tight end is always inside the end in the sniffer position, and when the tight end is in line there are three different alignments he can get, causing for more thinking on his part. We try to eliminate as much thinking as possible, especially for the offensive line and tight ends in the blocking schemes. The base way we teach the play is with the play side guard and tackle double team the 3 technique to the backside linebacker, center blocking back on the first down lineman backside, backside guard pulls for the first linebacker in the box play side, and the backside tackle steps down protecting B gap to C gap. The biggest thing that is a little bit different for us regarding our play side double team to backside linebacker. If the back-side linebacker tries to flow over the top instead of beating our head against the wall trying to pin his backside, we use what we call the wheel technique. What this means is as he tries to come over the top, we become strong with our inside hand and use his and run him to the play side. The back-side linebacker will now be run past the gap, and the ball will cut back behind the back-sided linebacker.

Read More

Manipulating 9 Potential Conflict Defenders in the Wing T

By Rob Armstrong
Offensive Coordinator
Baker High School (FL)
Twitter: @robarmstrong41


It is an honor to have the opportunity to share a few of the concepts we use against a variety of defenses. I would also like to thank X&O Labs for this opportunity. Everything we do is based on the defender’s reaction to the conflicts we create. This report will focus on creating individual conflicts and calling plays depending on how the defense adjusts.


Attacking 4-4/Conflicting the OLB

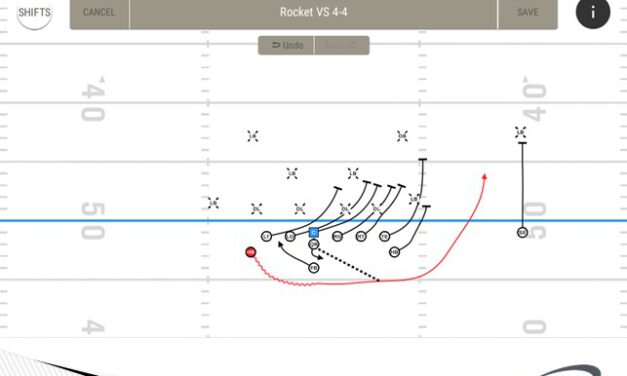
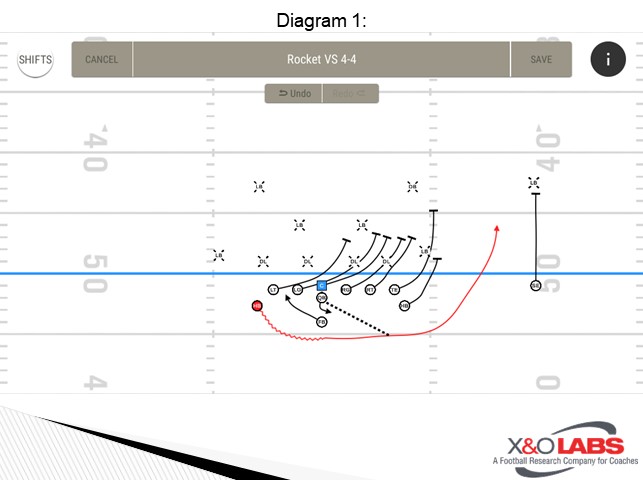
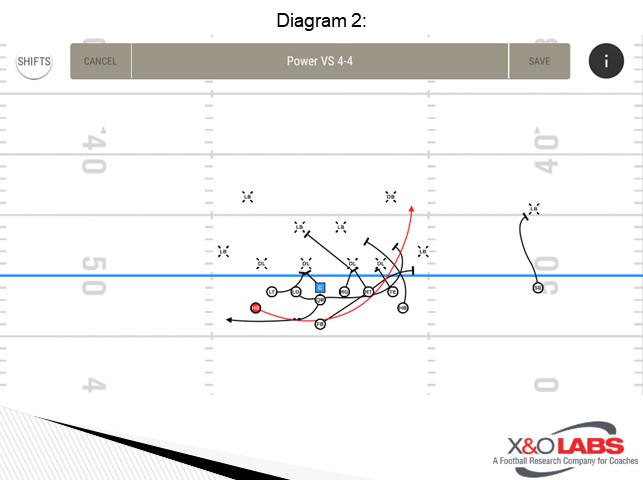
Anytime we face an 8-man front we like to start with an over formation. This gets a corner removed and lets us see how they want to position the strong OLB and DE.  We immediately want to conflict the OLB with Rocket or Power. This is a simple conflict to create.  The rocket motion forces the OLB to stay wide for contain, but the OLB is still responsible for forcing the Power. We will call what he gives us.


Editor’s Note: Coach Armstrong has provided narration for each clip below:


Clip 1: Notice the OLB widen to the play side. The Rocket has loosened him enough to come back and kick him out with Power.  Also, notice how wide the WB catches the ball.

Clip 2: Power after running some rocket/jet motion successfully, the Key blocks by play side wing taking the OLB wide and the TE cutting FS off.

Clip 3: Notice how running the Rocket has made the OLB widen for an easy kick out on the Power. Good job by fullback getting his head inside and good job by the RB turning up.

Read More

The “Snag and Go” Variation off Four Verts

By Braden Mitchell
Offensive Coordinator/Quarterbacks
Stevens Point Area Senior High (WI)
Twitter: @TheeBMitch_XV


These are our go-to shot plays to get the ball down the field. We will install these concepts at the start of each season and have them in the game plan depending on what coverage we expect to see that week. I believe in creating big plays. When you can get those 25+ yard plays, they can change a game. I just moved out to Wisconsin and this will be my first year at SPASH, so all my clips are from Northridge HS in Utah, where I was coaching for 12 years.


4 Verts

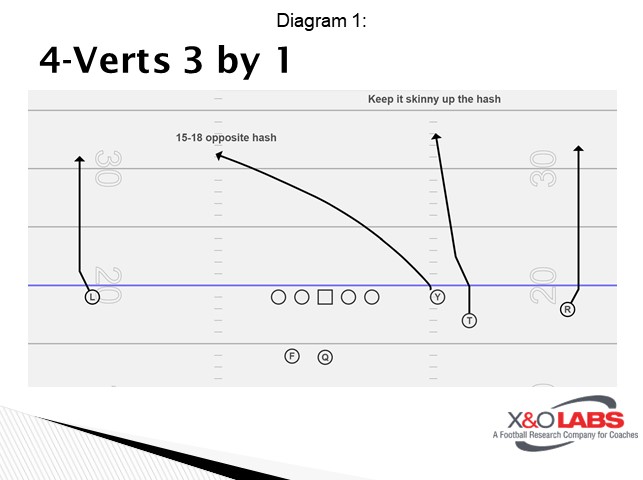
I know everyone has this in their system, so I won’t spend a ton of time talking about the basic version of this, but we do prefer to run this out of 3 by 1 formations.


Coaching Points:

We want our outside receivers to take the outside release and force the corners to stay wide with us. Defenses are getting better at having corners trying to split the outside receiver with the skinny post or modifying the coverage to combat the 4-verts. So, the wider we can get them, the better. We like our tight end being the #3 receiver because he is our bigger body to run that deep cross. Their landmark is 15-18 yards opposite hash, but more than their landmark, I tell them they want to pull that free safety with them, so they need to get his attention and make him move with him. Our #2 receiver is running our skinny post and must avoid any contact and get up that hash. He should be seeing the free safety and noticing if he is getting pulled to that opposite hash by the tight end, if he is then he knows he can bend it a little bit to the middle because he has a little more room there. Quarterback is reading that free safety, and more than reading him he is trying to manipulate him to take that deep crosser. So, I tell him on his 3-step drop to make it look like you want that tight end, then when you hit that last step you should have 2 choices. Either the safety is carrying the cross and you can hitch and throw that skinny post, or he didn’t take the crosser and you need to hitch and drive that ball to him.


Variations:  

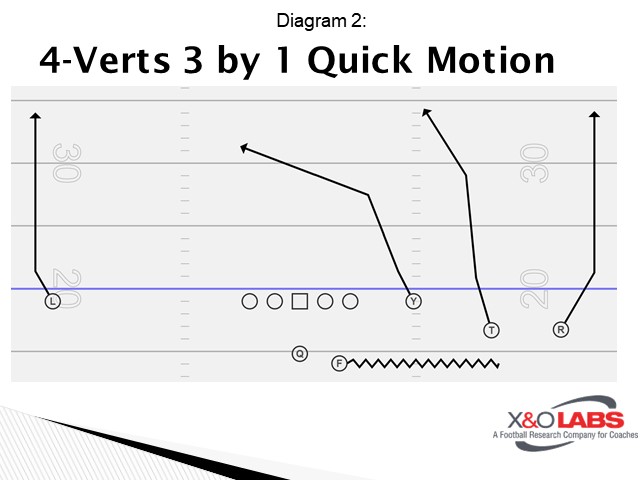
Defenses have gotten good at corners splitting the receivers or the “flat” defender carrying that 4th vertical.  Now we must get a little more creative with the 4-verts. To combat the flat defender, carrying the vertical we will quick motion our back out.


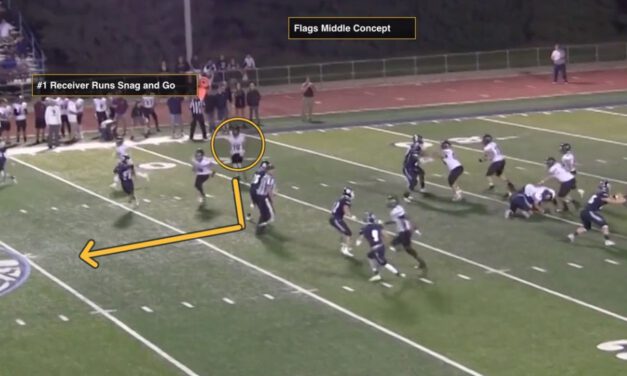
The first time we show this we will just run a key screen with him and have the three receivers block it head up. Then we’ll come back with this look and the quarterback is just seeing who comes hard to stop the key screen and replaces him with the vertical. In this case, it is the strong safety that comes down hard.

Read More

Bucket System to Streamline Pressure Package Communication

By Jason Thier
Defensive Coordinator
Dickinson State University (ND)
Twitter: @JasonThier


Our belief here at Dickinson State Football is one of the most critical parts of our job as coaches are to be great teachers. It does not matter what we know, it matters what our players know. To centralize our teaching and limit confusion, we have a specific method of organizing our playbook and conveying information. We utilize the “bucket system” to group like concepts together to assist with retention of information. For example, boys’ names are two-person line games, girl names are four-person line games, NBA teams are inside linebacker blitzes, etc. We also have a shared vocabulary for movement and coverage techniques to cross-train positions, creating scheme versatility. Finally, we use a tag word system in our pressure package to determine the location of the pressure to cut down on verbiage and endless memorization. The focus of this article will be on how we implement our tag word system when bringing pressure and how it can be adapted to any scheme.

How does the use of tag words cut down on verbiage and endless memorization? We identify six different locations we can choose to bring pressure from at any given time. Those locations include field, boundary, at a TE, away from a TE, at an RB, and away from an RB. In a non-tag word system, say your favorite pressure pattern is called Smash and Smash comes at the TE. Now, let’s say you want to call the same pressure patterns, but away from the TE. You must assign a new term telling your players it is the same pattern but from a new location. To be able to bring this same pressure pattern, from all six possible locations, you must create six different terms and then require your players to associate those six different terms with the same pressure pattern. Thus, to install five different pressure patterns, which come from all six locations, you would need 30 different terms. It is easy to recognize how this could lead to verbiage overload and confusion when teaching.

In a tag word system, by using independent terms for pressure location and pressure patterns we can install those same five patterns, from all six locations, with 11 terms. All while our players only need to associate one term with each pattern. That is nearly two-thirds fewer terms being used in a tag word system than a non-tag word system to install the same five pressure patterns. Less verbiage and memorization allows players to think less and play faster. It also allows for the expansion of your pressure package, without putting too much on the player’s plates.

Read More