306")

Two-Gapping the Read Zone Game
By Mike Kuchar
Senior Research Manager
X&O Labs
 Coach Aranda comes to Utah State after four years at Hawai`i, the last two spent as the Warriors’ defensive coordinator after coaching UH’s defensive line the first two years. Last year’s Hawai`i defense led the Western Athletic Conference and was tied for 15th in the NCAA Football Bowl Subdivision (FBS) in sacks with 35 (2.7 pg), led by linebacker Art Laurel who ranked third in the WAC and tied for 24th in the nation with nine sacks.
As the defensive coordinator at the University of Hawaii last season, Dave Aranda would get his weekly dose of read zone schemes from teams such as the University of Nevada and Utah State University – which is ironically where he’ll call the defensive shots this season. So, he’d get frustrated at times watching offenses pre-determine who they were reading in the option game based on pre-snap alignment. Aranda, who runs a 4-3 base quarters package used to play single-gap control defense and wind up getting gashed for big yardage on zone wind backs because of a numbers advantage on the offense because of his two-safety look.
“No matter how you draw it up, the offense will have four guys at the point of attack – the QB, the tackle, the guard and the running back. If you’re a one gap type team and you’re playing it that way, whether your have a five and a 1-tech or a 3- and a 5-tech it really doesn’t matter because it’s four on three,” says Aranda. “You have two DL and one LB. The DE gets the shaft because he has to play two aspects – the dive, the bend of the dive to the inside out to the QB. You’re cheating a guy. An easy answer is to use someone from outside the box and bring him inside the box. The problem with that is the bubble screens and the now screens that are thrown by these offenses. Teams will read the LB that is walked out. If that LB steps up and reads run on the play action to handle QB on zone read. Once the QB sees him step up, he disconnects from the RB and throws the slant over the top of his head. It’s a tough play (diagram 1). I found you needed to get four and four and equate the numbers post-snap.”

So, after years of toiling with it, Aranda has changed to a more unconventional methodology when attacking the read zone schemes – and it comes in the name of equating numbers in the run game by two-gapping players across the board. Now, we must say it takes a ton of teaching, but if you see this across your schedule like Aranda did in the Mountain West Conference, it may be of interest to what you’re doing. He calls it getting “four-on-four” concept in the run game and like any other defensive preparation it starts with dissecting which kind of zone read team you are seeing.
“Zone” Read Teams vs. “Zeer” Read Teams
When Aranda starts prepping for a read zone team, he makes two vital distinctions. Are they a zone read team or a Zeer read team? Sounds like science fiction? It did to us, at least until he explained it.
- Zone Read Teams: This means the back is aiming for the outside foot of the guard. Zone teams cross the center and go to the opposite guard. There is no real threat of a bend back. It’s an away side play. The QB is a threat to run it if you’re not honoring him. Most teams that run the pure zone read these days will have the back even with the QB because there is no real threat of a wind back – they are looking to puncture (diagram 2).

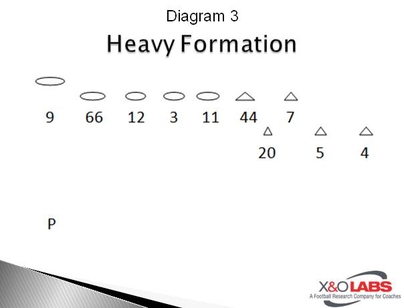
- “Zeer” Read Teams: This is a combination of veer/zone read schemes. These plays hit downhill like a veer. Now it’s a read because they try to put a two on one conflict on a DE. Many of these schemes are run out of the pistol or the broken pistol formation (diagram 3) that we’re seeing so much of now in the college game.

“There are two ways teams block it – they zone it or man it,” says Aranda. “Zoning it is better for offenses. People will zone the front the LB’s will run to gaps and it would be 4 on 3 and a crease for the back. Guys would just run to gaps back-side and the Zeer play would hit front side. You need to have 2 guys take two for one up front and have a LB to fall back.”
So when playing the Zeer read teams, Aranda plays with two 2-techniqes who “pre-snap” play B gap responsibility, two 5-techniques who play C gap inside out, with the Mike an A gap player inside out (diagram 4). But once the zone is declared the back-side 2-technique is the back-side A gap player. The Guard and Center wind up blocking one 2-techniue while the guard and tackle block the other 2-technique. Aranda talks about it being the same type of block, but how he coaches it is most important to learning the two-gap scheme. Since he feels the tackles are the most important component of the scheme, we’ll start there. 
2-Technique: Using the Hard-Shoulder Technique
Aranda aligns his defensive tackles head up the offensive guard and he calls them his read attack player. His job is to play the back-side block of the guard. “We will either get a surge to the right or the left,” says Aranda. “The guard is trying to set him up one way and the tackle will try to knock him out one going inside or the center will knock him out going outside, depending on where the play is going. The tackle will try to knock him and try to work up to our Mike LB (diagram 5). He wants to go hips, hands and feet into blocker. We talk about lifting blockers; we want to block the blocker. Take him where he wants to go. As the guard sets up inside, I want to take him inside at a 45-degree angle. We talk about fighting the hard shoulder.” 


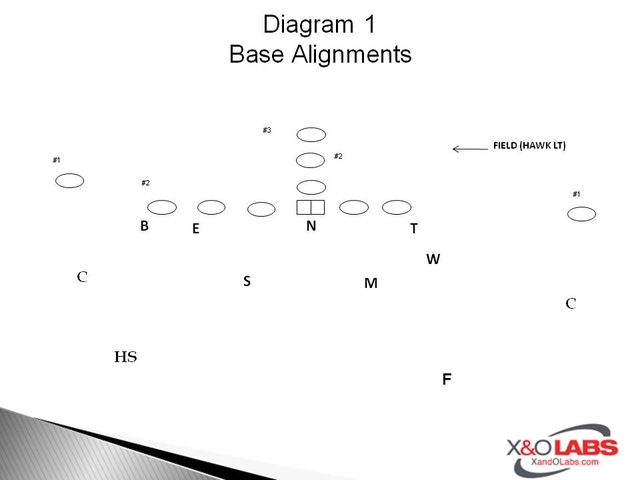
 Unbalanced formations have been around the sport of football for hundreds of years. This concept has been and is being used throughout football in numerous styles of offenses. It all began with the Unbalanced Line Single Wing. Eventually, the Straight T and Wing T came along and were popular in the 60’s and 70’s. It was at that point, formations became balanced with two tight ends and even number of linemen on each side of the ball. From there, we saw the development of the Wishbone Option/Veer offenses from coaches all over the nation. The one concept that all of those offenses and schemes have in common was the utilization of the Unbalanced Line formation.
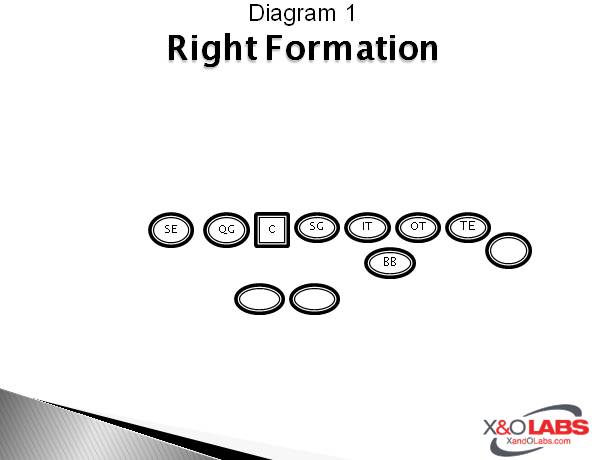
 As a Defensive Coordinator, I spend a great deal of time with my defensive unit with adjusting to motions and shifts. We define motion as one offensive player moving to change the demographic of the offensive set, and a shift is when two or more move from one side of the formation and reset on the other. Motions and shifts attack the Integrity of defensive structure. This is done by moving the strength of the formation, to deceptively camouflage attacks to and away. I’ve applied this same concept with our Punt Protection unit.
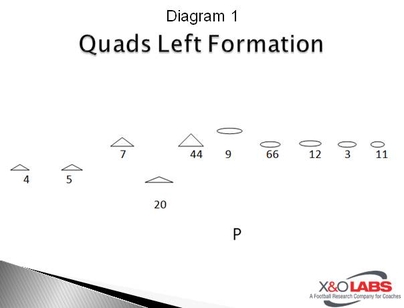


 By Ben Bullock