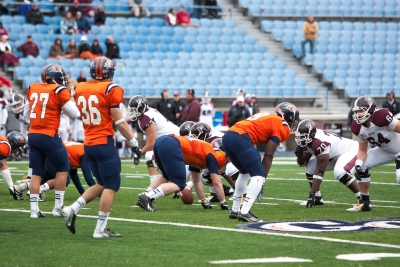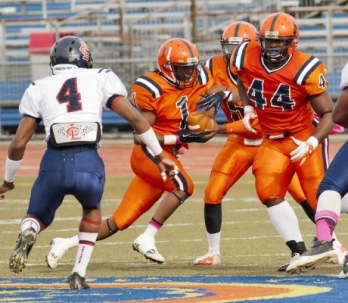
Packaging the Trey Read to Attack Benders

By Joe Osovet

Offensive Coordinator

Nassau Community College (NY)



nassauccEditor’s Note:  Known too many as an “Offensive Innovator” Joe Osovet serves as the offensive Coordinator at Nassau Community College in New York.  During his time there, his teams have had tremendous offensive success and finishing at the top of the division rankings.  Joe pioneered an innovative spread offense in 2012 to lead the NJCAA in most offensive categories. His highly effective offense produced two thousand yard rushers and garnered a top ranked scoring offense which averaged over 41 points per game.  Joe Osovet is a much sought after keynote speaker on his spread offense. He is a regularly featured speaker at Glazier and Nike Football clinics across the country.  Joe brings charisma, energy and devotion along with his 18 years’ experience to the coaching profession.


Our rushing offensive philosophy here is to incorporate as many triple options as we can in unconventional ways thus keeping the defense out of their comfort zone and forcing them to play assignment football. For two consecutive years now Nassau has been one of the top rushing teams in the country.  Our successful rushing attack led to two thousand yard rushers in 2012 averaging over 272 yards a game and over 236 yards a game this past season. The success our running game has had the past couple of years is directly related to what we call our package or plays.

Nassau Packages

When we create our packages, we are combining either a run / pass option or a run / run option all based on what the defense is doing.  Again, we want to ensure that the defensive can never be right and gaining a numbers advantage at the point of attack. We also believe that these packages help our quarterbacks by providing them with anoutlet to go with the football.

The process starts with us combining a quick pass or sprint pass with our base power run game.  We look at the concepts and who they effect to allowing the QB to throw on the run off of a crashing defensive end (which we call the “Bender”) while attacking the alley.  We wanted to incorporate more than just the “stick/draw” concept that is rather prevalent.  We found that the possibilities are endless and is all predicated on the defender you are trying to read or manipulate.

Trey Read as a Play Package

One of the most successful play packages we incorporate is our Trey Read concept.  This package combines our Trey Read counter scheme with secondary manipulation and the ability to run speed option out the back door.  All plays/variations within this package are based on reading the backside defensive end which we call the “bender.”  The Trey Read can be run out of any personal grouping.  It creates the illusion of complexity but in reality to execute this package is quite simplistic.
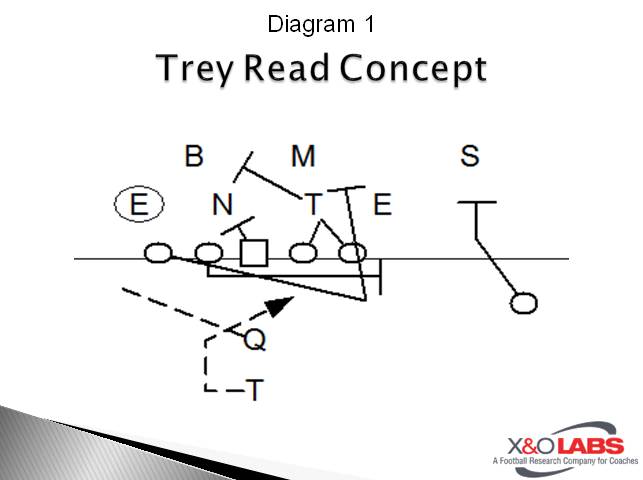
Slide1

Base Trey Read Rules:

Y:  Arc & close to anything that crosses your face (Cruise Technique) 

F:  Attack “C” gap defender  (cannot be the DE Cruiser)

TB:  6 inch stretch step, follow Playside Guard and Playside Tackle.  Don’t rush “slow to-fast through.”  We teach our backs that they are responsible for the mesh point not the QB.  We want our QB to see the entire picture on the edge such as gap exchange, zone pressure. etc.

If in (Red/Blue or East/West) drop step, get into 3x 5 pitch relationship, you have Speed Opt out back door vs a “Bender” or chasing defensive end.  

Read More

UL-Monroe’s Complete Kickoff Circuit

By Sam Nichols

Managing Editor

X&O Labs


Editor’s Note:  This article is a portion of the larger Special Teams Drills reseach report that we released last fall.  Click here for more Kickoff Drills from Villanova, Ball State, and more.


The University of Louisiana Monroe was one of the top kickoff coverage teams in the Sun Belt Conference last season and they use a concise, 3 station circuit to perfect the skills they use on their coverage unit.  They run all potential kickoff players through this 10 minute rotation with each drill lasting only 3 minutes.  Each of these drills are shown below.  They also run a faster, “Kickoff Vital Technique drill” that puts all three of these concepts together into one drill.  ULM’s special teams coordinator, Travis Niekamp, provides his narration of the drills below.

Drill #1:  Avoid

This drill is very basic, but the skill is essential to being able to negate the front line of the return team’s scheme.  The speed rip is not a natural motion, so this drill is used to introduce the concept and can be expanded on as players develop mastery.

Read More

Purposeful LB Tackling Progressions


By David Young – @HawkFB_CoYo

Head Coach

Skyview High School (ID)


skyviewtackleEditor’s Note:  Coach Young has been the head coach at Skyview HS for 11years and has 19 years experience overall.  He has coached LBs for 17 of those 19 years. His players have been named All-Conference Defensive MVP, five 1st Team All-Conference LBs, and two 1st Team All-State LBs. The Skyview defense has ranked in the top 5 in the 4A level for each of the past four years. This year, Skyview played in the State Championship game for the first time in its history.
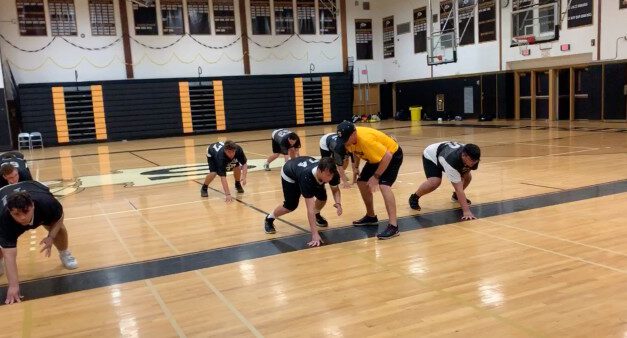
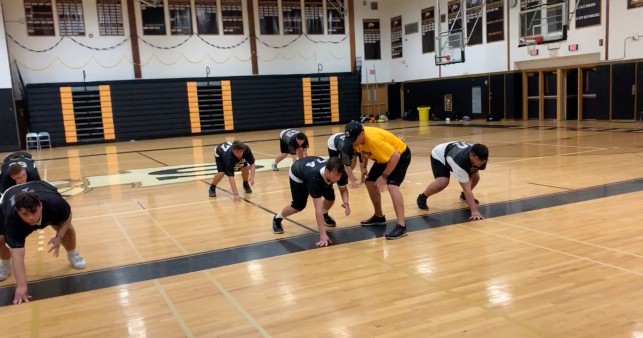
Three years ago, our leading tackler was our free safety. The kid was really good so his success is understandable, but that also meant our LB group was not and in turn our defense was just average. The more we discussed this issue as a staff, the more we felt this was a problem that we needed to address if our team was going to be really successful and fulfill our understanding of what we want our defense to be.

For us, it came down to this statement “the linebacker position is the heart of the defense.” We want the expectation for our defense is that the linebackers make all the tackles. For this to be possible, it is essential to teach fundamental tackling skills while engaging them at the linebacker position. 

Moving forward, we worked specifically toward that goal.  Two years ago our top two tacklers were linebackers and last year our top five tacklers were linebackers. In turn, our defense has been at the top in our league and in the state each of the last two years.  Last year’s statistics are really impressive considering we only played with four linebackers on the field. Our starting four linebackers recorded 75, 63, 60, and 56 combined tackles each. Our next leading tackler was a linebacker who was first off the bench and only started three games due to injuries sustained by the starters. He still finished the season with 60 combined tackles. Our FS was next on the list with 45 combined tackles.

Our linebackers have to be great tacklers for this to happen.  Over the course of this article I will explain the method I use to teach fundamental tackling skills while evaluating the talent of our kids. The drill sequence that you will see below is essential in creating purposeful learning and repetitions for our kids.  Much of what we are using here is thanks to Thurmond Moore and his Tackling Academy concepts.  We adapted it to fit our situation with our kids.

Fundamental Tackling Drills / Evaluation

Every spring I begin at square one with all of my linebackers regardless of experience. I also start here when fall camp opens. This is where I get to teach my athletes how to tackle like linebackers. This is where they learn how to stand, run, hit, and tackle like a linebacker should. I also begin evaluating their ability not just for starting positions and playing time but for the progression of drills that we will cover throughout the season. In high school we are not able to recruit our athletes. We have what we have. It is my job to make them the best version of themselves that they can be.

Some of the older more experienced linebackers may view this as tedious and boring. This is where they get to become the leaders and role models to the younger guys by demonstrating what the technique looks like when perfected and even help teach a bit.

I start with a handful of drills that are fundamental to the position regardless of ability. They must be mastered and become routine before we advance to more specialized drills.

Tackling

The goal is to teach them to tackle with their entire body. I focus on the hips and feet to teach them to engulf the ball carrier and run through him.

I start at the top of this list with the first two drills on day one. Depending on the athleticism of my players, I will add 1-2 drills per day.

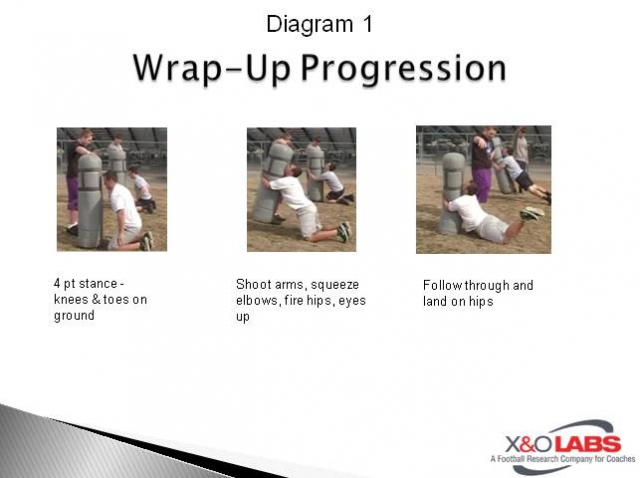
  1. Wrap-Up – Starting on two knees, I have them squeeze their elbows while trying to grab the back of the jersey. We use hand shields and old shoulder pads with jerseys to simulate the ball carrier.
    1. Coaching Points: Shoot hands through arm pits push hips forward. Hands should end up slightly above head. Elbows get to chest level. Squeeze elbows as much as possible. Eyes on hands.

Slide1 

Read More

Training the 4i Technique Defender

By David Pitman
Defensive Coordinator
Sachem North High School (NY)
Twitter: @coachdip


I recently wrote a sort of manifesto, putting the defensive system that I have adapted and evolved over the course of my almost 20-year coaching career into words.  I want to share part of the introduction to that report:

“I have read many articles promoting the value of playing multiple fronts and although I understand this value, I believe that it also promotes the ‘Jack of all trades, master of none’ mentality. In our system, we talk about playing a singular front with multiple coverage checks and adjustments. Our players are given visual keys and taught that action leads to reaction. If they can master this action and reaction, I believe that we can compete. In high school, we have to coach the players that show up and at times those players will not be the most talented players on the field, but by concentrating on a singular front we create mastery, it is this mastery that defines ‘What We Do.'”

It may help to understand that I began putting my system into a series of formal articles as I accepted a new position as the defensive coordinator at Sachem North High School, the district where I live and where my two boys will play football. I was asked to bring and install the defensive system that had led my previous school to a Long Island Championship.

In my original report, I spoke, in a general way, about a 3-4 defense built around a box that rarely changes. We play a 0 and two 4is with two ILBs aligned at 5 yards over the guards almost 100% of the time. By consistently, “Closing the Box” we can through automatic coverage be prepared to play against a multitude of different offenses. We believe that this consistency allows us to be a sound high school defense year in and year out.

The purpose of this report is to detail how we teach the 4i. It is ultimately this technique that is perhaps the most important and yet most overlooked part of any sound 3-4. I recently listened to a podcast on the 3-4. In this podcast the host spent over an hour discussing how the 3-4 is successful because it allows he said it requires you, to move your defensive line on almost every play. He spoke of his slants and stunts and how it created confusion for the offense by changing gap responsibilities. Although I understand and accept this philosophy, I found myself wanting to engage in a debate. I believe the value of the 3-4 is you can simplify gap responsibilities. By mastering the 4i technique you do not have to move or slant. This allows your LBs and DBs to fit into consistent run fits. I am not saying we never move, but over the course of the game, we are in a base call that majority of snaps. I believe that we must be able to defend soundly any offensive challenge that we face in our base defensive call. The key to doing that is the 4i.


4i Personnel Type

The reality of coaching at public schools is you have to have a system that adapts to the strengths and weaknesses of your team on any given year. To be a dominant 4i you do not have to be any size and shape. I have found success with all types of players. I have never had the 6’2″ 250lb DE that many of us envision when we think 3-4 DE. The key to this technique is a selfless, disciplined kid. A player who is willing to trust his visual key and smart enough to react with the proper action. More important than his physical attributes are his ability to recognize and react. Just to prove this point, I am coming off the most dominant defense I have ever coached. Statistically, we were the best defense in Suffolk County and a top-three defense on Long Island. My two kids that played the majority of the 4i snaps were average players at best. However, they played this technique very well. One was a weight room kind of kid, 5’10” 215 and strong but slow and not very athletic. This player worked very hard to master this technique and through his dedication became an All-Division player as a B gap dominator. The other player was a little bigger 6’1″ 230 but not nearly as strong or dedicated in the weight room. He was a bit faster and more athletic but not nearly as strong. He was a returning starter who seemed to get better with experience. He was also an All-Division player. These two did not have dominant statistics but by controlling the B gaps through the 4i technique they allowed us to be a championship-caliber defense and were recognized.


4i Stance, Alignment, and Start

We begin in the winter by teaching all linemen and OLBs the 4i technique. This technique is so important to what we do that it must become a habit for our kids and the more kids that have mastered this technique the more competition we will have during training camp.

We start with feet a touch wider than our shoulders and a slight stager with our right or left foot depending on whether we are in a right- or left-hand stance. We teach both right- and left-hand stances and require that players can play out of both. Once players have their feet set, I ask them to sit on an imaginary stool with their chest out and elbows on their knees. This sets the angle of their ankles and knees and creates the overall position of the stance. I then tell the players to, keeping their ankles and knees locked roll/ fall forward onto both hands. Their hands should be slightly in front of their heads. If they kept their ankles and knees locked, they should have rolled into a powerful, balanced stance with their hips slightly above their shoulders. The last thing is to lift their off-hand off the ground if players are not strong enough to fire out of a three-point stance I have them stay in a four-point stance. My commands for teaching this stance are. “Set your feet, sit on a stool, Roll/Fall forward, Offhand up.”

The 4i will align with his down hand on or near the inside foot of the offensive tackle. We tell the 4i that he must be aligned on the frame of the tackle, he cannot be in the gap. Depending on the player his alignment will be slightly different. He must be in a position that the tackle can never scoop him or cross his face but also be in a position that he can touch the tackle on any sort of reach scheme. Ultimately the 4i is a B gap dominator. He will consume the B gap and dominate any blocking scheme in the B gap, including inside and outside zone, power, trap, and option.

Read More

Scouting Opposing Punt Schemes for Potential Blocks


By Coach Tom Yashinsky – @tyash42

Head Football Coach

Onalaska High School (WI) 


Punt BlockEditor’s Note: Tom Yashinsky is the head coach at Onalaska High School in Onalaska WI.  He has just completed his 2nd year as head coach.  He was an offensive assistant on staff for four years prior to being named head coach.  He coached at University of Wisconsin La Crosse as a student assistant and at Ben Eielson Jr.-Sr. High in Alaska before moving to Onalaska. 
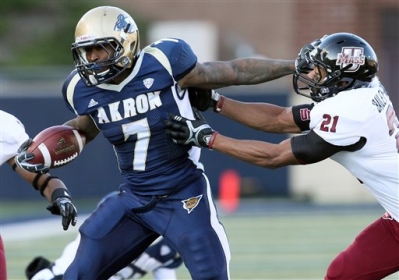
 

As coaches we are always looking to find an advantage in some facet of the game.  We try to find a spot that our opponent doesn’t spend as much time and take advantage of that.  For us, that advantage has come on special teams.  We haven’t consistently had as much talent as other teams in our conference so we need to find a way to steal points and possessions whenever we can.  One way we do that is pressuring and blocking kicks. 

I am fortunate enough to have a coach on my staff that is as passionate about Special Teams as I am.  Lewie Parish is my defensive backs coach and between the two of us we are always finding ways to take advantage of special teams mismatches.  We probably scout special teams more than most teams do.  I haven’t been coaching for as long as most, but in my six years at Onalaska we have never lost a game in which we have blocked a kick.  Usually a blocked kick is a huge turning point in a game for us.  I don’t have the statistics of what percentage of teams blocking a kick win games but I will tell you that if you look at some major upsets in college football history you will see that the winning team blocked a kick. 

The first thing that we do is teach our kids the rules of the kicking game.

  1. There is no roughing the kicker on a deflected ball.
  2. Any deflected ball that goes past the line of scrimmage is the same as a normal punt- STAY AWAY!
  3. You cannot hit the snapper on any kicking play.
  4. NEVER fall on a blocked kick behind the line of scrimmage.  This is a free opportunity to score.  They have at least 7 guys running away from the ball and it is 10 yards in their backfield, scoop and score.  Only time you will fall on a blocked kick is in the end zone. 

Philosophy of Blocking Kicks

  • Get a block or alter a kick.  If they know you are bringing pressure they will rush their snap and kick.  Force errors by applying pressure, or the image of pressure.
  • There is not enough time in the week to work on both blocking kicks and returning kicks, and be good at both of them.  We choose to go after kicks because in our conference we don’t consistently see punts that we can set up returns on. 
  • The most we can bring is 8 guys.  1 Return man, 2 guys covering gunners.  We will line up all 8 guys with hands down and show pressure.  Even if we don’t bring all 8 give the illusion that we are.  Don’t tip hand. 
  • Our fastest, most aggressive fearless guys will be the front 8. We do not use any Offensive or Defensive lineman on special teams (outside of PAT teams).  We want our most athletic kids on the field.
  • We rep our “Thump thump drill” once a week.  If a kid won’t block a punt in that drill they won’t in a game and won’t be on this team. .  Find out who your fearless kids are.  


Read More

Nine Drills Akron Univ. uses for WR Vertical Stems

By Mike Kuchar

Lead Research Manager

X&O Labs


akronThe Akron Zips are averaging 304 passing yards per game through its first two contests this season and much of that yardage has come from vertical concepts.  Receiver coach John Pont details the eight drills he uses daily to teach his inside receivers how to gain separation at the line of scrimmage and stack defenders. 
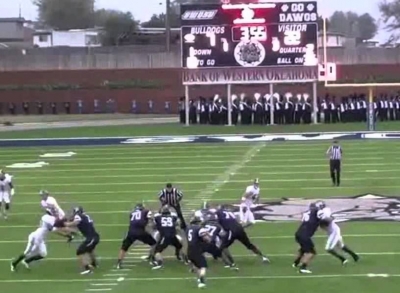
 

Drill #1 – Stance and Start Drill

  • Teaches the first step out of blocks.
  • Chest down and knees over toes.
  • Foot position must be heel to toe.
  • Front toe dug in ground and loaded.
  • Heel on back foot off the ground.
  • On snap, back leg should drive up to chest.
  • Chest should be down for the first five yards (sell vertical).

To see video of the stance and start drill, click on the link below:

Read More

Troubleshooting Common Pass Protection Errors

By Justin Iske
Offensive Line Coach
Southwestern Oklahoma State University
Twitter: @justiniske

Introduction


swokfbOne of the favorite things for coaches to do in the off-season is to draw up new plays, especially pass routes. Whether it is through self-scouts, stealing from opponents, clinics, staff visits, and simply having more time on their hands than usual, this is the time of year that coaches have the urge to add to their playbooks. Our philosophy here at SWOSU is to keep things as simple as possible so that our players can “play fast” and not worry about memorizing too many techniques and assignments. By limiting the number of schemes we have, we are able to really work on perfecting our techniques and get really good at a few things instead of being average at a lot of things.

For that reason, we like to go back to the basics and look at what we can do to correct problem areas in our blocks. In my previous article, I discussed how we problem solve concepts in the Inside Zone. This time, we are going to dive into how we address pass protection technique errors. He sections below will cover how we address issues with stance, alignment, kick sets, post step footwork, and punches.

Common Errors in Pass Pro Stance and Alignment:

I have found over the years that over half of the technique issues that you run into can be solved, at least partially, by getting into a better stance. It is easy for a coach to get so caught up in scheme and assignments that we forget to continue to teach proper stances. While size has an effect on stance, there are a few things we teach that are non-negotiable. They are as follows:

  • Stagger should be no more than toe to instep (except for tackles in obvious passing situations)
  • Toes should be pointed slightly out to keep weight on the insteps
  • Knees should be inside of the ankles to create power angles
  • Whether in a two or three-point stance, your shoulders must be higher than your glutes with the back in an arched position (not flat). We call this loading the hips.
  • Your down hand (if you have one) should barely be touching the ground, keeping almost all of your weight in your feet. Down hand should be straight down from the shoulder, not in front of the face. This will keep your shoulders square.

Here are some common stance errors and solutions:

Error #1: Using a false step or not gaining width on the first step.

Solution #1: It is important that the player put the majority of their weight opposite the foot that they are stepping with. For example, if a right tackle was going to kick set to his outside, he needs to put most of his weight on the left foot so that his right foot can gain width and depth with the first step.

Error #2: Poor pad level.

Solution #2: Many times, issues with pad level begin with the stance. If the player’s glutes are too high in the stance, the player becomes a waist bender instead of a knee bender after the snap. Simply getting the player to drop his butt down in the stance loads the leg muscles and lowers the player’s center of gravity to help them get their pads down.

Error #3: Poor alignment or spacing based on the concept.

Solution #3: As for pass protection, it is important to remember that the narrower your splits are, the closer edge rushers are to your quarterback. However, the wider your splits are, the more exposed you are to A gap pressures. We will adjust to our personnel every year. The more athletic are technique sound our guys are, the wider we make our “normal” splits.

Here at SWOSU, we want our players as far off the ball as legally possible. I tell my players if we don’t get warned about being too deep in our alignment at least once per game, then we are not doing our job! This is common for teams that run a lot of zone schemes and/or throw the ball a lot. Teams that run more gap schemes or the wing-t are more apt to crowd the ball. Other coaches will change their alignment based on the play call. Our guards set the depth and we tell our tackles to line up their inside foot on the inside foot of the guard so we don’t get a “flying V” look. It is important to note that if you are a team that uses two-point stances, you must lean forward in your stance so that your helmet breaks the center’s belt line.

Common Aiming Point Errors

Read More

How to Utilize a Defensive Wristband System

By Ryan Desrochers
Linebacker Coach
Liberty High School (AZ)
Twitter: @CoachRDes


Communication is vital to the success of any good football team. On defense, it can be the difference between a sack or turnover and a big play giving up points. While there are numerous ways to communicate to your team on the field, from hand signals to large display boards, one that I have used with great success in the past is a color-coded wristband system coupled with a matching call sheet. The system is flexible enough so that your best players can always be on the field, even at a position that they may have no necessarily practiced much at during the week.


Where to Begin:

The first thing that needs to be considered when developing your wristband is how individualized do you want to make them. You can make them custom to the team you are playing each week or have your system on the wristband for yearlong use. I chose the latter and printed the wristband, cut them out, laminated them, and they last for weeks, if not the whole season, of daily use. We put our entire front and pressure package on one wristband. If we wanted to run a stunt out of our 4-man front, we would signal in the four-man front, Under or Over, then the call from the wristband. For example, Under Pirate would be Under, then Navy-5.

The next piece that went into the design of our wristband was the placement of items within the wristband. We tried our best to put all our line movements and 1 backer pressures on the top level of the card, on the bottom we would put our five- and six-man pressures and our 4-man line stunts. Because we used the same wristband throughout the season, we allowed the players to keep them in their locker and study them, so they could become familiar with calls and their locations. There were calls that our players knew by heart and would not need to look at the wristband.    

Read More

Flexbone Formations: Perimeter Run Concepts

By Ian Gardner
Quarterbacks Coach
Desert Edge High School (AZ)
Twitter: @igardner33


Introduction

 D814992 2One key to success for any offense is forcing the defense to cover as much of the field as possible. When running condensed formations in the shotgun Flexbone, this can become more difficult. Often times teams will attempt to play a loaded box to stop the inside run. This past year, we regularly saw an 8-man box and even a 9-man box. To address this concern we worked hard on developing a solid outside run game to complement our inside run and triple option game.

Our perimeter run game was all built around the idea that we wanted to protect our inside run game, which consists of the Belly and the Veer. Therefore, the looks we gave for our perimeter run game were the same for inside run and triple option. In our opinion, the more the defense had to worry about the better for us. Our perimeter run schemes helped us do that and were a huge part of our offense as we completed our state championship run this past season.

Flexbone Basics

Before we get into the concepts, here is a quick review of how we personnel this offense. This is important because it drives how we build off of our main concepts.

  • OL – Athletic and mean, size is a bonus
  • QB –Smartest player on the field. Great decision maker. Athletic with decent running ability and ball security is a must. Leader.
  • A Back – Typical “dive” back. Inside the tackle runner. Willing blocker. Speed is a bonus.
  • B Back – Quicker and more explosive of the backs. Great for perimeter run game. Willing blocker. Needs the ability to play WR and align in the slot.
  • H Back – Most versatile player on the field. Must be the 2nd smartest player on the field. Must understand all formation alignment tags, blocking schemes, and at times catch and carry the football.
  • X and Y – Most important thing is effort and desire to block. Strength and physicality is a plus. Pass catching and play-making ability is an added bonus and makes the offense even better.

When we call a play, we always go in order of “Strength – Formation – Alignment Tags – Motions/Shifts – Play Call & Direction”. For example, “R Diamond Sling Ozzy Right”. At times, our plays can get to be a bit long when you include all the tags and motions. Thus, we huddle and utilize a QB wrister for our play calling.

In our offense, the play call determines how the A Back aligns. In the example above, “Ozzy Right” the A Back would align off-set gun to the left of the QB, slightly in front of the QB, splitting the inside leg of the tackle. In “Belly Right” (inside zone read), the back getting the ball would align 6 yards deep, splitting the outside leg of the guard to the left side. Different play calls determine if the A Back aligns off-set gun or in pistol.

Base Formations – Diamond & Navy

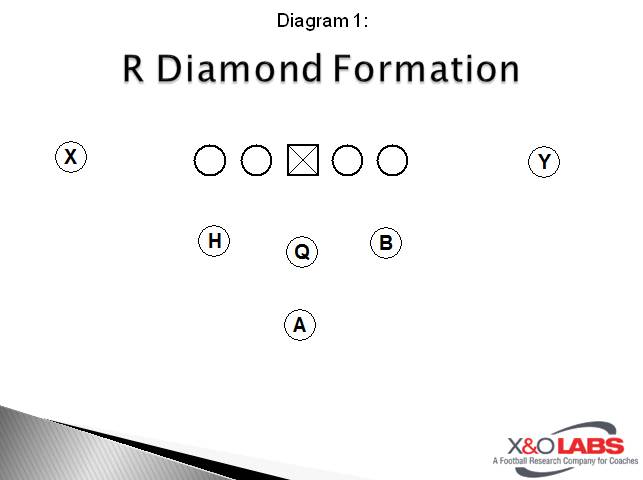
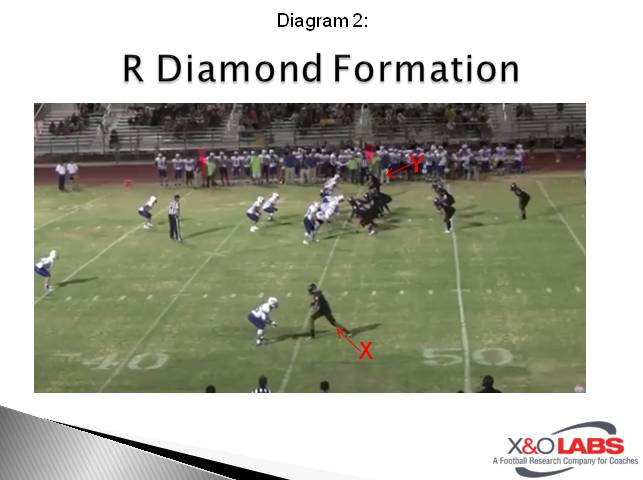
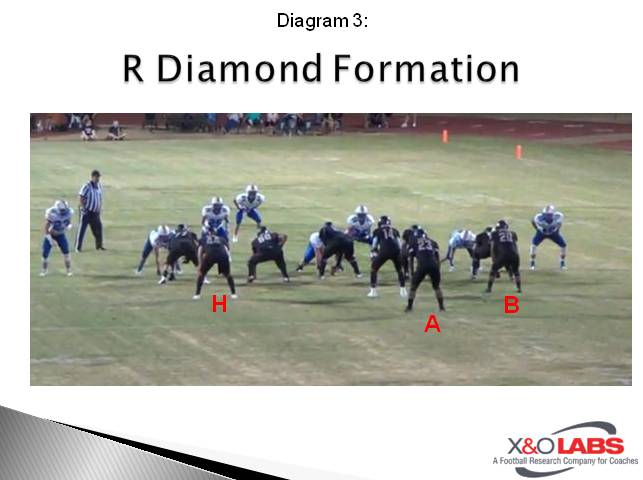
For the most part, we ran our perimeter run plays out of Diamond and Navy formations. In our shotgun Flexbone offense, the QB has his heels at 4.5 yards. In Diamond, the B and H Back both align even with QB, splitting the inside leg of the tackle. The B is to the strength, and the H is opposite. The A Back aligns based on the play call. The receivers align on the numbers as the Y goes to the strength of formation, the X goes opposite.

Note : All these diagrams are in “Right” formation strength.

Slide1Slide2Slide3

Read More

WR Stem Drills To Access Leverage

By Justin Zimmerman
Wide Receiver Coach
Maryville College
Twitter: @coachJZimmerman

Introduction

The one thing that all the great wide outs have in common is their ability to run great routes. There are so many things that go into great route running, but the ability to manipulate the defender by stemming their route. In simple terms, the stem of the route is the line the wide out takes getting to his breakpoint. Manipulating the stem of the route in order to gain advantageous leverage on the defender is key to putting the wide out in a position to win. I have always thought playing defensive back is one of the most difficult positions to play on the field simple because of the “unknown” factor. For that reason, using the stem of the route to create or keep leverage is paramount. At the end of the day, playing wide out is about getting from point A to point B as fast and efficient as possible and using the stem of the route to create leverage allows us to do this.

Leverage Identification

For us, everything begins in the meeting room. Ultimately a wide out’s success is determined by his ability to know and understand his job within the overall scheme of the offense and of any individual play. I can have the fastest and most athletic player in the world playing for me; but if that player does not know where to go and how to get there he is useless. It is important for a WR to identify the leverage necessary in their route to get to the breakpoint as efficient as possible and able to win. Once they have identified the necessary leverage, they can stem the route. Here is how we define inside leverage and outside leverage: 

Inside Leverage

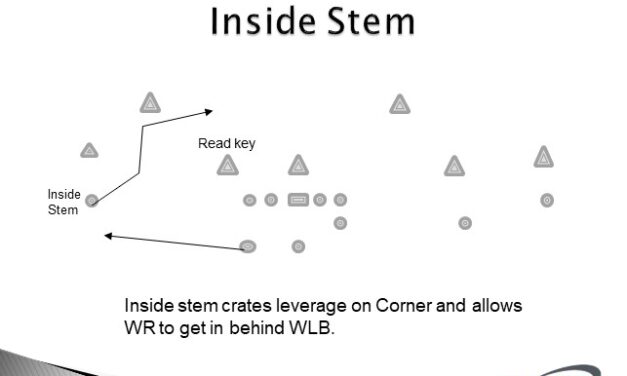
We define inside leverage as being between the defender and the football on the defender’s side that is closest to the football. Slants, digs, hard post, and crossing routes are examples of routes in which a WR would want to get inside leverage on the defender. For example, if the receiver gets inside leverage off his release he then maintains his leverage through the stem of his route. 

Outside Leverage

We define outside leverage as being between the defender and the football on the defender’s side that is farthest away from the football. Outs, comebacks, and corner routes are examples of routes in which a WR would want to get outside leverage on the defender.

Now that we have established the concept of leverage, we can begin to cover using the stem of the route to achieve the leverage the receiver needs to win the route. Again, at the end of the day, playing receiver is all about getting from point A to point B as fast and efficiently as possible. 

Coaching the Stem

The stem of the route is the line the WR takes getting to his break point. That line could look very different play to play based on the route and the defense. We talk about the stem of the route as a mechanism to achieve the leverage needed to win a route. 

There are so many variables that go in to determining what type of stem a WR will need for a specific route. An easy rule of thumb is simply get your body in a position to be between the defender and the football. There are a couple things to keep in mind when teaching the types of stems needed for routes.

Teaching Points:

Read More

Adding an Extra Defender vs. 3×1 Runs

By Joe Ginn
Defensive Front Coordinator
Choctaw High School (OK)
Twitter: @CoachGinn


Introduction

choctawEach game plan is different, but there is something about defending one-back trips teams that makes things especially nuanced. Over the past few years, we have found that our swap and vegas calls are a perfect solution to attack these schemes. Here is a bit of the background.

A few years ago, we were playing a very dominant run team. They had 5 outstanding linemen, highlighted by a right tackle who just committed to play at Nebraska. They were also forced by injury to move a third tackle to tight end, giving them six outstanding linemen up front. They came into the game averaging 45 points a game and 271 yards a game rushing on 41 runs a game. We knew going in we would had to stop the run to give our kids a chance to win the ballgame.

We knew we had to find a different way to get an extra hat in the box against their one back offense, which almost always had a tight end in the game. We also wanted to ensure that our extra hat was to their trips side, which was most of the time where they ran. They ran two different types of trips sets, strong and weak trips which I’ll diagram later. This game was probably one of the biggest games in our program’s history. A win would give us a chance to host a playoff game, and our school hadn’t even been in the playoffs in 30 years.

Swap vs. Strong Trips

Our secondary had a pretty simple week, as we knew playing cover number three to the trips side. This would give us a safety dropped down on the number two receiver and another safety aligned inside the number three receiver. The result is that we can keep our three linebackers in the box, giving us seven in the box to stop the run. They didn’t normally pass to the #1 receiver, so we felt like we could keep a corner matched up on the back side one on one.

The largest adjustment with our swap call against strong trips was only our front (Diagram 1). All “Swap” did was change the alignment/responsibility of our Strong side End and Sam LB. Instead of the End being in a 7-technique and Sam playing a 90- technique, Swap moved Sam to a 70-technique and the strong side end out to a 9 technique.

Read More

Creating the Punt Block Mentality

By Brian Mahan
Defensive Coordinator/Punt & FG Block Unit
Woodruff High School (SC)
Twitter: @CoachBMahan


Here is the worst kept secret in football, blocking kicks is fun! Coaches and players alike get excited by blocking kicks, it’s a definite momentum shift in a game and brings a team’s energy level up a couple of notches when it occurs. First and foremost, I do not know all there is to know about blocking kicks and I never will have all the answers for it. As we all know as coaches it’s not about the X’s & O’s, it’s about the “Johnny & Joes”, as Bobby Bowden always liked to say, and we were fortunate enough to have these types of players that could execute our block schemes. In 2018 we had two young men that had this ability, Nigel Cochran and Brian Hunter, that were responsible for all 10 blocked kicks. Nigel and Brian both had the desire to block kicks and it helped they were great athletes!

We do our best to identify 3-4 guys we believe could go and block these kicks and try to put them in a position to be successful at it. During the 2018 season, our team blocked more kicks (10), than any team I have coached before and returned two of them for scores. Blocking kicks is an art form in a sense, I learned from a former boss of mine at Georgetown High School in Georgetown, SC, Coach Barry Avant, who firmly believed in trying to block every punt and kick attempted in a game. Over the years I’ve been able to base our current block schemes off what I learned from Coach Avant. Currently, our Head Coach, Bradley Adams, believes in going after these types of opportunities at the right times and it’s our job as a block unit to take advantage of those opportunities when presented and give our team a lift or change the momentum of the game. In this report, I will show and discuss our schemes for blocking punts and field goal/extra point attempts and hopefully give you some ideas to use with your block units.


Alignment:

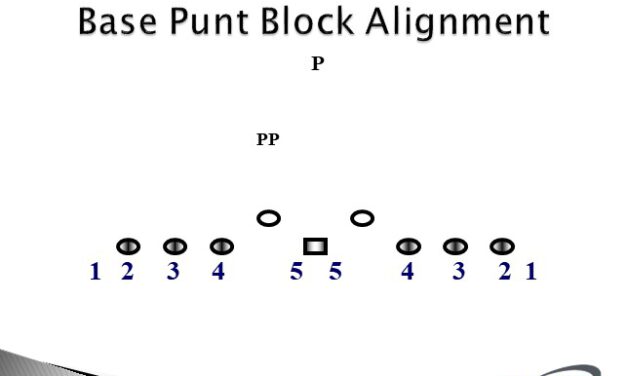
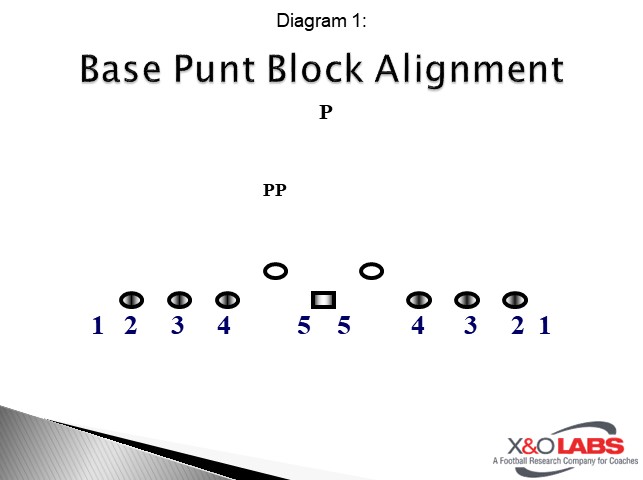
The first thing we always teach to our block unit is our base alignment and the stances we want them in. Players will “crowd” the line of scrimmage in a “bunched” stance. Their hand will be even with their front foot, with their face behind their hand. We number our rushers inside-out from 5 on the inside to 1 on the outside. Now there will be times we want to disguise a return and a block and have everyone in two-point stances. This really just depends on our scheme for the week as well. There are also those instances, like this past season, our kick blockers feel more comfortable in a two-point stance rather than the three-point stance.

  • 5’s – Alignment is on the shoulders of the long snapper
  • 4’s – Alignment is head up to slightly inside the eye of the guard
  • 3’s – Alignment is head up to slightly inside eye of the tackle
  • 2’s – Alignment is head up to slightly inside eye of the end
  • 1’s – Alignment is outside should of the end


Diagram 1


Punt Protection Schemes:

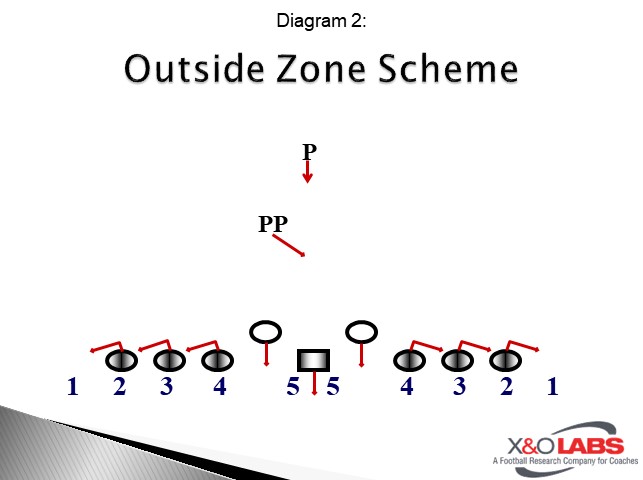
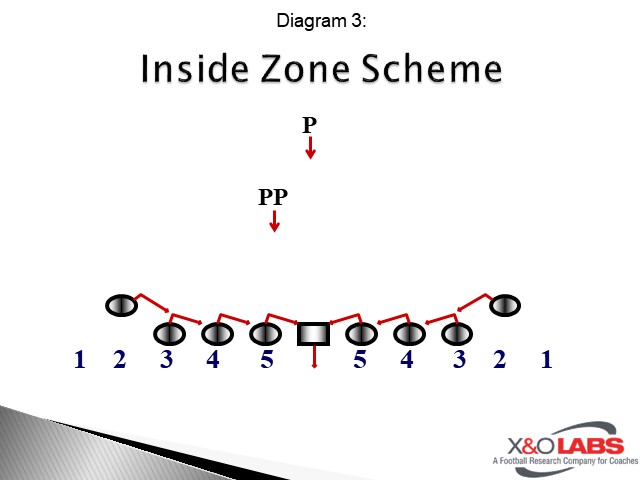
Next, we believe it is a must to teach the players the types of blocking schemes that are used in punt and field goal protections by our opponents. This is key in determining our punt block scheme for the upcoming game. The two most common types we see are inside and outside zone.

  • Versus Outside Zone Structure, players will have their outside foot back.
  • Versus Inside Zone Structure, players will have their inside foot back. (5’s will always have their inside foot back).


Diagram 2

Diagram 3


Proper Angles and Block Points

Our next teaching point is how to take the proper angles and block points. This an absolute must and cannot be overlooked and is essential to teaching the players how to avoid the roughing calls from improper techniques. We teach all our angles and block points from our base alignment. It is also important to note that we do not always bring both sides at the same time. We do this to avoid running into one another and causing injuries. Our teaching progression is as follows:

  • Players will “key the ball” when the ball moves, we move.
  • Players will step into the crotch of the blocker upon whom they are aligned on their first step.
  • With their second step, players will straddle the blocker and turn their backs into pressure.
  • When players come free, they will attack the inside number of personal protectors. If the personal protector steps out of their way, they will continue on the same path to block the kick.
  • To block the kick, players will dive “up and out” with their hands below their eyes in what we call the “Superman” position. If you have the resources, I advise purchasing a crash pad like the one used in track for the high jump or just ask to borrow the pad from the track team as we will often do.
  • If they are too far away to dive, we tell them to run through their block point with your hands down in the “Superman” position.


Read More

4-3 Pattern Read Coverages: Play Any Zone Coverage While Simplifying LB Rules

By Erik Kruppe
Head Football Coach
Farmington High School (MO)
Twitter: @KnightsFBFHS

Introduction:

At Farmington High School, our linebackers spend much of their time working on keys, reads, proper run fits, block destruction, and tackling. When it comes to defending the pass, we try to keep it simple for them. We want our linebackers to know exactly what is expected of them versus the pass, regardless of the coverage called.

Base Concept

Everything we do defensively is based out of a 4-3, Cover 4 concept. From our Cover 4 look, we have the ability to get in and out of different coverages. We want our linebacker’s pass defense rules to be consistent, regardless of what coverage is called.

To do this, our linebackers (Sam, Mike, and Will) are taught a count system. The Sam and Will understand their pass responsibility is based off the #2 receiver to their side, while Mike’s responsibility is based off #3 strong. Our linebackers understand they will either drop off their number, or play man on their number. For instance, the Sam will either drop off #2 (any zone concept) or play man on #2 (any man concept). We determine zone or man coverages by numbers and colors. Numbers indicate zone coverages, while colors indicate man coverages. For the remainder of this report, we will discuss how our linebackers pattern read (i.e. drop off) receivers in our zone coverages.     

Pattern Read Concept

Our Linebackers will drop off, or pattern read, their assigned receiver in any zone coverage. One of the first things our linebackers are taught is that their receiver can really only do one of three things: he can release inside, outside, or vertically. While each of those releases can encompass many routes, our linebackers need to understand the initial direction of the receiver’s release.  

Sam/Will’s Pattern Read Drops

Our Sam and Will drop off #2 to their side. If #2 is a split receiver, our linebacker will “Walk,” apexing the #2 receiver (#2) and the end man on the line of scrimmage (EMOL). If #2 is a tight end or a running back, our linebacker will remain in the box. 

Against a vertical release, our linebacker is taught to drop inside-out, making sure he does not expand past #2.  He is to get his hands on and collision #2, settling underneath the route. As #2 continues to run vertically, the linebacker will get his head on a swivel and look up #1. If he sees the #1 receiver (#1), he will expand to the hip, allowing our cornerback to sink underneath the smash concept.  If he does not see #1, our linebacker will square up and break on the ball when thrown.

Our Sam/Will is taught to let an inside release of #2 go, and look up #1 instead. This is one of the most difficult things to get linebackers (young ones in particular) to do correctly, as their natural instinct is to chase the route. We like to run double crossers when teaching our pattern read concepts in practice, because it allows the linebacker to see what it feels like when they chase a shallow cross, only to have the cross from the other side enter a vacated zone. We would rather have them learn from failure in a practice instead of a game.

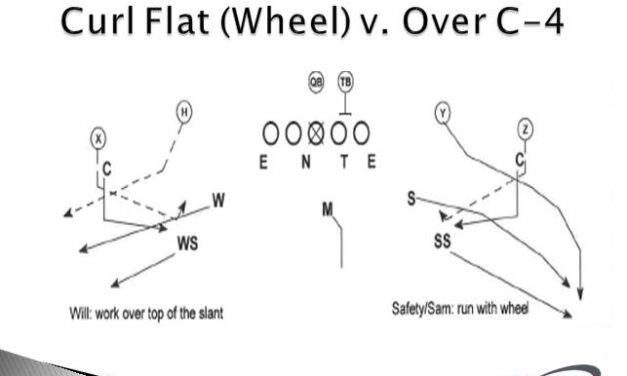
Versus an outside release, our Sam/Will is taught to expand with the route, staying higher and wider than it. By staying higher and wider than the route, it allows us to drive the up-field shoulder versus the arrow route, and smoothly work to the hip pocket of a wheel route (which our linebackers are expected to run with). Once recognizing an outside release, our linebacker must get on his horse, because he is naturally out-leveraged by alignment.

Read More

Research Report: WR Separation Off Press Coverage

By Sam Nichols
X&O Labs Managing Editor
Former Wide Receiver Coach
Hope College (MI)
Twitter: @SNicholsXOLabs

Introduction:

One of the top drill and technique requests in our annual survey was wide receiver release techniques against press coverage. We reached out to some of the offensive coordinators and receiver coaches around the country and compiled a set of drills from 8 coaches. It is important to note that each of these coaches felt it was important to group the press release concepts with basic footwork at the line of scrimmage as well as secondary release techniques. Many of these drill tapes will include those concepts as well.

The coaches who participated in this report are as follows (in alphabetical order):

Jared Ambrose: Offensive Coordinator, Towson University (MD), @CoachJambrose

Marlon Barnett: Wide Receivers Coach, LA Harbor CC, @iamcoachB

Ossie Buchannon: Wide Receiver Coach, Berry College (GA)

Brian Scott: Offensive Coordinator, Old Dominion University (VA), @ODUOC

Brad Spencer: Assistant Head Coach/Offensive Coordinator, North Central College (IL), @CoachSpence_NCC

Eric Treske: Co-Offensive Coordinator, Lakeland College (WI), @LCCoachTreske

Denver Williams: Wide Receiver, Trinity College (CT), @_coachdwilliams

Stan Zweifel: Head Football Coach, University of Dubuque (IA), @StanZweifel

Brian Scott: Offensive Coordinator, Old Dominion University (VA), @ODUOC


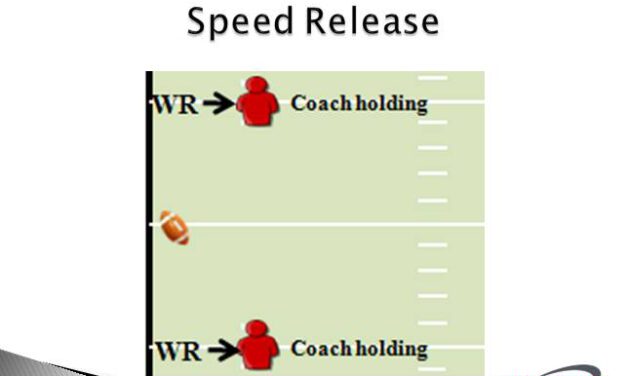
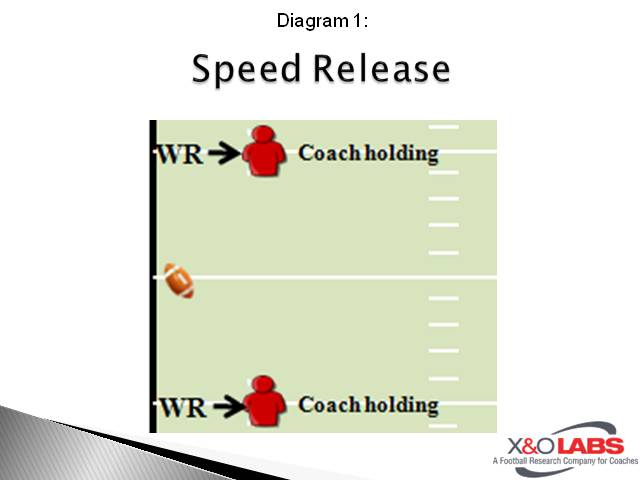
Speed Release Drill

Equipment

  • 2-3 Shields / Coaches to hold Shields
  • 1 Football

Process / Coaching Points

  • Off at snap of the ball
  • Press to get vertical
  • On the rip, get as skinny as possible. Don’t give surface area to defender
  • Stack back on the line

Slide1

Read More

Defending the Y-Off Formation With the 4-2-5

By Mike Kuchar
Senior Research Manager
X&O Labs
Twitter: @MikekKuchar

Editor’s Note: The following research was part of X&O Labs special report on “Linebacker Fits in the 4-2-5 Defense.” Scroll down to see how you can get a free copy of X&O Labs’ best-selling book, “The 4-2-5 Defense Study”, mailed directly to your home or school.


Introduction:

bucknellBucknell University prides itself on stopping the run. In fact, they have been in the top ten in total defense at the FCS level the last four years in a row. Operating out of a 4-2-5 structure, the Bison rely on the pre and post snap movement of the Y to dictate where its linebacker fit in run game. Mike Kuchar sat down with Linebacker Coach Brad Fordyce to talk about how he fits common one back run concepts such a Zone Read and Power Read.

Read More