Read Coverage: Simple Quarters & Pattern Reading

By William Mitchell,

Head Coach,

Lewisville High School (SC)

As a grad assistant in the late 90s, I was introduced to a form of pattern reading out of a 4-4 at the IAA level. Later I was at a few places where we tried to run Quarters coverage. In both situations it never seemed to click with our players. Sure, it seemed simple to our coaching staff, but we never seemed to get the production from it in proportion to the practice time used installing it. As my career progressed, I began to embrace the 3-3 package and the Cover 3 / Man-Free concepts that fit so well with this front. But as the offenses we faced became more & more advanced and proficient in throwing the ball, I began to see the need for a change-up. What we eventually came up with is our version of READ Coverage.

Originally I wanted a way that I could turn my 2 inverts (We call them Spurs) loose to play 100 % run vs 2 RBs without telegraphing the fact that we were in Cover Zero. What we came up with is this:

The READ Technique

This technique is used by 2 defenders against 2 receivers. The way that we teach it to the players is by telling them that this is going to turn into Man coverage within the first 5 yards; we are just letting the receivers determine who has who. Once the defenders have identified their responsibility, they attack the receiver as if they are Out of Phase (using the Saban terminology). They drive at the proper angle (more on that later) and try to get in a hip to hip relationship with the WR.

The CB aligns at 7-10 yds deep over the #1 receiver. The interior defender (FS or Spur) aligns 10-12 yds deep over the #2 receiver. Both players will “Read” the #2 receiever.

We tell our players that #2 can do 3 things in the first 5 yards. He can go inside, he can go outside, or he can go vertical.

  • If # 2 goes inside or vertical, both players yell “Stay,Stay” and the FS takes #2 man to man and the CB takes #1 man to man. The FS may have to get on his horse and chase the Drag route but the LBs are looking to wall off anything coming across.
  • If #2 goes outside, both players yell “Switch, Switch” and the CB jumps the route of #2. The FS has #1 but he will take a cut-off angle to defend the go route by #1 first. (Since that can beat us the fastest).

Read More

Maximizing the Impact of Your Pre-Snap Reads

By Sam Nichols

X&O Labs

The “Pre-Snap” read is far from an innovative concept.  Every quarterback is taught to do it in some way as he prepares to run the next play.

The difference between “making a read” and “making a purposeful read” all goes back to teaching.  Coaches that tell the QB to “look at the defense and take what they give you” will find that this only works if you have a coaches son at the helm.  Furthermore, many coaches stop short of teaching the rest of the offense how to use the information that they gather in conjunction with what the QB communicates to maximize the potential of every single play.

For that reason, I have always found it best way to create consistency for all players is to have a standardized approach to identifying and communicating pre-snap information. This means we will use the same format every play for all positions.  Here is a look at how I have taught this concept.

What is a pre-snap read?

  • Definition:  A survey of the defense to determine the play / scheme that they are going to run.
  • Objective:  Identify their play to speed up the decision that we must make once the ball is snapped.
  • Result:  Allows us to better attack our opponents weaknesses and avoid their strengths forcing them to change their plans and giving us control.

From there, we outline for our guys what that means to them on a play-by-play basis.

What are they reading?

Every snap, the players will identify pieces of information that will define the defense and allow us to “play fast”.  This information is, of course, different for the various positions.  For instance, the Offensive line is very interested in understanding who is in the box, but they likely don’t need to be concerned about the depth of the corner.  To simplify this whole process for the players, we have broken down the diagnosis into four distinct areas.  They are as follows:

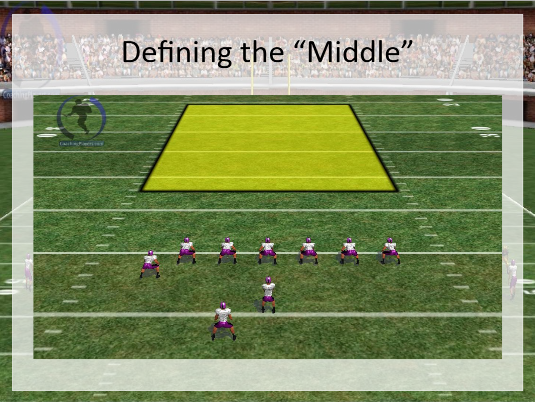
#1:  The Number of players in the “Middle”

The middle of the field is defined as the area from hash to hash and over tackle to tackle This read is basically telling the Quarterback and receivers how many safeties are involved in the defense allowing them to fit their routes, stems, and blocking concepts to fit that alignment.  It also helps us eliminate coverages and check into better vertical passing concepts.  The quarterback communicates the box information as part of the snap count.

#2:  The Number of players “Box”

The box is the area between the tight ends to the heels of the deepest linebacker.  This tells us how many players are dedicated to the run / are in a position for a quick blitz at the snap of the ball.  The line and backs need to be aware so that they can diagnose where their lanes and landmarks might be depending on the number of defenders and their arrangement in the box. The quarterback also uses this number to determine if the play can be run or if a check needs to be made to get us out of a bad play.

#3:  The Edge

The tackles, tight ends, and wide receivers must understand how the defends plans to play the edge of our alignment.  That means identifying and communicating the technique of the end man on the line of scrimmage and the force defender on that side.  This information effects blocking assignments and route angles.

Read More

Zaunbrecher: Developing QB’s Hands and Feet

An Exclusive Interview With Ed Zaunbrecher

Coach Zaunbrecher coached 34 years at the FBS level, including a three-year stint at Marshall as the Offensive Coordinator where he tutored QB Chad Pennington and Byron Leftwich and spent a five-year duration at the University of Florida in the same role while developing Rex Grossman.  He currently runs the Ed Zaunbrecher QB School (http://www.ezqbcoach.com) developing young QB’s into leaders.

X&O Labs Senior Research Manager Mike Kuchar was fortunate enough to conduct a two-part interview series with Coach Z.  Part two of Mike Kuchar’s interview with Coach Zaunbrecher, developing a red zone offense, will be published in next Tuesday’s report.

Mike Kuchar (MK):  What are 3 to 5 must have qualities for a successful QB at any level?

Ed Zaunbrecher (EZ): You need intelligence to make good decisions, pinpoint accuracy and quick twitch in that order.  You could play in a lot of different offenses if you’re intelligent.  If you’re accurate you improve your chances of completions against tight coverage.  You need quick twitch to be able to react fast enough to situations, both mentally and physically.


MK:  In your research, what is the ideal grip for a young QB on the football?  Why? At what point in his development would you change your QB’s grip?

EZ: As long as the middle finger is perpendicular to the laces and the size of the hand relative to the football will determine how far up on the ball they can grab it.  The fingers don’t want to be to the center of the ball, but if a player has giant hands they may be close to it (center of ball).  You want to have something to push against where the curve of the ball is.  The key thing is to make sure when you hold the ball, it’s still in the fingers and not in the palm of the hand. The other thing is not to grip it too tightly.  Anytime you compress the muscles to hold something tightly, you’re not fluid in your motions.

As far as changing throw patterns go, if they can repeat their motion and they are accurate with it, I don’t want to mess with them.  If they are not repeating it, then they have to work on setting the ball consistently.  If it’s a fifth grader who doesn’t know too much you’ll work on a few more things.  If you got a guy who is a senior and is already a good thrower, I’m working mostly with the feet and the head.  Some guys get in and set the ball differently every time they throw it so we need to work on that.  There’s a great drill to work on that.  Everyone has a mirror in the bathroom.  The kid puts a piece of tape down on the floor where he lines up and he practices stepping with the front foot and setting the ball.  He sets it in the right position and he gets another piece of tape up on the mirror at the bottom of the ball where it’s set correctly.  He will stand there in front of the mirror and step and set repeatedly.  I tell them everytime they go to the bathroom do ten of these drills.


MK:  What is the biggest mistake you see young QB’s make when gripping the football?

Read More

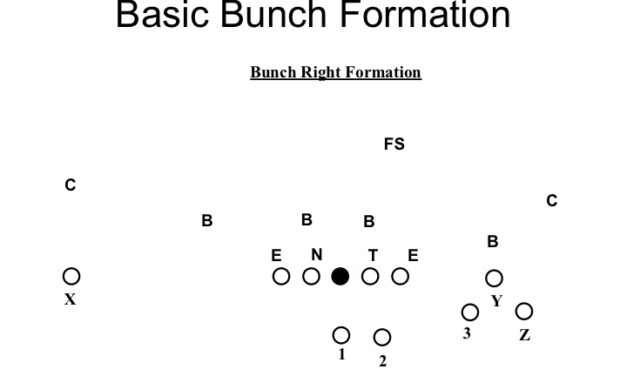
The Bunch Pass Game

By Greg Lauri

Offensive Coordinator

John Glenn High School

I would first like to thank X&O Labs for the opportunity to contribute to the study of the bunch formation on their Insiders website.  I think that this website is representative of all the good that football coaches do.  The sharing of information is critical to the development of coaches and the advancement of the great game of football.

I would also like to thank Dave Shanahan, our Head Coach, for the opportunity to develop our offense.  Over the past four years we are 43-3, with back-to-back County and Long Island Championships.  Over the past two years, as the offensive coordinator, along with the support of Coach Shanahan, we have moved our offense to a new level.  We are a spread team, then we implemented our empty package, which helped us obtain our first championship.  This past season we continued to develop our empty package and added some bunch formations, which helped us obtain our second championship.

Read More

14 No-Huddle Do’s and Don’ts

By Sam Nichols

Wide Receivers Coach

Hope College (MI)

Sam Nichols, Wide Receivers Coach, Hope College (MI)
Like many things in life, much of what I have learned about the no-huddle I learned from trial and error.  But the older I get the more I don’t feel I have the patience or time to deal with failures on my path to success.

This fall thousands of teams across the country will be installing No Huddle concepts as part of their offense, so I thought this would be a perfect time to share what I have learned through years of using and consulting on the no huddle to help you avoid the common mistakes and encourage important concepts.

#1:  Don’t Change Just to Change 

Too many coaches add or re-tool offenses without understanding why they are doing it.  Make sure that you know exactly what you are hoping to get out of the no huddle and be prepared to make sacrifices to reach those goals.  Obviously, I believe that it can help your offense, but it will not fix an offense that is poorly run in the first place.  If you are to this point and you cannot convincingly explain why and how the no huddle is going to take your offense to the next level, it might not be worth your time!

#2: Do Use a Preset Formation

Another way to take precious seconds off your time between plays is to set a default formation.  Even better at the HS level where most of the game is played from the hashes, you can set defaults from the left middle and right to help eliminate the movement between plays.  This coming year, will be having our players pre-align in a trips formation to the field when we are on the hash and a 2×2 formation in the middle of the field.  The default formation will be determined weakly based on the defense we plan on seeing that week.  This eliminates the extra movements and speeds up our rate of play.

#3:  Don’t Add No-Huddle to an Already Bloated Playbook

Chapter two discussed how to trim your offense to fit within the Full Throttle  system.  While most people will take that advice, there are a few people who will insist on keeping every single formation, motion and play into their new system.  This may work, but you will likely not get the most out of the system.  Remember the K.I.S.S. principle and use this as an opportunity to focus your offense on what you do best.  You can always add once the system is up and running.

#4:  Do Use Your Personnel Wisely

Here are a few things we know:

  • We all know that receivers in a pass centered offense can get tired and not run great routes.
  • We also know that defenses usually only scout 1 deep and know little about the subs you bring in.
  • We know that DB’s are always told to not let anyone behind them.

So what does this mean in the No Huddle?  Well, teams will usually be playing their studs against your studs and they likely will not change when you send in a sub.  Therefore, you will have their starting TB, for instance, against your 5th, 6th, or 7th best receiver.  No contest right?  Wrong.  If you shift your mentality from beating that defender to wearing him out, you will make real hay with the 7th receiver of yours.  Here is what you do.  Tell him to run to the end zone every play.  Gas that TB and force them to sub.  If they don’t, you just killed their running game in the 4th quarter.  If they do then not you put your stud back in and throw right over their backup.


Read More

Delaware’s Drive and Pivot Concepts Out of Empty Formations


By Jim Hofher,

Offensive Coordinator,

University of Delaware

Editor’s Note:  X&O Labs’ Senior Research Manager, Mike Kuchar, was granted exclusive access to the University of Delaware’s Offensive Coordinator, Jim Hofher.  During this meeting, Coach Hofher, revealed his drive and pivot concepts out of an empty formation. If you have any questions or comments, please post in the “comments” section below this report. 


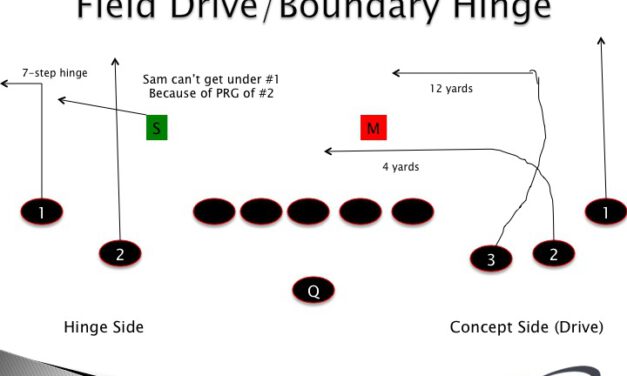
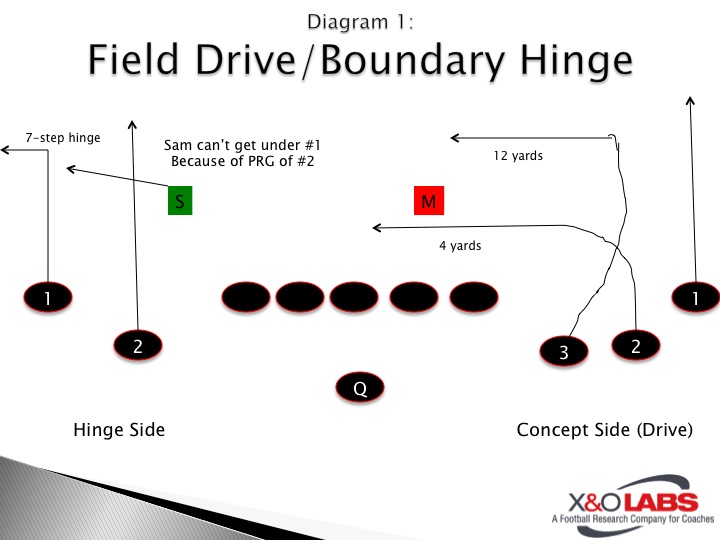
Field Drive/Boundary Hinge Concept (Diagram 1)


Philosophy:

  • Three-man side executes “Drive” Concept
  • Two-man side executes “Hinge” Concept
  • Formationally, the three-man side should be to the field, while the two-man side will be to the boundary.   This can be altered based on game plan.

Field Drive Rules:

  • #1 Receiver: Takeoff route; get on top of defender.
  • #2 Receiver: Underneath route; get under the movement key (which is the play side inside linebacker).  Must fight his way under the wall.  Target is at four yards. Create an oblique angle. Must take an outside release to gain width and also to create a passive rub against man.
  • #3 Receiver: Outside release and run an in route try to gain no more than four yards width with his release to 12 yards.  Twelve yard speed cut and becomes an automatic rub.

Boundary Hinge Rules:

  • #1 Receiver: Seven step hinge (out route) or convert to a go route against a low cornerback. Against press technique, the hinge will convert to a go.  In Coach Hofher’s words, “The QB doesn’t get off of the X side just because it’s press, but we will get off the X side if there is safety help.”
  • #2 Receiver: “Protection Release Go (PRG)” trying to pin the expanding coverage player.  The goal is to protect the hinge route so that the flat player cannot get under number one.   He must rip to outside hip of defender.  As Coach Hofher states, “He may rub or initiate contact while running.  We want alley players to be unable to affect hinge.”

 Video:

Read More

14 Keys to Efficient, Effective Practices


By Sonny Wolfe,

Quarterbacks Coach,


McGill University

Sonny Wolfe, Quarterbacks Coach, McGill University (Former Head Coach)

Key 1: Prep, Plan & Prepare

Great preparation is required to manage efficient and effective practices. To an extent each week is a race against time. The team – either yours or your opponent’s – who best uses their time, will give their athletes a much needed advantage. To insure that your practice time is maximized, planning is of the utmost importance; a daily meeting is required – input from all staff should be encouraged.

Key 2: The Right Kind of Communication

The next step is to get the “practice plan” into everyone’s hands ASAP (assistant coaches, players, student managers, equipment managers etc.); this will allow everyone to arrive at practice “ready to go.”  Players should have structure explained to them in pre-practice meetings, and the plan should be posted for the players.

Key 3: Set Clear & Specific Practice Rules

Practice rules and tempo must be clearly defined and understood. Every program must determine rules based upon their philosophy, level and needs. All rules are designed to have the most efficient and safe practice environment. Here’s a list of our rules:

  • Tempo Options:
    • LIVE – regular football rules (might consider QBs not live)
    • THUD – live on the LOS – modified rules elsewhere – see below
    • TEACH – walk through or ½ speed drills with “form contact” if any
  • Stay Away From the QB: Defenders if they beat their man, or are unblocked due to an assignment error, do not try to get to the QB – if they beat their man – run past the QB. The QB is the key to most offenses – we need our best guy healthy game day.
  • No Collisions: No one follows through on a potential “knock out shot.” Examples – if an offensive player has a potential “ear hole” block he will break down and insure the defender cannot make the play, but will not “blow him up.” Defenders will not unload on a defenseless receiver.
  • Tackling: No offensive player is taken to the ground. If the ball carrier (running back or QB on run plays, or receiver on completed pass plays) is met head on, the defensive player will form tackle him. If the tackler is approaching on an angle he will tag the ball carrier’s near hip – this will help our pursuit as the B.C. will continue downfield.
  • All Players Stay on Your Feet – Always: Offensive players will not cut block; defensive players will not leave their feet to make a tackle. No player will leave their feet to jump on a fumbled ball in the backfield – this includes fumbled QB/Center exchange, QB/RB fumbled exchange and poor Gun snaps. The lone exception is a receiver attempting to catch a pass.
  • No Grabbing Jerseys: Grabbing jerseys encourages poor technique and can result in twisted ankles and knees.
  • No Bull Rushes: We prefer that our d-linemen work on other techniques to improve their skill level. This will also help keep the QB “clean.” In order that our O & D linemen work some bull rushing and pass protecting against the bull rush; we do work some during 1-on-1 periods.
  • No Batted Balls: Having d-linemen bat a ball during a team period is a disruption – we encourage our D linemen to raise their arms, forcing our QBs to find a throwing lane. During defensive periods, you might allow batted balls; however by so doing, you cannot evaluate the coverage as effectively.
  • Stay Away From the QB:
  • Stay Away From the QB: Yes – we repeat this message twice.


Read More

7 Steps to Effective Defensive Game Planning


By Kevin Loney


Head Football Coach

Nichols College (MA)


I’m truly honored to be able to write an article like this for my peer coaches.  These game-planning philosophies are a product of a number of stops along my coaching career and a lot of trial and error.  Thankfully, I’ve been blessed to spend time at all three levels of NCAA college football, and I’ve had the distinct honor to learn at the feet of some of the game’s best.  Through all of this, I‘ve learned that the most important reality is that at the end of the day, football games are won by players, rather than schemes.

Step 1: Evaluate Talent                                                                                                                                                           

With that in mind, I firmly believe that the even before we can put our marker on the grease board, our first responsibility of coaching is to be able to objectively evaluate talent. We must figure out objectively what our players can & can’t do.  We must also be able to assess objectively what the opposition’s guys can & can’t do.  What are the match-ups?  Where are the mismatches?  How can we exploit our pluses?  How can we hide or protect our minuses?


Next, we must figure out what do our guys need to do to improve their weaknesses.  Then we must ask ourselves, “can we get it taught and how long will it take?”  For example, I was blessed to spend two seasons at the University of Notre Dame as an intern and a Grad Assistant with the Offensive Staff under Coach Charlie Weis.  After the 2007 season, we took the time to go through each snap of the season and evaluate our scheme, what did we do well, and what did we struggle with.  We had a protection called 64 Scan.  It was a pretty in depth protection concept and we as a staff felt that after watching it we should de-emphasize it in our playbook. After listening to us, Coach Weis felt that it was a concept that we would need in 2008.  Our job was to take almost our entire spring and training camp practices to get it re-taught and practiced enough that it would not be a liability.  After all that work and practice time, it went from being our worst protection to one of our best.

Step 2: Establish Philosophy                                                                                                                              

Once you have evaluated your talent, you can begin to establish a defensive philosophy.  Here at Nichols, we start with a few simple premises:

  • First, we believe that we must dominate 1st down and first and possession & 10 snaps.
  • We want to get the offense off schedule, which means putting them in long 2nd downs which we believe lead to low percentage 3rd downs, which lead to punts.  We coach our players that it is the job of the defense to take points off the board. 
  • We must turn TD’s into FG’s, turn FG’s into long FG’s or failed 4th down attempts, and finally force punts instead of FG’s.

Step 3: Come Up With Answers                                                                                                  

Our coaching staff believes that at the end of the day, it’s our job as coaches to have and create answers to the challenges presented by the opposing offense.  We take time during off-season as a staff to come up with answers to the things we don’t see often.  For us, it’s the Triple Option, Wing-T, Spread, and Pistol offenses.  For High School coaches, it may be the Single wing, or the Double Wing.  I challenge my offensive staff to do the same with defenses they don’t see often like the 3-4, 3-3 and various types of zone pressures.  Once we’ve put our answers to these issues together, we try to use late pre-season practices and possibly spring to introduce these answers to our players, we don’t think that the first time they see them should be in preparation for the game.

Read More

WR Drills – CW Post (Part 2)

Video Length: 11:02

Read More

WR Drills – CW Post (Part 1)

Video length: 14:46

Read More

Developing a 7-Technique C Gap “Bully”

Defensive Ends: Using Your 7-Technique to “Bully” Tight Ends

By Jared Pospisil

Defensive Columnist

X&O Labs

Jared Pospisil, Defensive Columnist, X&O Labs

Researchers’ Note: Please welcome Jared Pospisil to the X&O Labs’ team.  Coach Pospisil is the Defensive Coordinator at Union High School (IA) and will now also serve as a monthly defensive columnist for X&O Labs.  His previous report on his Cover 4 Run Read Drill is one of the most read and commented reports in X&O Labs’ history. As you’ll read in his first column below, Coach Pospisil brings a unique perspective to solving problems on the defensive side of the ball.  And every month, Coach Pospisil will bring you unique – but proven – ways to better your defense. Please welcome Coach Pospisil by posting in the Comments section below.

One of the main things that has helped our defense improve over the past few years is the development of our defensive end play, particularly as it pertains to maintaining a solid C gap defender.  What we do with our defensive ends is not groundbreaking; still, we are happy with our “Bully” method that we use to package and teach a particular DE concept in our Over 43 defense.

Ironically, it took getting a thumpin’ in the first round of playoffs four years ago to bring about the positive change.  In that game, we played Crestwood High School (IA), a very physical, two-tight end, full-house backfield offense, whose main plays ran off the tight end’s rear.  Crestwood routinely caved down our DEs so quickly that our linebackers and defensive backs did not have an opportunity to fill before the running backs were already five yards downfield.  The next day, as I replayed the events of the game over and over in my head, I became sick thinking of how effective the off-tackle play was for our opponent and how ineffective our defense was at stopping it.  Then I realized our defense faced many teams in our district whose main offensive plays ran off-tackle, and we did not defend that play well all year!  From that day on our defensive staff set out to find a way defend the C gap better.

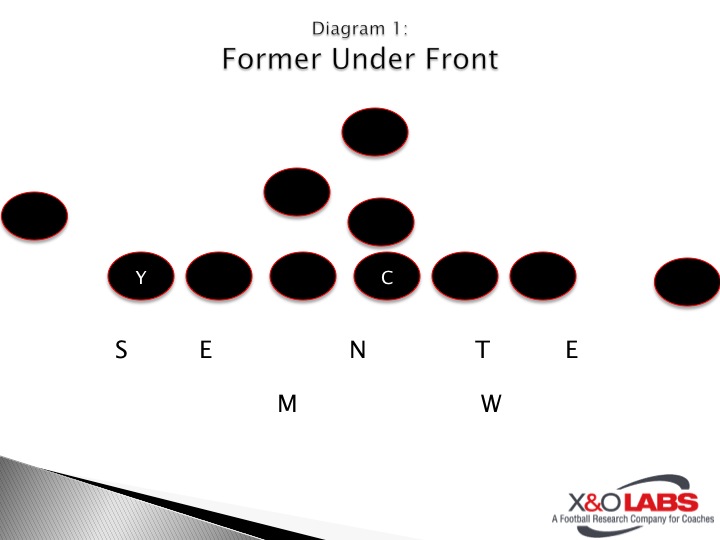
At the time, we utilized two 5-technique (outside shade of the offensive tackle) defensive ends in our Base Under front (Diagram 1).  We taught them to key the ball and attack the outside shoulder of the offensive tackle across from them at the snap.  Unfortunately, this left them extremely vulnerable to a down block from just an average tight end, notwithstanding some of the bulldozer types we regularly faced in our district.  After talking to a few college coaches and watching film of a number of college and professional games, we decided that we would ask our DEs to widen to 7-techniques (inside shade of the TE) in an attempt to give our defenders a better chance to fight off the down block.


Still, we did not want to tell the defensive end “just line up wider.”  Instead, we set out to develop a concept labeled with a tag word for our new DE play, a tag word that would encompass the required alignment, key, responsibility, and technique.  We settled on the term “Bully” because that is what we wanted our DEs to do to TEs: We expected the DEs to harass, beat up, and knock down TEs.

The “Bully” Technique:

7-Technique Defensive Ends

Now, any time our DEs see a TE align to their side, they are to utilize the Bully technique.  We tell our Bully DEs to align their outside nostril to the TE’s inside nostril, as close to head-up as possible without actually being head-up (Diagram 2).  The DE’s movement key is now the TE, not the ball.  We used to be a ball-key team.   However, we felt that when the DE looked down at the ball or the offensive tackle he was an easy blind side target for the TE.  Now when the DE focuses on the TE, he has a fighting chance to maintain the C gap.

Read More

Offensive Line: 4 Ways to Improve Pass Protection

By Justin Iske

Offensive Line Coach

Fort Hays State University

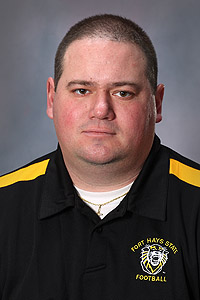
Justin Iske, Offensive Line Coach, Fort Hays State University (KS)

One of my favorite sayings is “you never stop learning.” That is why we try to do as much research as possible every off-season and why we remind ourselves often that there are many ways to do things. We do not claim to have all the answers, but our hope is that this article gives you a pointer or two that will help you.  Most of the ideas that appear below have been stolen from other coaches. However, we have also gotten many great ideas from our players as far as what is productive for them and what is not. We have exit meetings with our players after every season and every spring practice to ask them questions about what they like and don’t like about what we do.  While we don’t suggest making major changes every year, there is always something that can be improved upon.

General Fundamentals:

We wanted to share a couple of general thoughts on pass protection before we get into the nuts and bolts of our pass pro technique.

  • Eyes on the target (middle of chest):  We use the phrase “Aim small, miss small.”  We work to keep our eyes open throughout the duration of the play in order to react to pass rush moves, slants, twists, etc.
  • It is important that our steps mirror each other (and are the same distance) so that we maintain our base at all times. We must lead with the foot in the direction we are going.  For example, if setting to the right, the right foot must move first.
  • We want to keep both feet on the ground as much as possible. You wouldn’t throw a punch in a boxing match with one foot in the air, just as you don’t want to make contact with a defender with one foot in the air. That is why we drag our second step to keep in contact with the ground.
  • If you have a player that is having a problem with false steps (stepping with the wrong foot or not gaining width on that first step), have them shift their body weight opposite the direction they are going to force the first step. For example, if most of your weight is on your right foot, it is impossible to step with that foot and vice versa.
  • Finally, we teach our players the concept of the pocket. It is our center and guards’ responsibility to ensure the depth of the pocket (keeping defenders on the line of scrimmage) and our tackles’ responsibility to ensure the width of the pocket (pushing rushers as wide as possible). Obviously, if you are a turn or slide protection team, the guard to the slide side has some gray area on this in terms of staying on level with their tackle, but that is the general idea that we want to get across to them.

The Punch:


We teach our linemen to set with their hands low. In our kick or post set, the thumbs are together with the hands at belt level six inches from your stomach with the elbows in tight to the ribcage. When the defender is within range, the punch should be executed on the rise at the bottom of the defender’s numbers.

  • We talk about “lifting him out of his shoes.”  As the arms are extended to a lockout, the head and shoulders must be kept back and there is a slight roll of the hips.
  • The feet must stay alive and we must stay square and in front of the defender.
  • Keep the hands active until you have established inside hand leverage with the thumbs up and elbows in. Grab cloth within the defender’s framework.

Once we have become efficient with the punch, we will use a few change-ups to keep defenders off-balance:

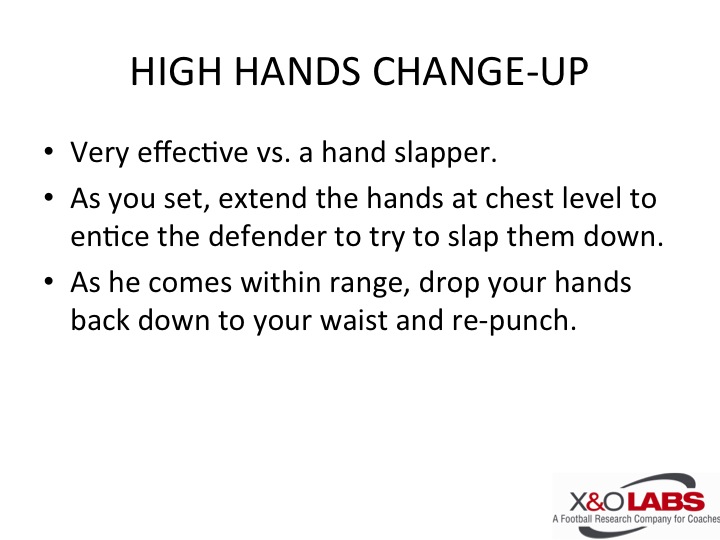
  •  The first is to show the defender high hands. This is especially effective versus a defender that is a hand slapper. As you set, extend the hands at chest level to entice the defender to try to slap them down. As he comes within range drop them back down to your waist and re-punch.
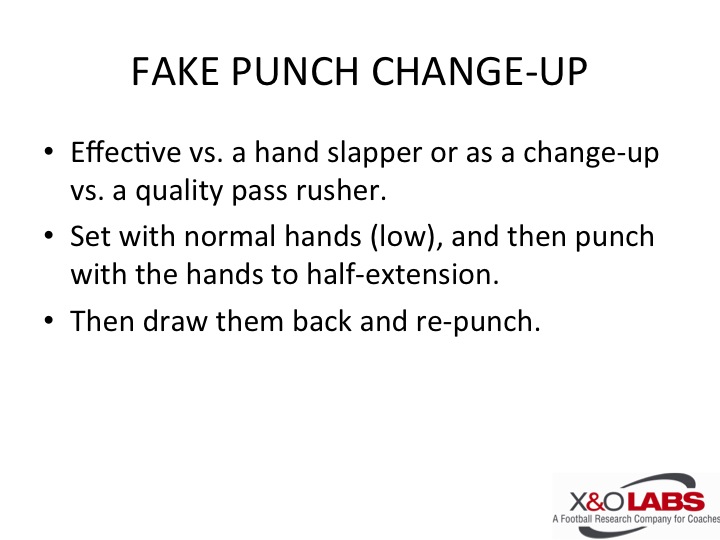
  • The second change-up we use is called a fake punch.   This would be used anytime we face a quality pass rusher as a change-up to keep them off-balance.We will set with low hands initially, then punch with the hands to half-extension, draw them back, and then re-punch. Our film evaluation that week will determine which of these techniques we will incorporate and how much of each we will use. 

The following examples are the drills I use in practice to teach hand placement:


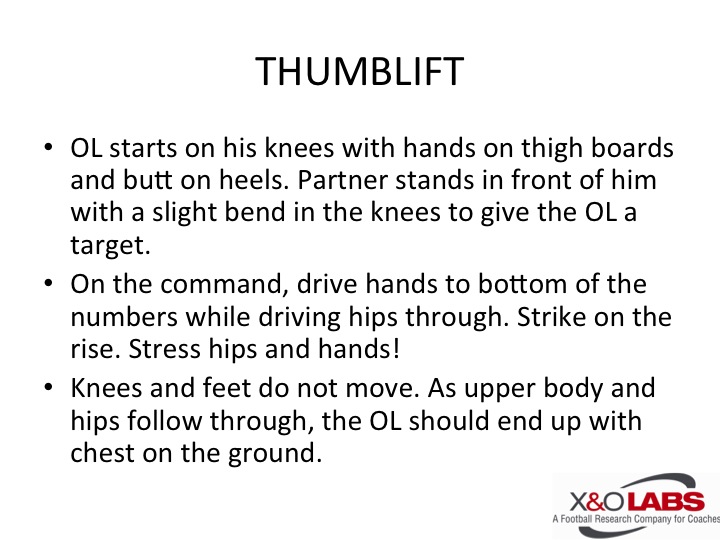
Thumblift:

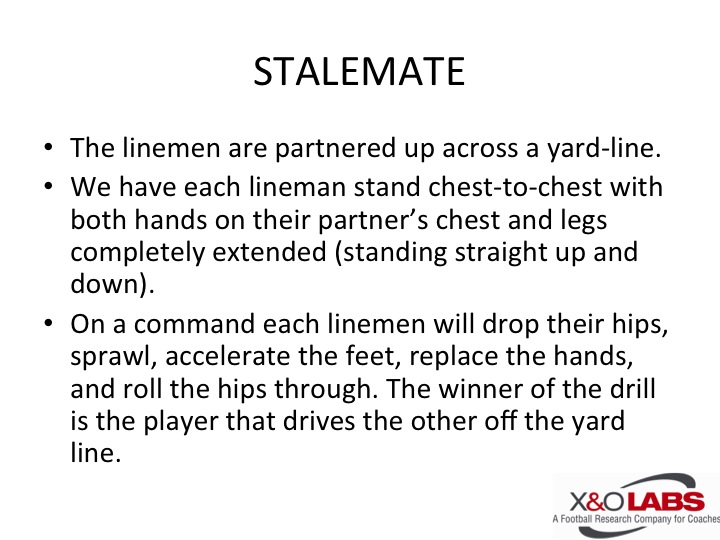
Stalemate:

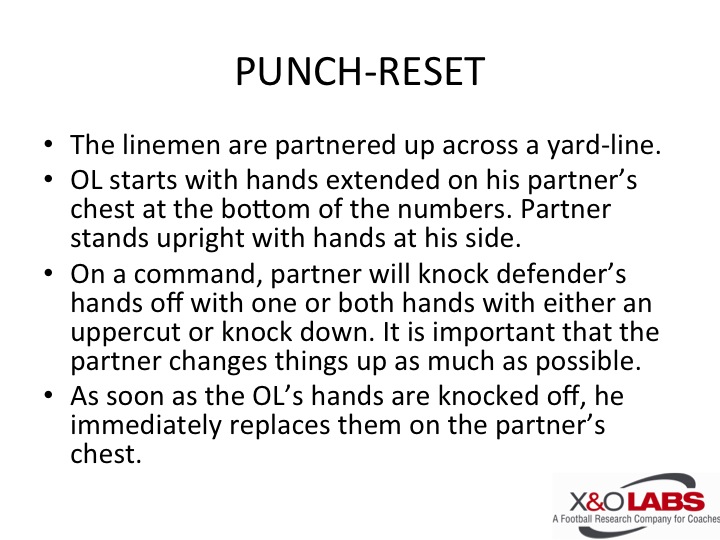
Punch-Reset:

Click below to see Coach Iske’s hand placement drills in action.  His drill tape and tutorial is below.

Read More

Zone Read Concept Study: Case 1 – Structure and Schematics


The Zone Read Concept Study:

Part 1 – Structure and Schematics (59 minutes, 36 seconds)

Please Note: For a better viewing experience we recommend you close out other programs you are using on your computer prior to playing the video.  If you have any buffering issues, just click the pause button and allow the video to download for a few minutes before clicking the play button.

Read More

Zone Read Concept Study: Case 2 – Play of the Skill Positions


The Zone Read Concept Study:

Part 2 – The Play of the Skill Positions (58 minutes, 50 seconds)

Please Note: For a better viewing experience we recommend you close out other programs you are using on your computer prior to playing the video.  If you have any buffering issues, just click the pause button and allow the video to download for a few minutes before clicking the play button.

Read More

Zone Read Concept Study: Case 3 – Play of the Offensive Line


The Zone Read Concept Study:

Part 3 – The Play of the Offensive Line (42 minutes, 25 seconds)

Please Note: For a better viewing experience we recommend you close out other programs you are using on your computer prior to playing the video.  If you have any buffering issues, just click the pause button and allow the video to download for a few minutes before clicking the play button.

Read More