306")
By William Clay
Offensive Coordinator
Halsom High School (TX)
Twitter: @brandonclay88
The Run Pass Option, RPO, has been a staple in many high school and college offenses for a while and it's made its way to the professional level. You will hear many defensive coordinators with tongue in cheek, call it “cheating”. If you were to query defensive coordinators what drives them crazy and most of them will say, “multiple formations” add on top of that not changing personnel and you get an added element of surprise and deception that makes it difficult for opposing defenses to pick up tendencies as you are not shuffling in players to change formations. Therefore, changing formation without changing personnel and using RPO’s can create a frustrating offensive game-plan for the opposing defense regardless of your level of play.
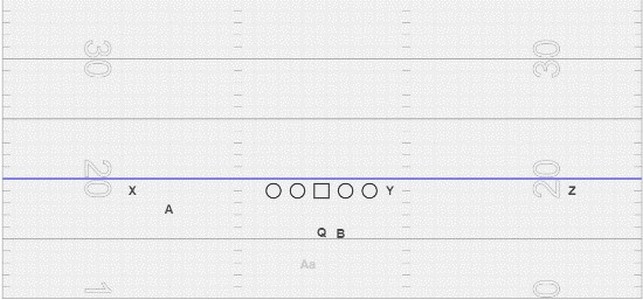
At Haltom High, over the last two seasons, we use multiple formations and focus on using a TE/HB player that allows us to manipulate defensive fronts. The main formations we use for this are:
“Black”: Twins with a sniffer or H-back
“White”: Pro Twins with a TE
“Blue” TE Trips
“Black”
“White”
“Blue”

For this article, we will focus on RPO’s that we run regardless of the formation and can be tagged on many different run plays. They are:
- Crawfish: WR Bubble Screen
- Lobster: Bubble/Slant combination. To a single WR it just a slant.
- Flat: an arrow route.
In terms of general mechanics, we are a signal/one-word team. Our coaches signal formation and play to the skill kids, and the QB uses one for the OL. We require our TE/HB to know the signals. We do not give specific alignment signals when are in an H-Back formation. He lines up based on the play. Any checks or audible are always signaled in by coaches on the sideline. We also are a no-huddle team and play with multiple tempos in order to keep the defense on their toes.
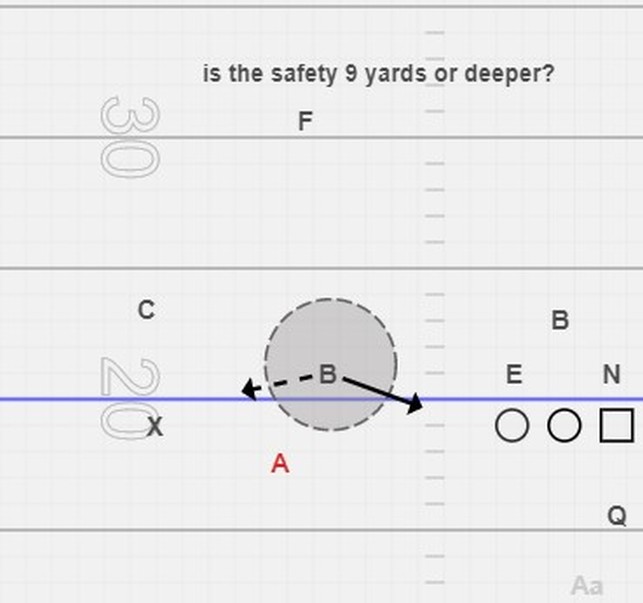
QB Read:
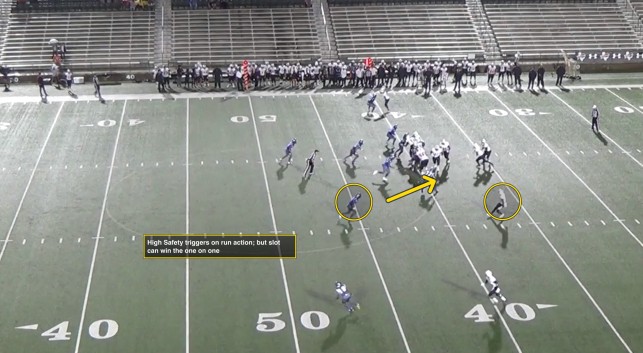
In order to simplify the reads, our QB will look from High safety to the Flat/Backside defender. This decision “flow chart” is consistent throughout all our reads. The default is to always give the ball to the RB if you are ever unsure.
- Is the Safety 9 yards or deeper? If yes, then read the flat defender on the snap. If no, give the ball.
- Does the flat defender play the run on the snap? If yes, then throw the RPO. If no, give the ball.
- Are you unsure? If yes, ALWAYS give the ball. You can never go wrong by handing the ball off.
Crawfish: WR Bubble
We like to tag Crawfish to the play side of Counter. We run regular counter (GT) and counter stay (GH) depending on formation and RPO. The QB will go through his RPO progression read. When we are scouting film, we will always note where the flat defender aligns between twins and trips, where his eyes are and how fast he usually decides on run or pass. Remember, we want to run the ball so if he plays pass quickly, that is always a plus for us. The key to this RPO is putting the OLB or flat defender in conflict.
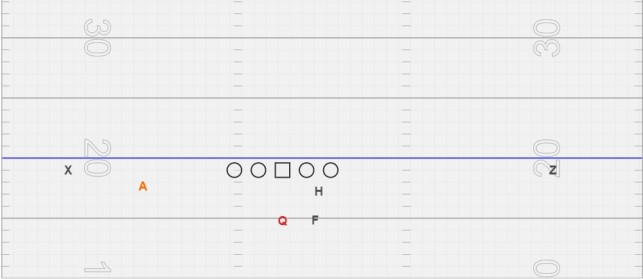
Black Formation: (Twins with H-Back)
Out of our Black formation, our TE/H-Back aligns away from the play, we usually run GH with him, and he seals on the playside backer.
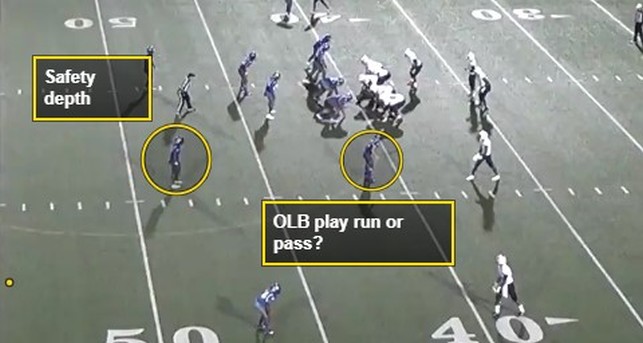
Here you can see the OLB aligns tight to the box and the safety is deep enough that the QB will proceed with this RPO read. However, based on the OLB alignment, the QB can pre-snap note that he is probably playing run.