By Pete Llaneza
Offensive Line Coach
Boonton High School (NJ)
Before the 2018 season our head coach, Bryan Gallagher decided to fully commit to the spread option offense developed by Paul Johnson. In ten games this season we rushed for 3,960 yards. We scored 44 rushing touchdowns. We averaged 7.4 yards per carry. These totals were a big improvement from our 2017 rushing stats. Part of the reason for our success was due to the talent we had in the backfield. Another reason for our success can be tied to the scheme. There are many teams that run this style of offense and have talented backs but do not have the same type of success. The thing we had, that all teams who run this style of offense successfully have, are five tough guys up front who were willing to work at the details of blocking every day.
Navy Head Coach Ken Niumatalolo said, “Culture beats strategy all day long. Our culture is the way we come off the fricking football.” I believe our success is based upon the culture of effort, toughness and attention to detail developed during our offensive line individual period. I remind our guys every week, the reason we rush for 400 yards on Friday night is because of the work we put in during our individual periods. This article will discuss our offensive line individual run block drill progression and how we have developed the Boonton Bomber offensive line culture.
Stance

I am not a coach who wants his guys in a “comfortable stance”. The stance is the first part of executing a good block. I want our players to start in a position that will give them the best chance to be successful in executing their assignment. That stance is usually uncomfortable at first. As the players become more flexible, the stance gets more comfortable.
In our version of the spread option offense our lineman will have more weight on their down hand than most offensive lineman. However, we do need to pull, pass set and down block often. We ask our guys to be in a more balanced stance than most spread option teams and we do not want a stagger. Pad level is a point of emphasis. We want our guys as low as possible in their stance. The following is the progression we use to teach the stance. We will do this before each practice at the start of the summer. After a few practices, we will eliminate this portion of practice. However, we are constantly coaching the stance in other drills.
When we set up the stance progression we align our first team, second team, third team on yard lines. The centers will align in a row. The left guards in a row. The left tackles in a row. The right guards and tackles will also align in rows on the other side of the center. Everyone will do this progression at the same time. We ask the center to put his toes on the near tip of the yard line. The guards will take a 3 foot split from the center. The tackles will take a 3 foot split from the guard. We have a split stick to help measure this. Our split stick is a PVC T that is 3 foot long at the top. We can lay it down to quickly assess the split of our offensive line.
We also want our guards to take a vertical split so their helmet breaks the beltline of the center. This vertical split has many benefits. The main benefit is it allows our guards and tackles a better chance of reaching a defensive lineman on the backside of scoop blocks. To get this vertical split we ask the guards and tackles to put their hand down on the yard line that the center has his toes on.
Stance Progression and Technique Fundamentals
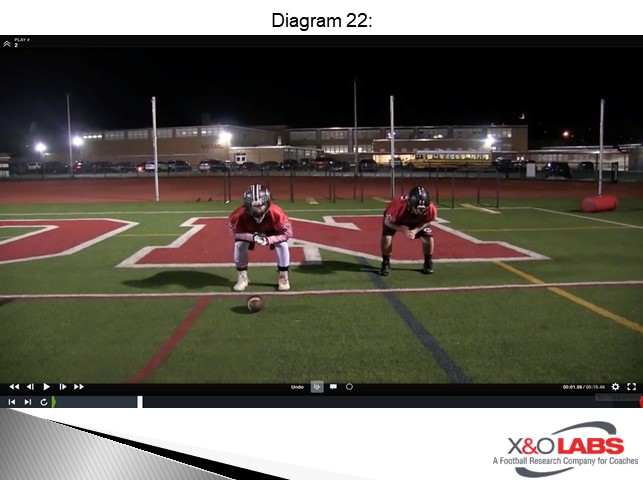
- Step up to the line in a hip width power stance. Same width as when Olympic lifting. Pigeon toed in, with heals out.
- Squat down, shaking hands until forearms touch thighs.
- Stretch out down hand out. Right side OG/OT use left hand. Left side OG/OT uses right hand. Center will stretch non-snapping hand out. We want to promote forward movement. Stretching the down hand out promotes that.
- Reach hand out until heals pop off the ground. Pinky should be in line with the big toe. All five fingers in the ground. Thumb of the offhand should be under the chin with fingers spread.
- Back should be flat and down hand should be out in front of the eyes. Hips should be slightly higher than head.
*** The center will reach out to grab the ball, putting thumb on the top lace. Center’s arms should be extended.
To study film of this drill, click on the video below:


