306")


By Garrett McLaughlin
Special Teams Coordinator/Defensive Line Coach
Bates College, Lewiston Maine
Twitter: @_CoachG_
On every defensive staff, I've been a part of, there has always been a conversation about blitz game. The best way to bring extra heat against the run and pass while also mitigating risk and keeping things as simple as possible for the players. One of the best answers we've found to that is 'Hot Pressures' – 3 Deep, 2 Under-fire zone coverage while rushing six. There are some very distinct advantages to this pressure structure:
- It’s simple. You can easily mirror it, make one-word calls to help your defense line up, and it requires very few checks
- It's vision-based. For any of the non-blitzers, it is a pure spot drop, eyes on the ball operation
- It’s easy to disguise
- Great vs the run
- If you run Cover 4 as a base, the strengths and weaknesses of the coverage are quite different
Most importantly, it has a demonstrated track record of success. Running these types of pressures in 2015 at SUNY Buffalo State over 200 times, we allowed 1.4 yards per carry, along with 4 INTs, 10 sacks, and numerous TFLs. We were a four-down, press quarters operation, but I’m convinced (and have seen it done on film) that this scheme can be successful within any structure. As a staff we didn’t have any situation we would call these pressures in – Whenever we felt it was right, we would let it rip.
BASIC CONCEPT / RULES
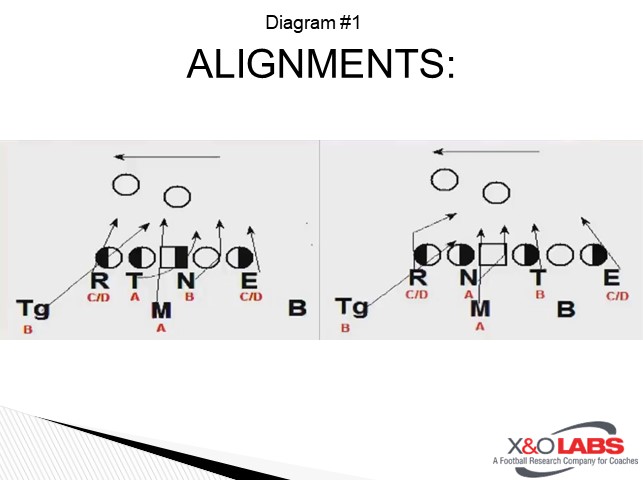
Before going into specific teaching, there are some important general points to review. The first is how critical disguise is to this pressure structure working. Part of the benefit of running your pressures in this manner is that it is easy to be deceptive within how you do it. So with whatever your base defense is, make sure you’re giving the same look pre-snap when you have a hot pressure called.
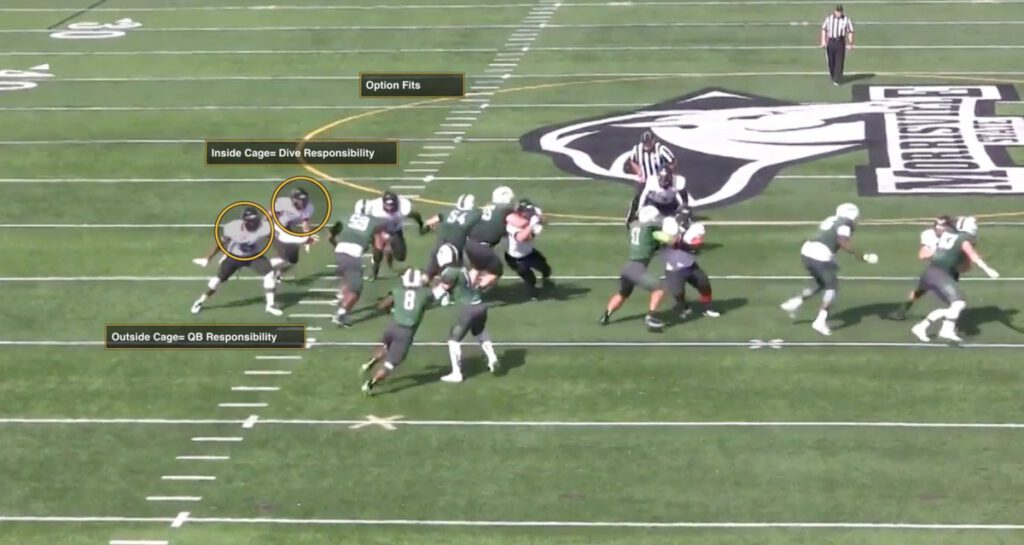
Within that, from a front standpoint, at Buffalo State, we always played it from our base rules. It was most important for the defensive line to understand where they had to get to within each pressure concept. For example, if ‘Fire’ was called (See Diagram below), the left defensive tackle knew that he had to get into the opposite A Gap, regardless if he were lined up in a 3 tech, a 2i, or a 1.
Additionally, built into all our pressures vs a TE surface the C Gap would always be the one that would be open. That way, our second and third level fitters can always anticipate where the open game will be.