The 4-2-5 Study: Case 4
4-2-5 Pressure Packages
By Mike Kuchar
Senior Research Manager
X&O Labs
Now, we’ll start to explore perhaps the most intriguing aspect of the 4-2-5 defense (or any defense for that matter) the pressure package. We’ve found that many 4-2-5 coaches will devise their blitz scheme around both offensive personnel and formation. Some of these coaches check blitzes based on formation (such as the Tiger Cat package below) where some used "run as called" pressures, meaning the blitz does get run regardless of what the offense comes out in.
When we conducted our research on the 4-2-5 blitz package we found some interesting data on what formations coaches like to pressure and which players they like to pressure with. The concluding data shows that (these are all majority numbers).
- 38.6 percent of coaches use five man pressures in their blitz package – playing a three deep, three under coverage principle behind it.
- 36.7 percent of coaches will blitz the weak side inside LB more than anyone else in the defense.
- 34 percent will pressure two man surfaces (just a guard and tackle) more than any other offensive formation or place on the field (this includes field side blitzes and strong side blitzes)
We will present all of the variations of these blitzes in this report.
Three Under/Three Deep Pressures
Since this is the most popular blitz package of the coaches we surveyed, we’ll start here. What better way to start than to analyze the Virginia Tech Hokies blitz package? The way the Hokies classify their three deep/three under blitz packages are by field and boundary pressures. But, before we get into who is blitzing, we should give a brief explanation of three-deep, three-under coverage before detailing the blitz.
We know as coaches that you must teach the coverage first, before dialing up the blitz. This can be a common mistake in installation, particularly if coaches get trigger-happy (and this can happen) by dialing up all the variants of a zone pressure package.
It is important to note below that these coverage players could be anyone, which is why it’s essential to teach the coverage behind the blitz first so that players understand the "concept" behind their coverage. Of course, different coaches have different terminology behind their coverages, so our intent here is to provide you with a general rule for each of these coverage players.
Zone Pressure Coverage Responsibilities:
Deep Thirds Player: These two players, usually the corners, are responsible for (not surprisingly) the deep third of the field. They can start from a press alignment and "bail out" pre-snap or can start in a regular off alignment (1×7 yards) off number one receiver. This player can also be a safety on a corner blitz (which is shown below). This player must handle and out-breaking routes, which can be an effective throw against zone pressures, as well as any sail routes down the hash. They would not be responsible for post routes.
Middle Thirds Player: This player is responsible for the post-area of the defense. He must be the "center fielder" of the defense and be able to leverage any seam routes down the middle of the field. He has to make sure to stay deeper than the deepest of any vertical routes. He can start in a two-deep rotation, but must end up as the middle thirds player once the ball is snapped.
Hot to 2 Players: These two players, most commonly referred to as "SCIFF" players, are responsible for Collisioning the Seam routes, Getting under the Curl routes, and Driving through the Flat routes. Realistically, they are responsible for handling the number two receiver post-snap and must wall off any crossers.
Hot to 3 Player: This player is responsible for the number three receiver post-snap. He will open up to the three-receiver side post snap, but end up matching the final number three which will usually be the running back in spread formations.
Zone Blitz Techniques
Before we detail the blitz, there are several specific techniques that must be explained, particularly used by the first level defenders or the defensive line. Of course, it’s easy to draw up any blitz on paper, but it’s imperative that coaches explain the technique their players need to use to execute the blitz successfully.
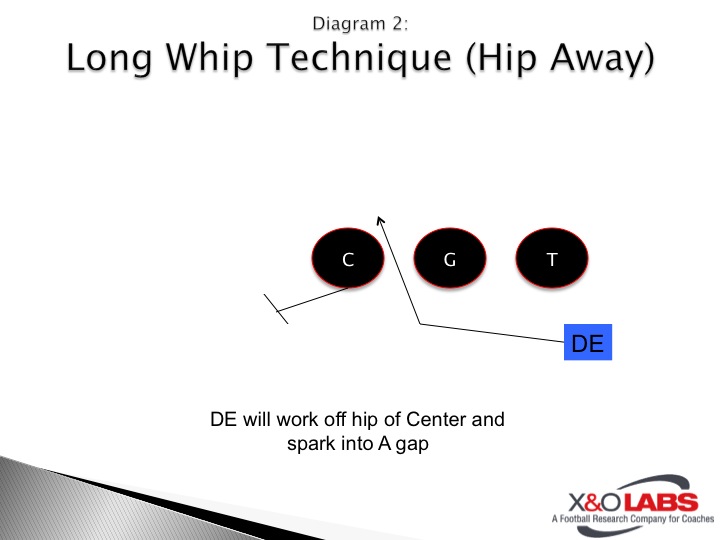
Long Whip: This is used by a defensive lineman to the side of the blitz where he needs to get two gaps inside on the snap of the ball. Usually, he’ll read the adjacent hip of the defensive lineman in the gap he’s aiming for. If that hip comes at him, which means the gap is closed, he’ll redirect into the next open gap (Diagram 1). If that adjacent lineman’s hip goes away, he continues to penetrate the intended gap (Diagram 2). 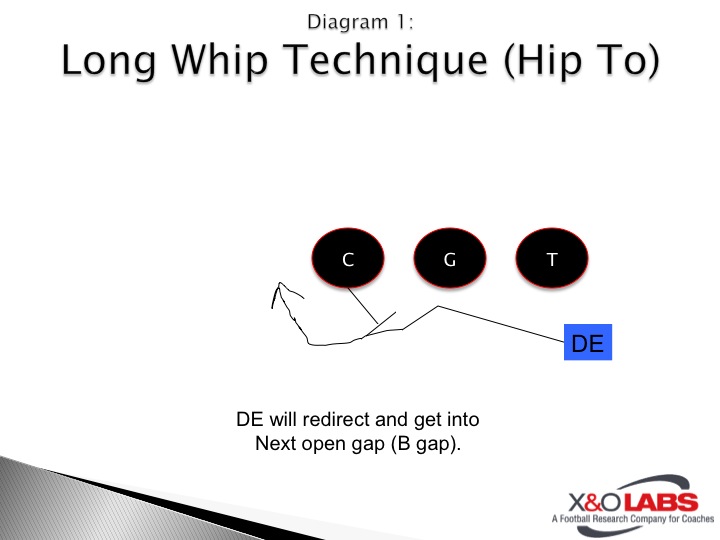
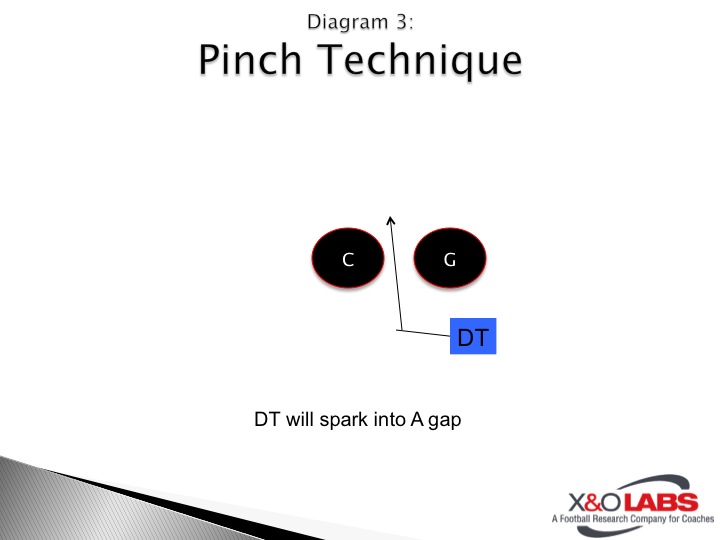
- Pinch: This is simply a one-gap stunt to the side of the blitz. Coaches will differ on whether they want a lateral or flat step used by the defensive lineman on the stunt. Either way, it’s his job to get into the next adjacent gap (Diagram 3).
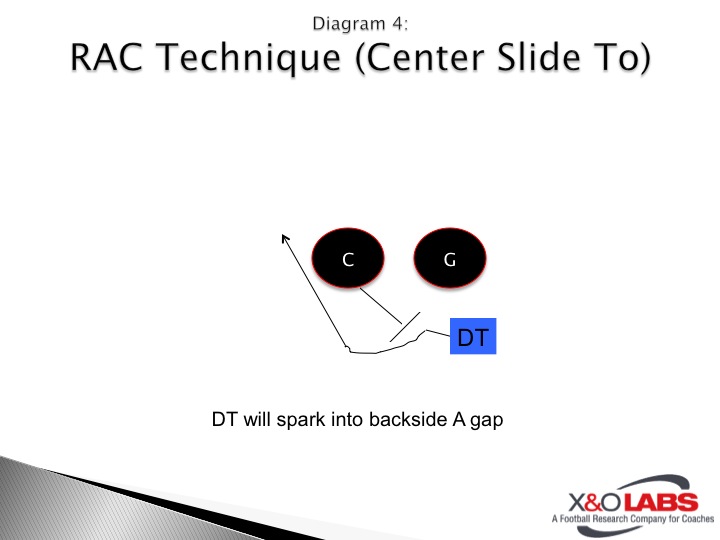
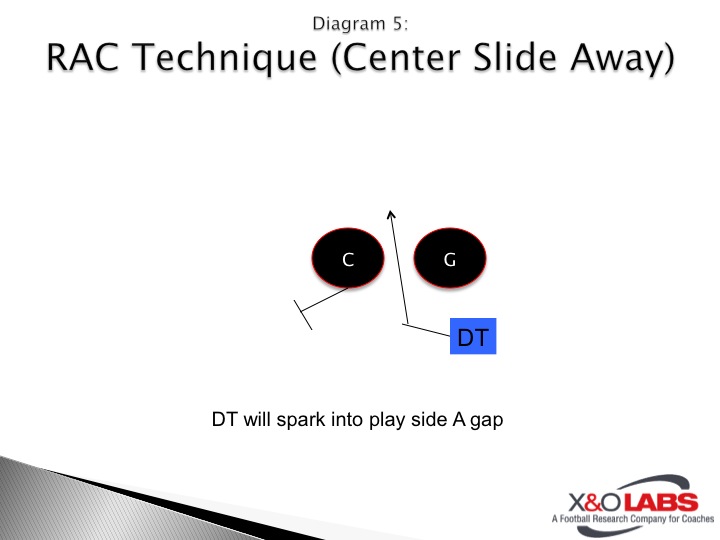
- RAC (Rip across Center): This is mainly used by a defender to the side of the blitz whose job it is to get across the Center’s face to the opposite side of the blitz. Sometimes it’s necessary to take a more lateral step as to not get knocked off course. We’ve spoken to coaches who will monitor which way the Center sets because he is often the key in the slide protection scheme. If the Center turns toward him, he will cross his face (Diagram 4) with usually a rip move. If the Center steps away, the defender may stay on track in his gap (Diagram 5).
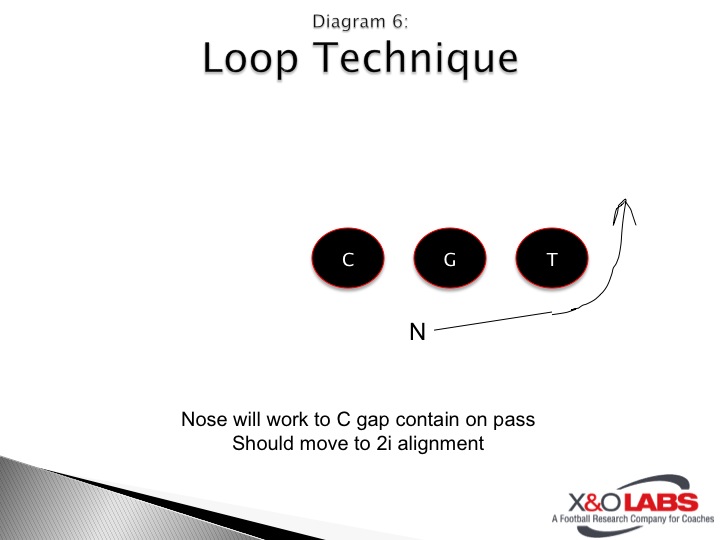
- Loop: This technique is used by a defensive lineman to the side away from the blitz who is responsible for contain if pass develops. This player must work to get depth post-snap to ensure the proper angle on contain. If this is a Nose Guard, he will usually cheat to a 2i technique or a 3-technique can commonly get there from his original alignment (Diagram 6).
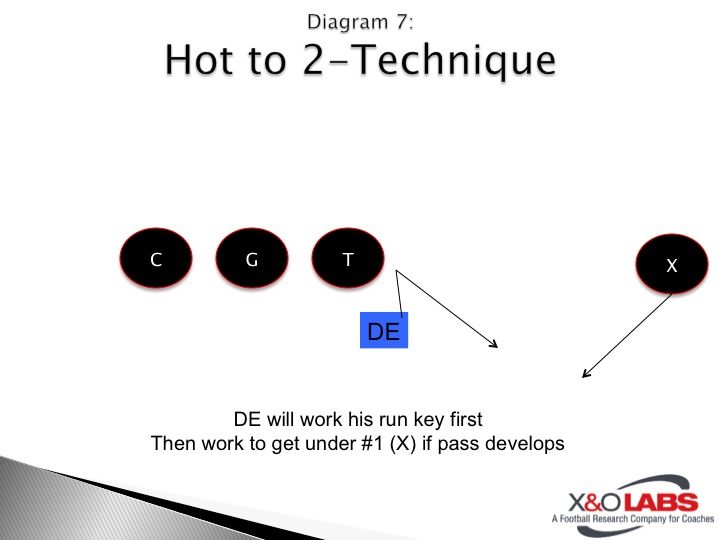
- DL on Hot to 2 Player: This may be self-explanatory, but any first level defender that is responsible for coverage in zone pressure schemes MUST play run first by getting his run read first off the key he is on, which is the offensive lineman he is aligned on. If that defender gives a run read, there is no reason for the DL to execute his pass responsibility, instead he should continue on his run technique (Diagram 7).
Field Pressures
Whip Dog (Diagram 8)


