306")


By Mike Kuchar
Senior Research Manager
X&O Labs
Twitter: @MikekKuchar
Special Reporting by Adam Hovorka, X&O Labs Contributing Writer
Introduction
RPOs are formation-based concepts particularly when they are designed to attack four down, two-high safety structures. Defensive coordinators that use these structures ask a lot of their safeties to be able to fit in the run game and help on the pass game. So, when offensive coordinators design their RPO concepts, they are looking to manipulate what defender is responsible to play both run and pass. They find which defender is stressed by formation and they work to manipulate that defender with a run read. While we already detailed who those defenders can be in the previous case, in this case we are going to share our research on the coverages that defensive coordinators are using to protect these possible manipulated defenders.
Two-Back Formation Fits:
Not surprisingly, most of RPO formations explained in this report are one-back formations by nature. 2x2 and 3x1 structures are the more popular formations offensive coaches are implementing in their RPO game. However, there is a contingent of coaches that have chosen to use two-back personnel groupings, such as 20 personnel and 11 personnel H/Y off structures, to design their RPOs. While some of these diagrams are displayed in this report, most defensive coaches use the following protocols in defending RPOs from these two-back formations:
- Two-Back offenses doesn’t always require a safety to be tied into the fit; it’s possible to defend 20 personnel groupings with the seven box defenders.
- For H/Y off 11 personnel outfits, the inside backers will be tied to the post-snap direction of the H/Y off. He creates an additional gap that needs to account for.
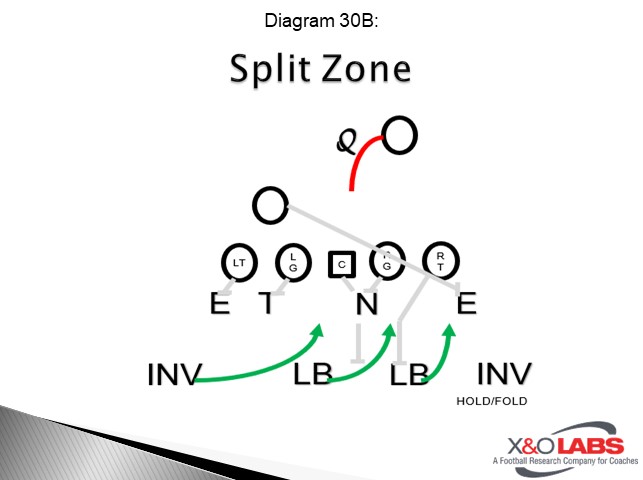
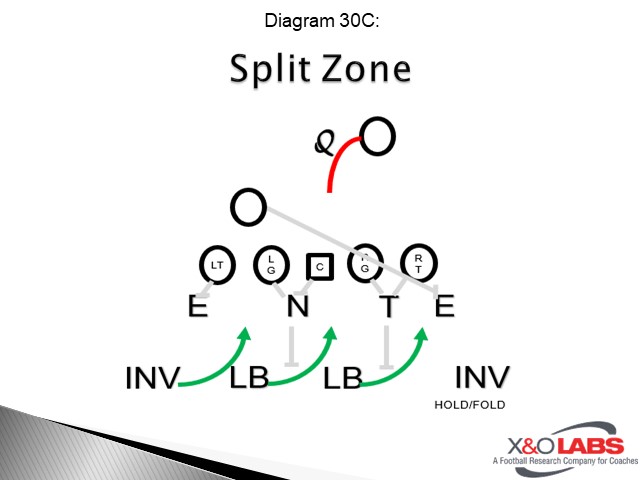
In either case, the pre-snap alignment of the Y/H and the direction of the mesh will be the primary indicator in which defenders will be run first or pass first defenders. The diagrams below detail the day one run fits four down, two-high safety defenses will utilize against the H/Y split zone schemes that are popular today.
Two-High Coverage Methodologies in Defending RPOs
Quarters (Cover 9) Coverage
Why It’s Effective Against RPOs
Playing pure cover nine allows for a two-high look to defend the possibility of downfield vertical threats while also providing for a solid run surface against 10 personnel teams. Against RPO teams, cover nine allows for a possibility of 8.5 defenders to the run game and 2.5 defenders to the pass, depending on the formation. It’s best served in clouding the read of the QB to make a decision because of the uncertainty of the two overhang defenders. Coaches will utilize quarters coverage structures either by setting the 3-technique to the field, to the back or as base call against Pistol formations. It’s also effective because it can essentially become cover zero with underneath help, which provides assistance on the interior RPO game such as slants replace routes.
Quarters Coverage Fits with 3-Technique set to Field:
- 3-Technique set to field
- Mike: B gap defender
- Overhang to field - Run to, A gap defender; Run away - hold and fold player
- Overhang to boundary - Run to, B gap player; Run away - hold and fold player