306")


By Jason Brown
Defensive Coordinator
Dutchtown High School (Geismar, Louisiana)
Introduction:
The popularity of the spread offense has made this formation and it’s variations a major concentration for defensive coaches at all levels. With offenses becoming more and more prolific it is on us as defensive coaches to find more and better ways to defend and give our teams a chance to win. It is my goal to present some concepts we have used to combat this very popular formation, and to stimulate thought in an effort to come up with even more ways to defend this formation.
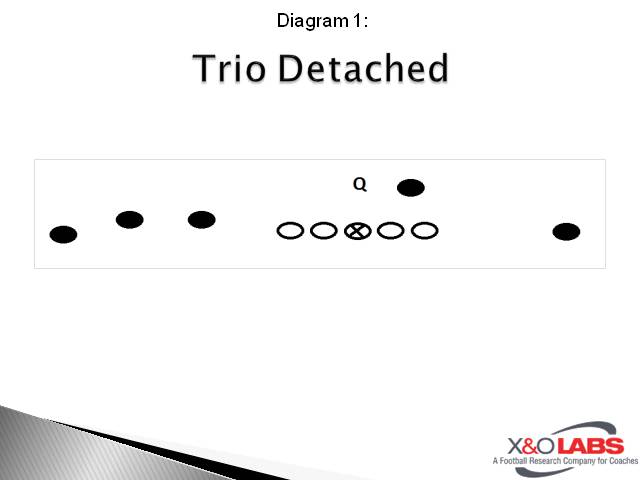
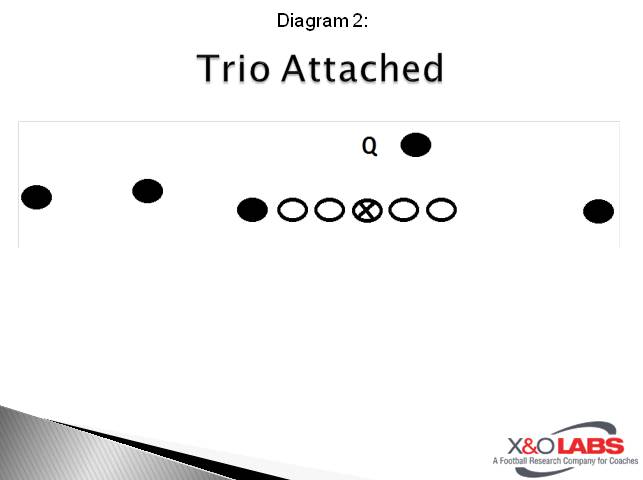
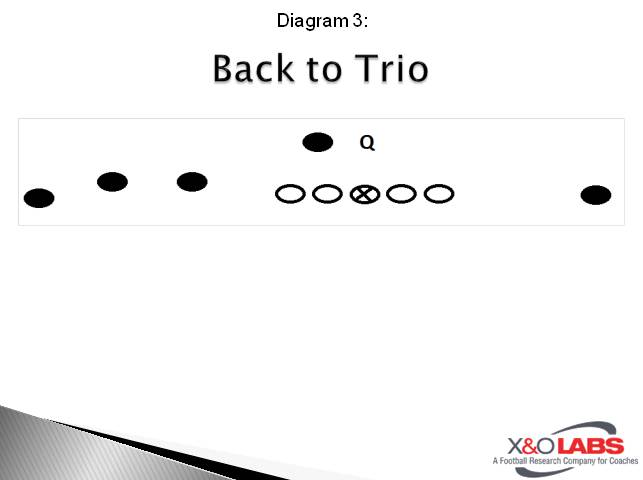
When identifying trio formations, we must know if it is a 3x1 detached or attached formation (Diagrams 1 and 2), and if the back is set to or away from the trio (Diagrams 3 and 4). These variations help us in scouting and help us match up our coverage preference against each set.

When we defend 3x1 formations, we think it is imperative to have multiple ways to attack. Each 3x1 coverage has its weakness and it is important, as a coordinator, to move the stress points of your defense around. In other words, if you defend the formation the same all the time, the offense will identify the stress and exploit it. It is our belief that we should control when and how we expose our weaknesses in coverage rather than have the offense dictate vulnerabilities by virtue of formation.
Loaded Zones
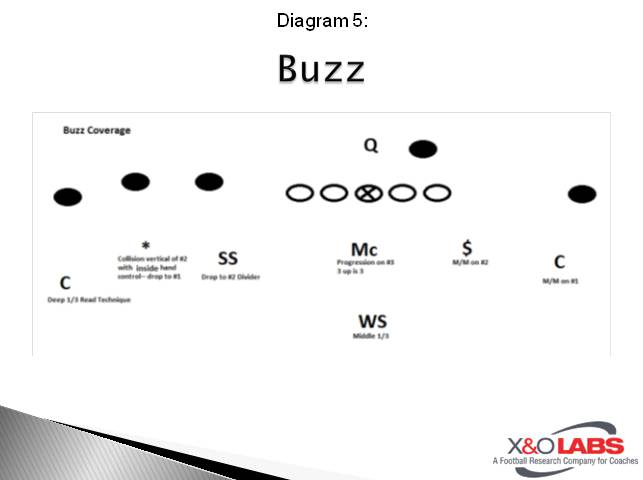
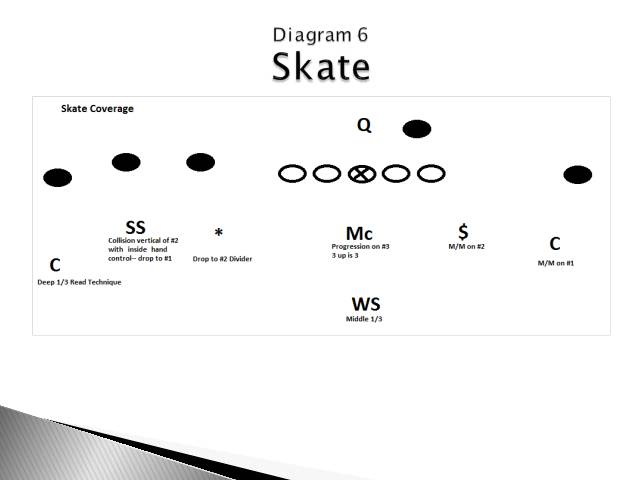
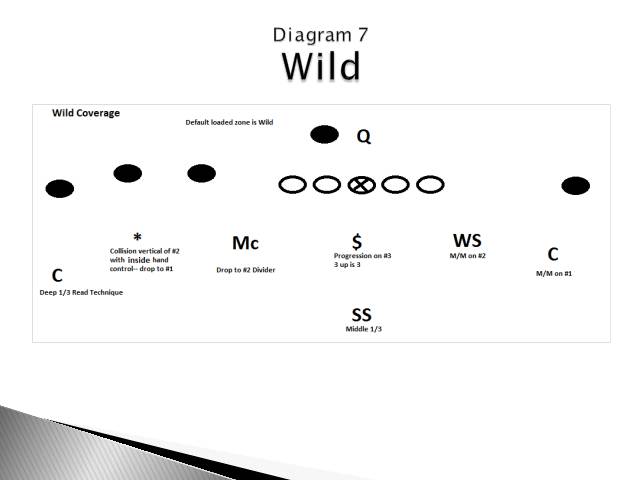
This concept basically allows us to play a pushed over 3 deep zone to 3x1 sets where you have 5 on 3 zone to the trio side and man to man backside. The 5 on 3 numbers allow us to be very good versus a myriad of passes to the trio side, and helps us be very good versus the run. The weakness of the Loaded Zone is the fact that it is man to man weak side and teams will exploit the coverage on the weak side until they get tired, especially if they have a favorable matchup at the wide receiver or running back.
We have three different Loaded Zones that we play:
- Buzz (Diagram 5) Strong Safety plug into divider
- Skate (Diagram 6) Strong Safety Role down to flat
- Wild (Diagram 7) Weak Safety roll down opposite the trio and be the man to man on #2 player.