


306")
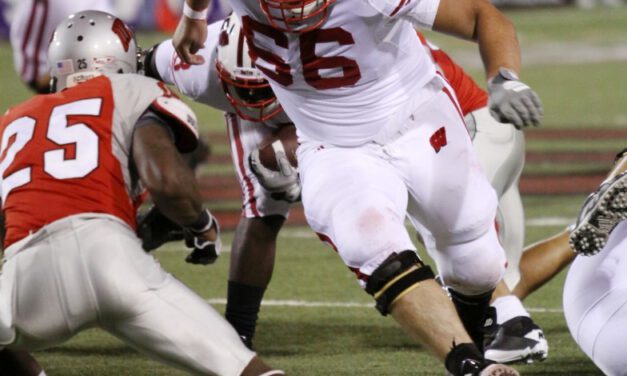
OL Drills – Pin and Pull Schemes – University of Wisconsin
 Video Presentation: X&O Labs’ Senior Research Manager, Mike Kuchar, explains Wisconsin’s pin and pull scheme in this exclusive video below.
By Mike Kuchar Senior Research Manager X&O Labs
Since over half of the country is knee-deep in two-a-days this time of year, X&O Labs didn’t want to produce a long drawn out report. We know how precious your time is during the start of the season. Instead, we wanted to produce a quick tutorial on the pin and pull scheme, particularly the practice drills needed to incorporate the scheme. Commonly referred to as an outside zone/perimeter concept, the pin and pull play has been used by major programs across the country. It’s a variant of the outside zone scheme, but instead of combination blocks at the point of attack, teams will man block the scheme. The premise is for any uncovered lineman to pull while any covered lineman will block down.
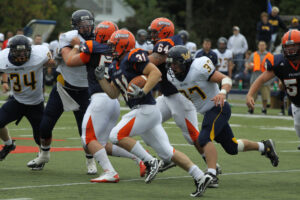
Instead of putting together an entire report on the scheme (we’ve done that with our outside zone report) we wanted to give you a couple drills that you can use to incorporate the individual blocks into your routine. It’s already the end of August, and chances are you have your offensive package installed already. So instead, we’ve decided to showcase the drills of two of the best college programs that run it: Wake Forest and Big Ten Champion, Wisconsin Badgers.
Because this research report is all on video, there isn’t a ton of copy, facts or figures tied into our material. Instead, we’re providing you with what we all know is important…video. This way you can see for yourself how these major college programs drill their players to execute the pin and pull scheme. But before we show our offensive line drill tapes, we did want to provide an overview of the pin and pull scheme. Below is a PowerPoint video presentation on exactly how Wisconsin and Wake Forest teach the pin and pull concept.


 We start each drill with three things in mind that we hope the athletes carry over into games: alignment, stance, and key. Generally, when our safeties make a run call to their sides, they align at 8-10 yards deep, on the outside shade of the EMLOS; in most cases, this is a tight end or an offensive tackle, depending on the offensive set we see that week. For the stance, we ask our safeties to use a square stance, with knees and hips flexed, back slightly flat, hands loose in front of the body. During a run call, we want our safeties to keep their eyes out of the backfield. As a result, we tell them to key the EMOLS solely. We find that, in most cases in high school offenses, the tight end or open side offensive tackle tip off the type of play. At the snap of the ball, we tell our safeties take a couple pop steps in place as they key the EMLOS; this gets their feet moving without losing ground.


 Conversely, if we are out-numbered at the point of attack the QB must recognize this as a bad situation and check the play into a more advantageous run or pass based on the game plan for that given week – our 3 vs. their 4 (See Diagram 2).
  As I mentioned earlier, one way that you can account for that 4th defender is to create a four man surface to the play side by motioning into a 3×1 formation so that the slot receiver can account for that edge player (See Diagram 3).
  You could also call the play out of a 3×1 formation to begin with, giving you a 4 man surface to work with right off the bat (See Diagram 4). If you have a slot WR that is a physical blocker this could be a great matchup for you, or it could be a nightmare if that guy isn’t willing to be physical blocking an OLB/Safety type player.